A_playsound
Содержание:
Examples
Play sound on click
import useSound from 'use-sound';

import boopSfx from '../../sounds/boop.mp3';

const BoopButton = () => {
  const play = useSound(boopSfx);

  return <button onClick={play}>Boop!<button>;
};
Playing on hover
This demo only plays the sound while hovering over an element. The sound pauses when the mouse leaves the element:
import useSound from 'use-sound';

import fanfareSfx from '../../sounds/fanfare.mp3';

const FanfareButton = () => {
  const play, { stop } = useSound(fanfareSfx);

  return (
    <button onMouseEnter={() => play()} onMouseLeave={() => stop()}>
      <span role="img" aria-label="trumpet">

      <span>
    <button>
  );
};
Increase pitch on every click
With the option, you can change the speed/pitch of the sample. This example plays a sound and makes it 10% faster each time:
import useSound from 'use-sound';

import glugSfx from '../../sounds/glug.mp3';

export const RisingPitch = () => {
  const playbackRate, setPlaybackRate = React.useState(0.75);

  const play = useSound(glugSfx, {
    playbackRate,
    // `interrupt` ensures that if the sound starts again before it's
    // ended, it will truncate it. Otherwise, the sound can overlap.
    interrupt: true,
  });

  const handleClick = () => {
    setPlaybackRate(playbackRate + 0.1);
    play();
  };

  return (
    <Button onClick={handleClick}>
      <span role="img" aria-label="Person with lines near mouth">

      <span>
    <Button>
  );
};
Пещерные звуки[]
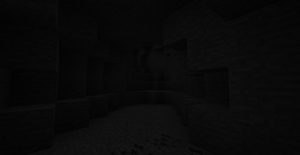
Тёмная пещера: здесь чаще всего слышатся фоновые пещерные звуки.
Пещерные фоновые звуки, или жуткий шум (согласно субтитрам), — это звуки, которые могут воспроизводиться, когда игрок находится в тёмной области или под землей. Всего существует 19 различных пещерных звуков.
Возникнуть пещерные звуки могут в любое время, в любом измерении, в любом свободном от блоков пространстве, при уровне освещения ниже 8. Звуки можно услышать, находясь в 10—20 блоках от источника звуков в любом направлении, при этом точка-источник может быть в непосредственной видимости игрока. Также условия для воспроизведения звуков можно воспроизвести, иными словами, определение допустимых точек-источников пещерных звуков основывается на текущей, а не изначальной, геометрии мира.
Проигрывание пещерных фоновых звуков зависит от уровня настроения. Настроение (от англ. mood) — это значение в процентах от 0 до 100. Когда игрок находится под землёй или в тёмном месте, уровень настроения увеличивается, а когда нет — наоборот, снижается. Если уровень настроения достигнет 100 %, проигрывается один из пещерных звуков, после чего значение настроения аннулируется и цикл повторяется заново. Настроение и его текущее значение можно увидеть на экране отладки.
Пещерные фоновые звуки можно найти по пути . В самой игре тон звука может меняться в некоторых пределах.
| Пещера 1 | |
| Пещера 2 | |
| Пещера 3 | |
| Пещера 4 | |
| Пещера 5 | |
| Пещера 6 | |
| Пещера 7 | |
| Пещера 8 | |
| Пещера 9 | |
| Пещера 10 | |
| Пещера 11 | |
| Пещера 12 | |
| Пещера 13 | |
| Пещера 14 | |
| Пещера 15 | |
| Пещера 16 | |
| Пещера 17 | |
| Пещера 18 | |
| Пещера 19 |
Simpleaudio
Simpleaudio – это кроссплатформенная библиотека. Также используется для воспроизведения файлов WAV без каких-либо зависимостей. Библиотека simpleaudio ожидает, пока файл закончит воспроизведение звука в формате WAV, перед завершением скрипта.
Например:
import simpleaudio as simple_audio

filename = ' example.wav '
wave_object = simple_audio.WaveObject.from_wave_file( filename )
play_object = wave_object.play( )
play_object.wait_done( )
# Wait until audio has finished playing
В файле формата WAV сохраняется категоризация битов, которая представляет необработанные аудиоданные, а также хранятся заголовки вместе с метаданными в формате файла обмена ресурсами.
Окончательная запись состоит в том, чтобы сохранять каждый аудиосэмпл, который представляет собой конкретную точку данных, относящуюся к давлению воздуха, как при 44200 выборок в секунду, 16-битное значение для записей компакт-дисков.
Для уменьшения размера файла этого достаточно для хранения нескольких записей, таких как человеческая речь, с более низкой частотой дискретизации, например 8000 выборок в секунду. Однако более высокие звуковые частоты не могут быть представлены достаточно точно.
Некоторые из библиотек и модулей, обсуждаемых в этой статье, воспроизводят и записывают байтовые объекты, а некоторые из них используют массивы NumPy для записи необработанных аудиоданных. Оба напоминают категоризацию точек данных, которые можно воспроизводить с определенной частотой дискретизации для воспроизведения звука.
В массиве NumPy каждый элемент может содержать 16-битное значение, эквивалентное отдельной выборке, а для объекта bytes каждая выборка сохраняется как набор из двух 8-битных значений
Важное различие между этими двумя типами данных заключается в том, что массивы NumPy изменяемы, а объекты байтов неизменны, что делает последние более подходящими для генерации аудио и обработки более сложных сигналов
Пользователи могут воспроизводить массивы NumPy и байтовые объекты в библиотеке simpleaudio с помощью оператора simpleaudio.play_buffer(). Но перед этим пользователи должны убедиться, что они уже установили библиотеки NumPy и simpleaudio.
Пример: сгенерировать массив Numpy, соответствующий тону 410 Гц.
import numpy as numpy
import simpleaudio as simple_audio

frequency = 410  # user's played note will be 410 Hz
fsample = 44200  # 44200 samples per second will be played
second = 5  # Note duration of 5 seconds

# Generate array with second*sample_rate steps, ranging between 0 and seconds
tp = numpy.linspace( 0 , second , second * fsample, False )

# to generate a 410 Hz sine wave
note = numpy.sin( frequency * tp * 2 * numpy.pi )

# user should Ensure that highest value is in 16-bit range
audio = note *(2**15 - 1) / numpy.max( numpy.abs( note ) )
# now, Convert to 16-bit data
ado = audio.astype( numpy.int16 )

# to Start the playback
play_object = simple_audio.play_buffer( ado , 1 , 2 , fsample )

# user now Waits for playback to finish before exiting
play_object.wait_done( )
Usage Notes
Importing/sourcing audio files
requires a path to an audio file, and it isn’t obvious how to provide one in a React application.
Using , you can «import» an MP3 file. It will resolve to a dynamically-generated path:
import someAudioFile from '../sounds/sound.mp3';

console.log(someAudioFile); // “/build/sounds/sound-abc123.mp3”
If you try to pull this trick in another React build system like Next.js, you may get an error like this:
The problem is that Webpack (the bundler used under-the-hood to generate JS bundles) doesn’t know how to process an MP3 file.
Alternatively, most tools will give you a «public» (create-react-app, Next.js) or a «static» (Gatsby) folder. You can drop your audio files in there, and then use a string path.
The sound files you’ll use with follow the same rules as other static assets like images or fonts. Follow the guides for your meta-framework of choice:
No sounds immediately after load
For the user’s sake, browsers don’t allow websites to produce sound until the user has interacted with them (eg. by clicking on something). No sound will be produced until the user clicks, taps, or triggers something.
takes advantage of this: because we know that sounds won’t be needed immediately on-load, we can lazy-load a third-party dependency.
will add about 1kb gzip to your bundle, and will asynchronously fetch an additional package after load, which clocks in around 9kb gzip.
If the user does happen to click with something that makes noise before this dependency has been loaded and fetched, it will be a no-op (everything will still work, but no sound effect will play). In my experience this is exceedingly rare.
Reactive configuration
Consider the following snippet of code:
const playbackRate, setPlaybackRate = React.useState(0.75);

const play = useSound('/path/to/sound', { playbackRate });
doesn’t just serve as an initial value for the sound effect. If changes, the sound will immediately begin playing at a new rate. This is true for all options passed to the hook.
StopSound Command
- Java
- PE
- Xbox
- PS
- Nintendo
- Win10
- Edu
StopSound Command in Minecraft Java Edition (PC/Mac)
In Minecraft Java Edition (PC/Mac), the syntax to stop a sound effect from playing is:
/stopsound <targets>
Definitions
- targets is the name of the player (or a target selector) that you wish to stop the sound effect for.
- source is optional. It is the source that is currently playing the sound effect. It can be one of the following: *, ambient, block, hostile, master, music, neutral, player, record, voice, weather.
- sound is optional. It is the sound effect to stop. (See List of Sound Effect Names.)
StopSound Command in Minecraft Pocket Edition (PE)
In Minecraft Pocket Edition (PE), the syntax to stop a sound effect from playing is:
/stopsound <player>
Definitions
- player is the name of the player (or a target selector) that you wish to stop the sound effect for.
- sound is optional. It is the sound effect to stop. (See List of Sound Effect Names.)
StopSound Command in Minecraft Xbox One Edition
In Minecraft Xbox One Edition, the syntax to stop a sound effect from playing is:
/stopsound <player>
Definitions
- player is the name of the player (or a target selector) that you wish to stop the sound effect for.
- sound is optional. It is the sound effect to stop. (See List of Sound Effect Names.)
StopSound Command in Minecraft PS4 Edition
In Minecraft PS4 Edition, the syntax to stop a sound effect from playing is:
/stopsound <player>
Definitions
- player is the name of the player (or a target selector) that you wish to stop the sound effect for.
- sound is optional. It is the sound effect to stop. (See List of Sound Effect Names.)
StopSound Command in Minecraft Nintendo Switch Edition
In Minecraft Nintendo Switch Edition, the syntax to stop a sound effect from playing is:
/stopsound <player>
Definitions
- player is the name of the player (or a target selector) that you wish to stop the sound effect for.
- sound is optional. It is the sound effect to stop. (See List of Sound Effect Names.)
StopSound Command in Minecraft Windows 10 Edition
In Minecraft Windows 10 Edition, the syntax to stop a sound effect from playing is:
/stopsound <player>
Definitions
- player is the name of the player (or a target selector) that you wish to stop the sound effect for.
- sound is optional. It is the sound effect to stop. (See List of Sound Effect Names.)
In Minecraft Education Edition, the syntax to stop a sound effect from playing is:
/stopsound <player>
Definitions
- player is the name of the player (or a target selector) that you wish to stop the sound effect for.
- sound is optional. It is the sound effect to stop. (See List of Sound Effect Names.)
python-sounddevice
python – sounddevice – это модуль python для кроссплатформенного воспроизведения звука. Этот модуль предоставляет привязки для библиотеки PortAudio и имеет некоторые подходящие функции для воспроизведения и записи массивов NumPy, содержащих аудиосигналы.
Если пользователь хочет воспроизвести файл WAV, он должен установить NumPy и звуковой файл, чтобы открыть формат аудиофайла в файлах WAV в виде массивов NumPy.
Например:
import sounddevice as sound_device
import soundfile as sound_file

filename = ' example.wav '
# now, Extract the data and sampling rate from file
data_set, fsample = sound_file.read( filename , dtype = ' float32 ' )
sound_device.play( data_set, fsample )
# Wait until file is done playing
status = sound_device.wait( )
Оператор sound_file.read() используется для извлечения необработанных аудиоданных, а также частоты дискретизации файла, которые хранятся в заголовке формата файла обмена ресурсами. Оператор sound_device.wait() используется для того, чтобы убедиться, что сценарий завершается только после завершения воспроизведения звука.
Pydub
Pydub – это библиотека Python, используемая для управления аудио и добавления к нему эффектов. Эта библиотека представляет собой очень простой и легкий, но высокоуровневый интерфейс, основанный на FFmpeg и склонный к jquery. Эта библиотека используется для добавления тегов id3 в аудио, нарезки его и объединения аудиодорожек. Библиотека Pydub поддерживает версии Python 2.6, 2.7, 3.2 и 3.3.
Однако пользователи могут открывать и сохранять файл WAV с помощью библиотеки pydub без каких-либо зависимостей. Но пользователям необходимо установить пакет для воспроизведения звука, если они хотят воспроизводить звук.
Следующий код можно использовать для воспроизведения файла WAV с помощью pydub:
from pydub import AudioSegment
from pydub.playback import play

sound_audio = AudioSegment.from_wav( ' example.wav ' )
play( sound_audio )
Если пользователь хочет воспроизводить другие форматы аудиофайлов, такие как файлы MP3, им следует установить libav или FFmpeg.
После установки FFmpeg пользователю необходимо внести небольшое изменение в код для воспроизведения файла MP3.
Пример:
from pydub import AudioSegment
from pydub.playback import play

sound_audio = AudioSegment.from_mp3( 'example.mp3 ' )
play( sound_audio )
Используя оператор AudioSegment.from_file(имя_файла, тип_файла), пользователи могут воспроизводить любой формат аудиофайла, поддерживаемый ffmpeg.
Например:
# Users can play a WMA file:
sound = AudioSegment.from_file( 'example.wma ', ' wma ' )
Библиотека Pydub также позволяет пользователям сохранять аудио в различных форматах файлов. Пользователи также могут рассчитать длину аудиофайлов, использовать кроссфейды в аудио с помощью этой библиотеки.
Sound slots
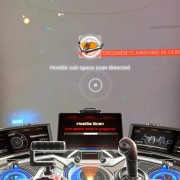
A_PlaySound supports playing sounds on eight sound channels (while A_StartSound supports more than that), indexed from 0 to 7. Playing a sound on a channel overrides any sound playing on the same channel, except for 0 (aka CHAN_AUTO), which first searches for a free channel, starting from 7 and decreasing until a free channel is found. If none of the channels are free, the sound is played on slot 0, overriding any sound playing there. The following constants can be used for sound slots:
- CHAN_AUTO (0)
- CHAN_WEAPON (1)
- CHAN_VOICE (2)
- CHAN_ITEM (3)
- CHAN_BODY (4) — The default, for historical reasons.
- CHAN_5 (5)
- CHAN_6 (6)
- CHAN_7 (7)
These constants can also be represented as numbers, such as: A_PlaySound("sound/name", 5). The slot parameter can be further combined (using the | operator) with the following modifier flags:
- CHAN_LISTENERZ (8) — Sound is played from the listener’s Z-height. (Verification needed)
- CHAN_MAYBE_LOCAL (16) — Sound is subject to and will not play if the sound is made by an actor other than the local player’s camera when compatibility flag is enabled.
- CHAN_UI (32) — Sound is considered an interface sound and is not recorded into savegames.
- CHAN_NOPAUSE (64) — Sound is not paused by menus and will play through time-stopping powerup effects.
- CHAN_LOOP (256) — Sound loops.
- CHAN_NOSTOP (4096) — Do not override the sound that is currently playing on the same channel with this one. This is only the case if both sounds are the same. If they are different, the playing sound is overridden regardless.
| Note: flag 128 is CHAN_AREA, which is specific to sector sounds and cannot be used with A_PlaySound. |
Other Game Commands
You can use other commands and cheats in Minecraft such as:
How to Use the Ability Command
How to Use the Achievement Command
How to Use the Advancement Command
How to Use the AlwaysDay Command
How to Use the Attribute Command
How to Use the BlockData Command
How to Use the Bossbar Command
How to Use the CameraShake Command
How to Use the ClassroomMode Command
How to Use the Clear Command
How to Use the ClearSpawnpoint Command
How to Use the Clone Command
How to Use the Code Command
How to Use the Connect Command
How to Use the Data Command
How to Use the DataPack Command
How to Use the DayLock Command
How to Use the Debug Command
How to Use the DefaultGameMode Command
How to Use the Difficulty Command
How to Use the Effect Command
How to Use the Enchant Command
How to Use the EntityData Command
How to Use the Event Command
How to Use the Execute Command
How to Use the Experience Command
How to Use the Fill Command
How to Use the Forceload Command
How to Use the Function Command
How to Use the GameMode Command
How to Use the Gamerule Command
How to Use the Give Command
How to Use the Help Command
How to Use the ImmutableWorld Command
How to Use the JFR Command
How to Use the Kick Command
How to Use the Kill Command
How to Use the Locate Command
How to Use the LocateBiome Command
How to Use the Me Command
How to Use the MobEvent Command
How to Use the Msg Command
How to Use the Particle Command
How to Use the PlaySound Command
How to Use the Publish Command
How to Use the Recipe Command
How to Use the Reload Command
How to Use the ReplaceItem Command
How to Use the Say Command
How to Use the Scoreboard Command
How to Use the Seed Command
How to Use the SetBlock Command
How to Use the SetMaxPlayers Command
How to Use the SetWorldSpawn Command
How to Use the Spawnpoint Command
How to Use the SpreadPlayers Command
How to Use the Stats Command
How to Use the Summon Command
How to Use the Tag Command
How to Use the TakePicture Command
How to Use the Team Command
How to Use the Teammsg Command
How to Use the Teleport Command
How to Use the Tell Command
How to Use the TellRaw Command
How to Use the TestFor Command
How to Use the TestForBlock Command
How to Use the TestForBlocks Command
How to Use the TickingArea Command
How to Use the Time Command
How to Use the Title Command
How to Use the TitleRaw Command
How to Use the Tm Command
How to Use the ToggleDownfall Command
How to Use the Tp Command
How to Use the Trigger Command
How to Use the W Command
How to Use the Wb Command
How to Use the Weather Command
How to Use the WorldBorder Command
How to Use the WorldBuilder Command
How to Use the WSServer Command
How to Use the Xp Command
How to Find your XYZ Coordinates
How to Keep Inventory when you Die
См. также[править | править код]
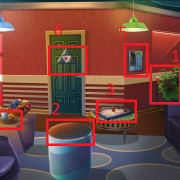
Давно хотели включить на варпе любимую песню? Или сделать «дискотеку» с настоящими песнями, а не мелодиями с пластинок? Предлагаю ознакомиться с блоком, который позволит создавать музыкальные композиции в игре.
Нотный блок позволяет настроить его на звучание одного из 24 доступных звуков (для одного типа инструмента), что бы в дальнейшем воспроизвести его подачей сигнала красного камня. Звучание также меняется, в зависимости от блока, на котором он расположен.
- Бас гитара: доски, тыква, сундук, верстак, музыкальный блок (деревянные блоки) ;
- Малый барабан: песок, гравий, песок душ (песчаные) ;
- Палочки: стекло, светящийся камень (стеклянные) ;
- Большой барабан: булыжник, обсидиан, кирпичный блок, адский камень (каменные) ;
- Пианино: земля, воздух (другие) ;
Диапазон допустимых звуков равен двум октавам. В общей сложности, с помощью музыкального блока можно прослушать 120 разных звуков. При подаче красного сигнала, нотный блок проиграет установленный звук один раз; таким образом, для несложной мелодии, количество блоков равняется количеству звуков. Если над ним установлен блок — звук проигран не будет, что можно использовать для создания компактной схемы с поршнем. Нажатие ПКМ повышает высоту звука на полтона, ЛКМ проигрывает раннее настроенный звук.
Довольно теории; каким же образом это можно использовать? Самый легкий способ воспроизвести простую мелодию — найти её табы. Цифра укажет на количество кликов, а по ритму подбираем задержку повторителей. Рассмотрим на примере «кузнечика».
1) Для начала находим табулатуру. Считаем количество цифр.
2) Ставим нотные блоки, под количество цифр. Я насчитал 44. Между ними устанавливаем повторители.3) Настраиваем, в соответствии с табами.
4) На слух выставляем задержку повторителей. Мой вариант, возможно, у вас получится лучше.
Изменение блока, что находится под музыкальным, приведет к изменению звучания всей мелодии, экспериментируйте.
Использовать можно как вам захочется — начиная обычным прослушиванием любимой песни и заканчивая эвентом «угадай мелодию» или дискотекой, все зависит только от вас.
Спасибо за просмотр, удачи.
Посмотреть все статьи
В «Майнкрафте» имеются специальные пластинки, на которых записана мелодия. Ее вы можете проиграть, если уже создали граммофон, однако это лишь те записи, которые уже были сделаны разработчиками. Естественно, каждому хочется создавать свои мелодии, а затем их проигрывать. К сожалению, такого простого способа, как запись на одну маленькую пластинку, нет. Однако в игре имеется нотный блок, который также называют музыкальным, — именно с его помощью при усидчивости и большом запасе упорства вы сможете сочинять полноценные мелодии. В данной статье вы узнаете, как сделать нотный блок в «Майнкрафте», а также как его затем использовать, чтобы сотворить полноценную мелодию.
Кроссплатформенный аудиовход – вывод с pyAudio
Pyaudio – это библиотека Python, которая представляет собой кроссплатформенный аудиовход – вывод с открытым исходным кодом. Он имеет широкий спектр функций, связанных со звуком и в основном ориентированных на сегментацию, извлечение функций, классификацию и визуализацию.
Используя библиотеку pyaudio, пользователи могут классифицировать неизвестные звуки, выполнять контролируемую и неконтролируемую сегментацию, извлекать звуковые функции и представления, обнаруживать звуковые события и отфильтровывать периоды тишины из длинных записей, применять уменьшение размерности для визуализации аудиоданных и сходства контента и многое другое.
Эта библиотека предоставляет привязки для PortAudio. Пользователи могут использовать эту библиотеку для воспроизведения и записи звука на разных платформах, таких как Windows, Mac и Linux. Для воспроизведения звука с помощью библиотеки pyaudio пользователь должен писать в .stream.
Пример:
import pyaudio
import wave

filename = ' example.wav '

# Set chunk size of 1024 samples per data frame
chunksize = 1024

# Now open the sound file, name as wavefile
wavefile = wave.open( filename, ' rb ' )

# Create an interface to PortAudio
portaudio = pyaudio.PyAudio( )

# Open a .Stream object to write the WAV file to play the audio using pyaudio
# in this code, 'output = True' means that the audio will be played rather than recorded
streamobject = portaudio.open(format = portaudio.get_format_from_width( wavefile.getsampwidth( ) ),
                channels = wavefile.getnchannels( ),
                rate = wavefile.getframerate( ),
                output = True( )

# Read data in chunksize
Data_audio = wavefile.readframes( chunksize )

# Play the audio by writing the audio data to the streamobject
while data != '':
    streamobject.write( data_audio )
    data_audio = wavefile.readframes( chunksize )

# Close and terminate the streamobject
streamobject.close( )
portaudio.terminate( )
Здесь пользователи могут заметить, что воспроизведение звука с использованием библиотеки pyaudio может быть немного сложнее по сравнению с другими библиотеками воспроизведения звука. Вот почему эта библиотека может быть не лучшим выбором пользователей для воспроизведения звука в своих проектах или приложениях.
Хотя библиотека pyaudio обеспечивает более низкоуровневое управление, что позволяет пользователям устанавливать параметры для своих устройств ввода и вывода. Эта библиотека также позволяет пользователям проверять загрузку своего процессора и активность ввода-вывода.
Библиотека Pyaudio также позволяет пользователям воспроизводить и записывать звук в режиме обратного вызова, где указанная функция обратного вызова вызывается, когда новые данные необходимы для воспроизведения и доступны для записи. Это особенности библиотеки pyaudio, которые отличают ее от других аудиобиблиотек и модулей. Эта библиотека специально используется, если пользователь хочет воспроизвести звук помимо простого воспроизведения.