Maerwald
Содержание:
Грядущая буря
 Грядущая буря
Эотас устремился к землям Укайзо – вы должны настичь его. В ходе этого квеста вам предстоит выбрать одну из фракций, на сторону которой вы встанете.
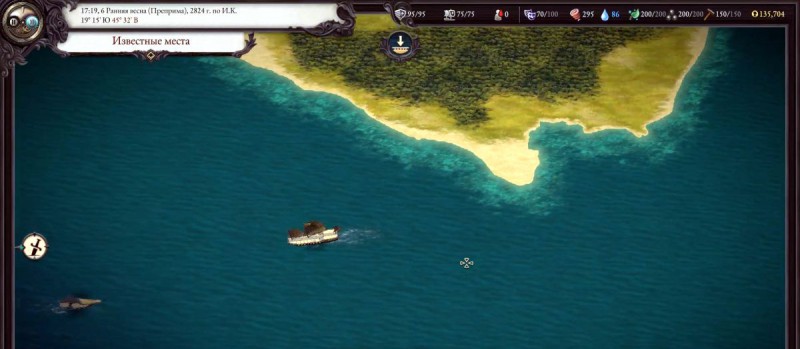
В пути садитесь на корабль и плывите на северо-восток карты вплоть до бури. Необходимо преодолеть стихию, чтобы загадочный остров Укайзо открылся вам.
 Отправляемся в плавание
Для одиночного путешествия вам придется установить на корабль паруса из крыльев дракона и обить корпус черным деревом. Все это можно приобрести в порту Некитаки у корабела.
Так или иначе, после выбора вы должны поговорить с новым капитаном, который откроет вам местонахождение уникального призрачного корабля. Используя его, вы легко сможете миновать бурю.
Предпочтя королеву Онеказу II остальным, отчитайтесь перед ней во дворце. Женщина отправит вас уничтожить хранилище с порохом текущей торговой компании, подставив тем самым их конкурентов – Вайлианскую компанию. Если вы сделаете это, королева отправит с вами в путь двух магов воды, что развеют бурю.
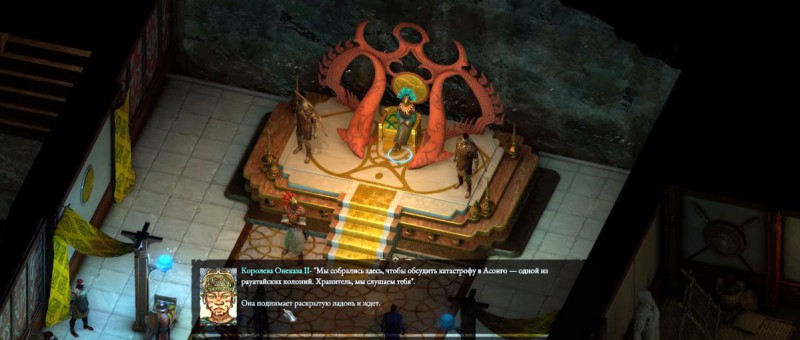 Королева Онеказа II
Что касается Вайлианской торговой компании, то при ее выборе вам сперва предстоит решить вопрос с верхушкой. Кто займет место главы – текущий директор Кастол или претендент Альвари. По итогу убивать никого не придется, однако вас все равно попросят встать на чью-то сторону.
Наконец, если вы выберите компанию Архипелага, то тогда вам придется выполнить нелегкое задание по убийству королевы Онеказы II. Можно также не трогать ее и прикончить лишь принца.
Journal[]
| quests\07_gilded_vale\07_qst_lords_of_a_barren_land | |
|---|---|
| ID | Objectives |
| Lord of a Barren Land | |
| 10000 | Gilded Vale is ruled by Lord Raedric, who resides in the keep beyond the Esternwood. With the Dyrwood in the grip of the curse known as Waidwen’s Legacy, he has resorted to harsh measures in order to root out the cause. It has made him enemies, many of whom would see him removed from power. |
| 1 | Travel to Raedric’s Hold. |
| 10001 | I was approached by a man who spoke against Lord Raedric’s cruelty. He asked that I join him in his cause, and put an end to Raedric’s rule. The keep lies east of the Esternwood, and will be heavily defended. It will be a considerable challenge to get inside. |
| 20004 | Kolsc believes that a frontal assault upon the keep would be impossible. He suggested I attempt to find a way in through the sewers, at the eastern edge of the moat. Alternately, I may be able to find some way to access the upper floor of the castle where Nedmar, Kolsc’s contact, resides. |
| 2 | Confront Lord Raedric the VII inside Raedric’s Keep. |
| 10002 | I have reached Raedric’s Hold. Lord Raedric waits somewhere within, but making my way inside will not be a simple task. |
| 20000 | I’ve spoken with Nedmar, the high priest. He promised to grant me safe access to Raedric’s throne room if I manage to free his former acolyte, Giacco, from the keep’s prisons in the lower dungeons. |
| 20001 | I’ve spoken with Osrya, an animancer in the keep’s dungeons. She has promised to open a secret passage to Raedric’s quarters if I manage to dispose of Nedmar, the high priest of Berath. He resides within the upper floors of the keep. |
| 20003 | Kolsc believes that a frontal assault upon the keep would be impossible. He suggested I attempt to find a way in through the sewers, at the eastern edge of the moat. Otherwise, perhaps I can find some way to access the upper floor of the castle where Nedmar, Kolsc’s contact, resides. |
| 20011 | I have released Giacco from his cell. |
| 20005 | I saved Giacco, Nedmar’s young acolyte, and informed Nedmar of my success. The priest gave me a key with which I can open the door to the scriveners’ quarters, and through it reach the chapel directly beside Raedric’s throne room. |
| 20012 | I have dealt with Nedmar. Osrya may appreciate the news. |
| 20006 | I slew Nedmar, as promised, and informed Osrya of the deed. Osrya was grateful for my assistance, and opened a secret passage that leads directly into Raedric’s chambers, which should provide easier access to his throne room. |
| 20007 | I’ve found some Berathian robes. They may help me blend in with the priests on this floor. |
| 20009 | I’ve killed Osrya, which makes it unlikely that she’ll assist me in reaching Raedric. |
| 20010 | I killed Nedmar, which has ended our bargain. |
| 20008 | Giacco has been slain. |
| 3 | Travel to Kolsc’s hidden encampment. |
| 10003 | I spoke to Lord Raedric, who had a different tale to tell. He has asked me to confront Kolsc about his plans to usurp the throne and leadership over Gilded Vale and its surrounding lands. Raedric says that Kolsc can be found within the wilds known as Magran’s Fork. |
| 20002 | |
| 4 | Confront Kolsc. |
| 10004 | I have found the place where Kolsc and his allies meet. Kolsc waits within. It falls to me to decide his fate. |
| 5 | Return to Raedric’s Hold. |
| 10005 | I have slain Kolsc, and thereby eliminated the primary threat to Lord Raedric’s rule. Raedric has promised a reward upon my successful return. |
| End states | |
| Kolsc Ends Quest | |
| 30000 | Lord Raedric VII is dead. Kolsc is now free to claim Raedric’s Hold and its surrounding lands, including Gilded Vale. |
| Raedric Ends Quest | |
| 30001 | I dealt with Kolsc, and informed Lord Raedric that he is free to rule the lands of Gilded Vale without further opposition from the usurper. |
| Force-Killed Both (Never spoke to turn in to either) | |
| 30002 | All the living heirs to the Raedric holdings have been slain by my hand. Gilded Vale will have to carry on without its ‘saviors’. |
Interactions[]
Pillars of Eternity
Woedica is the unseen antagonist. Her goal is to return to Eora empowered and reestablish her dominance as the foremost of the gods, using Thaos to further her agenda. The Watcher can defeat Thaos and then fulfil his purpose — to offer the stolen souls to Woedica — when deciding what to do at Sun in Shadow.
Pillars of Eternity II: Deadfire
- Woedica makes a reappearance as a part of the council of gods. She appears first after departing Maje Island, at Berath’s council. She reminds Berath of Eothas’ resilience — and the fact that he should scare her.
- When the player first leaves Neketaka they will receive the Burned Book of Law in their inventory. Interacting with the book allows the Watcher to communicate with Woedica in private. She will reveal certain information about the history and machinations of the gods, saying that she plans to use the Watcher as a test of the worthiness of mortals
Deity[]
When players create a priest character, they select a deity. Each choice highlights two types of behavior that are celebrated and two types of behavior that are condemned. For priests played as the main character, their Holy Radiance power will shift based on their behavior. Reinforcing their deity’s preferred behavior will gradually increase their power, while playing against type will cause a small diminishment in their power. These changes are not dramatic, but reflect a measure of dissonance between the character’s stated faith and how they choose to conduct themselves.
Moreover, each deity will give access to an exclusive and one .
| Deity | Favored dispositions | Condemned dispositions | Favored weapons | Exclusive talent | Exclusive |
|---|---|---|---|---|---|
| Berath | Stoic, Rational | Cruel, Passionate | Mace, Great sword | The Pallid Hand | Symbol of Berath |
| Eothas | Honest, Benevolent | Cruel, Shady / Deceptive | Flail, Morning star | Hope Eternal | Symbol of Eothas |
| Magran | Aggressive, Clever | Passionate, Diplomatic | Sword, Arquebus | Inspired Flame | Symbol of Magran |
| Rymrgand(unavailable for player) | Rational, Honest | Diplomatic, Benevolent | Hatchets | — | Symbol of Rymrgand |
| Skaen | Cruel, Shady / Deceptive | Aggressive, Benevolent | Stiletto, Club | Prey on the Weak | Symbol of Skaen |
| Wael | Deceptive, Clever | Rational, Honest | Quarterstaff, Rod | Incomprehensible Revelation | Symbol of Wael |
| Woedica(unavailable for player) | Rational, Cruel | Diplomatic, Benevolent | Unarmed | — | Symbol of Woedica |
Journal[]
| quests\04_defiance_bay_brackenbury\04_qst_elder_archives | |
|---|---|
| ID | Objectives |
| The Theorems of Pandgram | |
| 10000 | Nedyn, an animancer I met in front of the Brackenbury Sanitarium, told me of the Elder Archives and the rare manuscripts they contain, including one by an animancer named Pandgram.
She needs the Theorems of Pandgram to continue her research, but the archivists won’t give her access. |
| 1 | Go to the Hall of Revealed Mysteries in Copperlane. |
| 10001 | The Elder Archives are hidden in the Hall of Revealed Mysteries, which is in Copperlane. I’ll find the Elder Archives somewhere in the great library located there. |
| 20000 | I’ve learned that Grimda is the only one who can grant access to the Archives. |
| 2 | Find the Elder Archives. |
| 10002 | I found a way inside the Hall of Revealed Mysteries, but the Elder Archives lie behind more locked doors. |
| 3 | Get the Theorems of Pandgram. |
| 10003 | I made it into the Elder Archives. The manuscript that Nedyn asked for should be in here somewhere. |
| 4 | Retrieve the scroll of Wael for Grimda. |
| 10004 | Grimda has asked me to retrieve a stolen scroll of Wael.
If I do this for her, I may be able to get access to the Elder Archives. |
| 20001 | Grimda has granted me access to the Elder Archives. |
| 5 | Return to Nedyn outside the Brackenbury Sanitarium. |
| 10005 | I found the Theorems of Pandgram in the Elder Archives. Nedyn will be pleasantly surprised to see it. |
| End states | |
| Got Theorems | |
| 30000 | I obtained the Theorems of Pandgram for Nedyn, who was ecstatic to finally have it in her hands. |
| Killed someone | |
| 30001 | I obtained the Theorems of Pandgram for Nedyn. She wasn’t too pleased with the bloodshed at the Hall of Revealed Mysteries. |
| Told Grimda | |
| 30002 | I informed Grimda of Nedyn’s interest in the Theorems of Pandgram. Grimda thanked me for warning her and has taken measures to protect the book from any further attempts. She rewarded me for my honesty. |
| Quest Failed | |
| 30003 | Nedyn has been slain. |
Behind the scenes[]
| “ | Occasionally on a project you will inherit another person’s work when they move onto other areas in the game, or in this instance another project at our studio. This level was initially designed by Constant Gaw, a veteran designer here at Obsidian, and it shows in the levels unique design and look. However, his skills were needed elsewhere, and his area was handed down to me. A daunting task to fill the shoes of another designer, but it is gratifying to learn and improve based of an existing design.
A lot of what makes this dungeon unique apart from its layout, is the use of narrative that is interwoven into the design of the area. The dungeon as a whole serves one purpose: to craft a powerful, unique weapon fused by the player’s choices. It is literally one giant puzzle. However, this is an aspect that lies underneath the direct goal of the level, which is to find ancient bronze weapons for The Dozens. Marrying the two cohesively was a challenge, but we managed to accomplish this by the characterization of a vithrack, Nridek, whom you encounter here. He is trying to understand the power of this place, and hopefully take it back to his people as a powerful boon, that is if the player has anything to say about it. |
” |
| ~ Matthew Perez, Junior Designer (upper) |
Developer commentary (upper)
| “ | In many RPGs, re-traversal can often be a chore, but unfortunately is often a necessity as areas must be economised and sometimes you will need to travel back through a wilderness or two to reach further areas within the game. In order to keep the player’s interest piqued in exploring, even through areas they previously existed, we try to throw extra content at them they might not have noticed the first time round.
Once such area is the second level of this dungeon. Chances are the player made their way through this area before the flooding had stopped in Stormwall Gorge. If they were to travel back into this dungeon they will discover previously flooded floor is now available. Here the player can find some valuable loot, and if they happen to be on a bounty, discover a powerful troll awaiting in the murky depths. |
” |
| ~ Matthew Perez, Junior Designer (lower) |
Developer commentary (lower)
Игра Pillars of Eternity — общая информация
Релиз игры состоялся в 2015 году — в версии для ПК. Однако она оказалась настолько популярной, что в августе 2017 года также вышли игры для PS4 и Xbox One, а ещё через два года — для Nintendo Switch.
 Игра не разочарует даже придирчивых геймеров
Важным достоинством игры является её нетребовательность — запустить можно даже на сравнительно слабом компьютере. Нужно всего 4 Гб оперативной памяти, процессор уровня Core i3, а также видеокарта Geforce 9600 GT. Конечно, любой современный игровой компьютер может похвастать куда более внушительными параметрами.
Время, затрачиваемое на игру, сильно зависит от стиля геймера. Если поспешить, выполняя только сюжетные задания, то прохождение игры «Пилларс оф Этернити» займет около 22 часов. Ну а чтобы заглянуть в каждый уголок, выполнить все побочные квесты, придется потратить значительно больше времени — до 70 часов.
При этом нужно понимать, что выше указано чистое время игры, когда геймер прекрасно знает всю последовательность действий и ему не приходится отвлекаться. Если же просто играть в свое удовольствие, затрачивая по 2-3 часа вечером, то на освоение мира уйдет пара тройка недель.
Факт! На протяжении всей игры геймеру предстоит много раз делать выбор — от этого зависит развитие сюжета и то, какую концовку он увидит.
Loot[]
Upper level
Debris:
- Random «medium» weapon
- Random gem
- ()
Debris:
- Random «large» weapon
- Random gem
- ()
Debris:
- Random «small» weapon
- Random gem
- ()
Corpse (Byne «The Nimble»):
- Fine Sabre
- Random currency
- Random food/drug/potion/lockpick/gem
- ()
Corpse (Bandon Leer):
- Helm
- Random currency
- Random drug/food/lockpick
- ()
Corpse (Urblat «The Ripper»):
- Mail Armor
- Random currency
- Random drug/food/lockpick
- ()
Corpse (Azrael Stonebelly):
- Grimoire
- Random currency
- Random food/drug/potion/lockpick/gem
- ()
Corpse (Hannah Cade):
- War Hammer
- Random currency
- Random food/drug/potion/lockpick/gem
- ()
Corpse (Nok-thar):
- Quarterstaff
- Random currency
- Random drug/food/lockpick
- ()
Web Sac:
- Quarterstaff
- Random armor
- Random gem
- ()
Web Sac (Hidden, Difficulty 6):
- 112x Adra Enîach
- Random accessory
- Random gem
- ()
Sarcophagus:
- Cladhalíath
- Ancient Engwithan Weapons
Lower level
Sarcophagus (Trapped, Freezing Pillar Trap, Difficulty 7 / Hidden — Difficulty 6):
- Random accessory
- Random gem
- ()
Vase:
- Random armor
- Random gem
- ()
Container:
- Random accessory
- Random gem
- ()
Side quests[]
These are miscellaneous quests which are not vital to the main storyline.
| Quest | Given by | Start location | Notes |
|---|---|---|---|
| A Mother’s Plea | Aufra | Gilded Vale – Aufra’s Home | |
| The Smith’s Shipment | Tuatanu | Gilded Vale – Black Hammer Smithery | |
| Buried Secrets | Wirtan | Gilded Vale – Temple of Eothas | |
| Lord of a Barren Land | Kolsc | Gilded Vale orEsternwood | Requires good reputation with Gilded Vale to trigger there or you can start it in Esternwood. |
| The Master Below | Steward | Caed Nua – Great Hall | Requires completion of The Old Watcher. |
| A Return to Court | Palace messenger | Caed Nua’s claim quest arc | |
| The Battle of Yenwood Field | Marshal Forwyn | ||
| The Master’s Tools | Tcharek | Endless Paths of Od Nua – Level 12 | |
| A Voice from the Past | Dalton | Copperlane | |
| His Old Self | Kaenra | Copperlane – The Goose and Fox | |
| Cinders of Faith | Fyrga | First Fires – Ducal Palace | |
| Rise and Fall | — | Heritage Hill | Cut content |
| The Wailing Banshee | Niah | Ondra’s Gift | |
| Supply and Demand | Maea | Ondra’s Gift – The Salty Mast | |
| At All Costs | Verzano | Ondra’s Gift – Vailian Trading Company | |
| The Theorems of Pandgram | Nedyn | Brackenbury | |
| Far from Home | Thristwn | Brackenbury – The Charred Barrel | |
| The Final Act | Kurren | Brackenbury – Hadret House | No longer available after completing Act 2. |
| A Farmer’s Plight | Rumbald | Dyrford Village | |
| Blood Legacy | Lord Harond | Dyrford Village – Dracogen Inn | |
| The Champion of Berath | Frightened villager | Hearthsong – The Celestial Sapling | Requires completion of Lord of a Barren Land. |
| At the Mercy of the Tribes | Cwineth | ||
| Hunter, Brother | Rîdaî | Hearthsong – The Passage of the Six | |
| Sacrificial Bloodlines | Simoc | Elms’ Reach – Hall of Warriors | |
| Into the White Void | Rymrgand | Elms’ Reach – Teir Evron | |
| A Servant of Death | Berath | ||
| The Nest Above the Clouds | Hylea orCasfath and Onŵen | Elms’ Reach – Teir Evron orOldsong | Can be received either from Hylea directly or from Casfath and Onŵen in Oldsong. |
| The Old Queen and the New King | Galawain orDesthwn | Elms’ Reach – Teir Evron orOldsong – Galawain’s Maw | Can be received either from Galawain directly or from Desthwn. |
| Prison of Ice | Larha | Oldsong – Galawain’s Maw |
Journal[]
| quests\01_defiance_bay_coppleane\01_tsk_unwanted | |
|---|---|
| ID | Objectives |
| Unwanted | |
| 10000 | The Crucible Knights are calling for the arrest of an orlan man named Eorn. Apparently he’s eluded capture thus far, though the Knights continue to hunt for him. |
| 1 | Find Eorn. |
| 10001 | The Edict of Arrest I found is recently dated. Eorn could not have traveled far, and it seems unlikely he could get past the guards at the gates. I should look for him in the city. |
| 20003 | Aldmar told me a rumor that Eorn hides in the catacombs under Copperlane. |
| 20000 | I found Eorn hiding down in the catacombs. He’s trying to flee Defiance Bay, but doesn’t have enough pands to get out of the city. I must decide what’s to be done about him. |
| 20004 | I recall meeting an orlan in the Copperlane catacombs. Aldmar might want to hear of it. |
| 5 | Decide Eorn’s fate. |
| 10005 | I met an orlan named Eorn down in the catacombs. He told me he’s being hunted by the Crucible Knights for the crime of murder. He’s trying to flee Defiance Bay, but doesn’t have enough pands to get out of the city, and has begged me to keep his secret long enough that he can gather the necessary coin. |
| 6 | Report to the Crucible Keep. |
| 10006 | I’ve killed Eorn, a man wanted for murder. Someone at Crucible Keep will likely be interested in knowing that I’ve solved this problem for them. |
| End states | |
| I Killed Eorn | |
| 30000 | I found the fugitive, Eorn, hiding from the Crucible Knights in the catacombs. I killed him on behalf of the city guard, and reported the deed to Steadman Aldmar. He thanked me for my service to the city, and the Knights in particular, and gave me a sizable reward. |
| Crucible Knights Killed Eorn | |
| 30001 | I found the fugitive, Eorn, hiding from the guards in the catacombs. He pleaded for me to keep his location a secret, but I decided to turn him in to the authorities. Steadman Aldmar sent a group of Crucible Knights down into the catacombs to finish him off, and gave me a sizable reward for finding the fugitive. |
| Eorn is Free | |
| 30002 | In the catacombs, I found an orlan named Eorn who’s hiding from the Crucible Knights. He was trying to scrape up enough money to leave Defiance Bay. I gave him enough coin to buy passage out of the city. He thanked me and told me that he would never forget my kindness. |
| I Took Eorn Prisoner | |
| 30003 | I found the fugitive, Eorn, hiding from the Crucible Knights in the catacombs. He pleaded for me to keep his location a secret. I decided he didn’t deserve the Knights’ vengeance or his freedom. I took him prisoner myself and sent him to the dungeon at my stronghold. |
| Quest Failed | |
| 30004 | Someone critically important to this quest has died. |
Cult[]
The cult of Ondra takes on many forms, the most noticeable of which are Ondra’s Giftbearers. They are a group which collects trinkets, love notes, and other objects from people that live far from the sea in exchange for a small fee. These objects are then cast into the ocean or dropped in a particularly deep spot during a special ceremony. There have been some cases of Giftbearers abusing their responsibility, which led to them being mistrusted or even attacked in some areas.
Of note is the secretive Abbey of the Fallen Moon, a remote cloister in the White March. Unknown to all but the highest ranking members of the cult and Giftbearers, it is built around the corpse of Abydon, the smithing god. It houses both the Salt Well, where the greatest burdens are forgotten, and the orders of High and Low Tides: the most revered ranks of Ondra’s faithful, dedicated to memory and forgetting. The order of the High Tide is responsible for the day-to-day operations and defense of the Abbey, as well as preparing for the Low Tide’s vows. The Low Tide is composed of Giftbearers who inhabit the Halls of Silence beneath the Abbey, where they submit to slow erasure of memory. Ultimately, they are sacrificed in the ritual of the Rising, where the Tidecaster selected by the Conclave arrives to drown them all and allow members of the High Tide to take the vows and inhabit the Halls below. Notably, many members of the Low Tide later regret their choices and the slow disintegration of their minds. Thus, the ritual is designed to prevent them from ever leaving the confines of the Abbey and revealing their secrets to the world beyond.
Rituals
The ritual of sprinkling holy water is one of the most important traditions in the Ondrite church. For Ondra’s followers, it signifies not only a sanctifying of the church, but the actual presence of the Lady of Lament herself. All Ondrite holy water comes from the ocean, and those pilgrims who convey the water from the sea are held in great esteem among Ondra’s faithful.
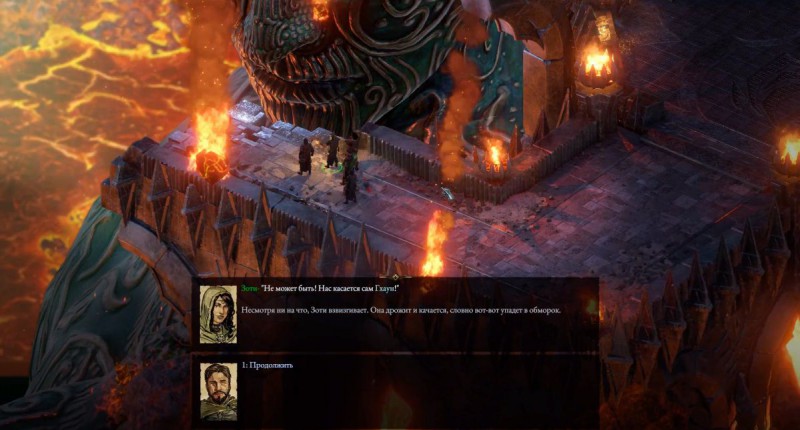
Он ждет в огне
 Он ждет в огне
На острове Асонго Эотас отказался слушать вас. Вместо этого бог предложил встретиться на островах Зубы Магран, если вы хотите узнать о его намерениях больше.
Пробившись через заслон врагов, высаживайтесь у причала. Внутри Чрева захватите питомца Злого Тролля, что прячется слева от моста, а затем перейдите этот же мост и побеседуйте с великаном. Разрешив проблему, захотите в башню.
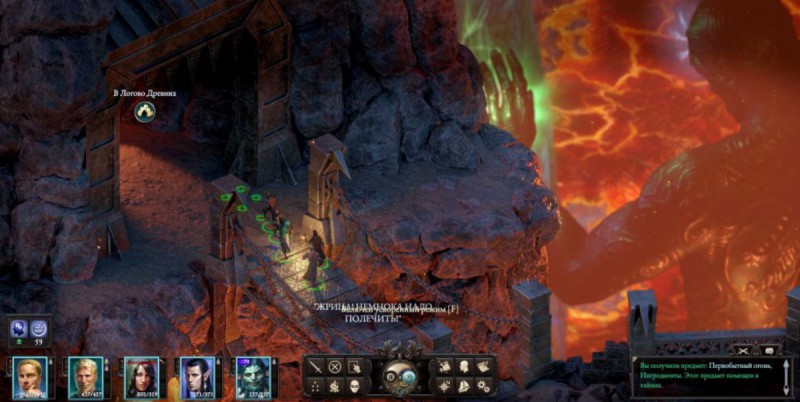 Логово Древних
В башне вы должны открыть дверь силой или с помощью ключа, который находится в помещении наверху. Далее вам снова повстречаются великаны, каких придется уговорить мечом или дипломатией. За ними же вы сможете пройти к еще одному мосту.
Финал пещеры ознаменуется столкновением с драконом, которого можно как умаслить, так и прикончить. Так или иначе, раздобудьте камень для запуска алтаря, а затем активируйте пурпурную душу.
 Эотас и метеоритный дождь
Теперь ступайте назад к мосту и идите к твердыне. Продемонстрируйте охране камень, чтобы пройти. Сейчас вам доступно изучение всей области, после чего вы можете встать на лифт и добраться до Эотаса.
Город, пропавший в веках
 Город, пропавший в веках
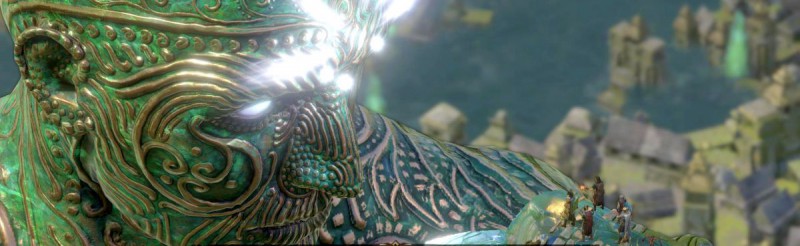
Эотас достиг острова Укайзо, где собирается разорвать перевоплощение сущностей Эоры. Необходимо отыскать его и остановить.
Оказавшись на острове, вам предстоит сокрушить местного стража. Он фактически является главным противником Pillars of Eternity 2 Deadfire, т.к. далее с самим богом драться не придется.
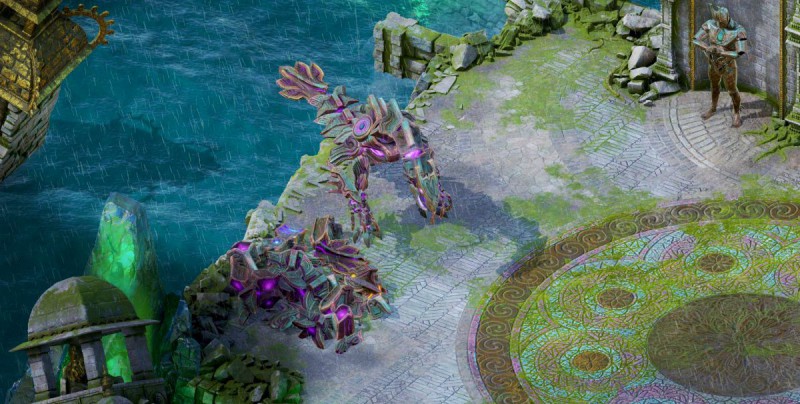 Битва со стражем Укайзо
Когда битва будет завершена, ступайте на восток. После ведущей к башне тропинки деактивируйте механизм, что создает бурю.
Теперь идите назад и поговорите с хазануи Кару, что встретится вам в пути. Если вы убили Онеказу II, то тогда враг может не появиться, но в других случаях все равно предстоит сражение.
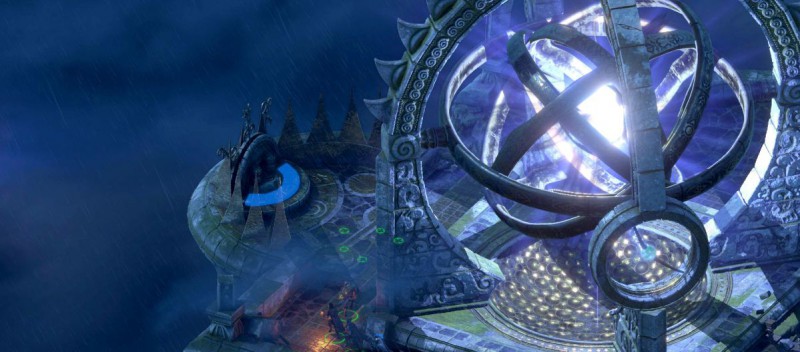 Отключить механизм, вызывающий бурю
Далее минуйте променад и воспользуйтесь лестницей, что приведет вас к финальной локации, где и находится Эотас. Если вы попытаетесь помешать ему, то тогда он мгновенно аннигилирует вас. Второй вариант – просто согласиться с богом и выжить.
Путь в Порт-Маже

После того как разберетесь со всеми задачами в стартовой локации (например, выполните задание «Лечащие руки»), отправляйтесь в Порт-Маже – единственный крупный город на этом острове. Двигаясь по глобальной карте, вы наткнетесь на паломников Эотаса, идущих в туда. Начнется интерактивная сцена, в которой вам будут доступны следующие варианты действий:
- Вы можете прокрасться мимо них незамеченным, закончив таким образом постановочное взаимодействие.
- Можете выйти и поприветствовать их в открытую. Окажется, что у них застряло колесо и они не могут ехать дальше.
- Можете использовать Силу, чтобы приподнять вагон и помочь паломникам. За это вы получите немного денег и положительную репутацию у Детей Утренней Звезды.
- Можете использовать Ловкость рук, чтобы незаметно спереть ларец с деньгами, пока якобы осматриваете вагон, чтобы найти способ его починить.
- Можете использовать Устрашение, чтобы ограбить паломников – получите деньги и алхимические ингредиенты. Затем можете либо оставить их в покое, либо убить и забрать все ценное с трупов. Это, понятно, приведет к понижению репутации у Детей Утренней Звезды.
- Можете просто пойти дальше, отказавшись помогать им – это также снизит вашу репутацию у этой фракции.
Background[]
In a world with many gods, there are many different types of priests. Though the majority of priests spend their time tending to worshipers or engaged in relatively peaceful pursuits, there are ranks of dedicated adventuring or mercenary priests who have turned the flame of their faith into a spark to ignite the power of their souls. Such men and women have found a divine link to their chosen deity, but their abilities stem solely from within.
Dedicated to spreading the news of their gods’ dominions in the realms of mortals through their own deeds, adventuring priests thrust themselves into lethal conflict to prove their worth. Often trained to fight alongside soldiers of their respective churches, priests are capable in the fray (and near the fray, for those who follow less melee-oriented faiths), but their true power comes from their prayers, faith-inspired miracles that aid their allies and punish their enemies. These miracles range from combat blessings, weapon enchantments, and protective barriers to divine summons, sanctified wards, and crippling curses. In many ways, the prayers of priests have almost as much variety as wizards spells, though priests are restricted to invoking prayers that are aligned with their faith. Additionally, priests often specialize in the weapons, armor, and litanies of prayers most beloved by their church. Thus, the multitude of gods produces a multitude of different priests, each with their own unique array of abilities.
Priests are well-versed in philosophy, myths, and legends, giving them an inherent bonus to the Lore skill. Additionally, the requirements of their faith often involve traveling long distances in difficult circumstances, giving them an inherent bonus to Athletics.
Companion quests[]
Every scripted companion has a personal side-quest that you can complete together with them:
| Quest | Companion | Start location | Notes |
|---|---|---|---|
| Fragments of a Scattered Faith | Edér | Gilded Vale | Requires completion of Visions and Whispers. |
| The Trials of Durance | Durance | Magran’s Fork | Appears not before starting The Old Watcher. |
| Time and Tide | Kana Rua | Caed Nua | |
| The Long Hunt | Sagani | Woodend Plains | |
| The Child of Five Suns | Pallegina | Ondra’s Gift | Requires completion of At All Costs. |
| Two-Sided | Aloth | Copperlane – Copperlane Catacombs | Requires completion of Never Far from the Queen. |
| Dream and Memory | Grieving Mother | Dyrford Village | |
| True to Form | Hiravias | Stormwall Gorge | Talk to him after he joins party. |
| The One That Got Away | Devil of Caroc | Durgan’s Battery – Galvino’s Workshop | |
| Secrets of the Tacan | Zahua | Stalwart Village | Talk to him after entering and exhausting all his dialogue options. |
| The Burden of Memory | Maneha |
Background[]
Pillars of Eternity
|
An emaciated figure hunches over a stack of books. As you enter the room, it rises, and you feel as though you can see each rib and vertebrae shift into place beneath a pale film of flesh. It turns, twisting wasted skin and tendons around its bones. Two eyes burn from its angular, shrunken face. |
Concelhaut is one of the most powerful mages on Eora, who has spent a lifetime studying magic and inventing new spells (the list includes Concelhaut’s Corrosive Siphon, Concelhaut’s Parasitic Staff, Concelhaut’s Draining Touch, Concelhaut’s Crushing Doom, and Concelhaut’s Draining Missiles), and then extended it by pouring his soul into a phylactery to extend life and knowledge. His apprentices spend years in their laboratories, toiling over new enchantments for the privilege of learning at his feet, further enhancing his potential.
Concelhaut is a longtime rival of Llengrath and other archmages (Ninagauth, Minoletta, Kalakoth and Citzal) who try or have tried to take him down by any means necessary, including hiring a mercenary army that Concelhaut dismisses as merely a nuisance. He is single-mindedly dedicated to the pursuit of knowledge and by 2823 AI has four apprentices: Uariki, Pelden, Sabel, and Tanoss. He is reluctant to part with anything that might diminish his power, especially the Engwithan phylactery — as it’s literally carved into his skull with runes, sealed with a peg of adra, and merged with a complex web of spells.
In his office is a Sky Dragon eye, suggesting that he may have slain such a beast himself or is at the very least, as powerful as a mature Sky Dragon (though it is questionable whether he would be able to take on an Adra Dragon or an Alpine Dragon in single combat).
His ultimate goal is to discover time manipulation, as pioneered by Caedebald the Red and Maura of the Seven Hills. To that end, he needs a soul that can draw on the power of the ether: A Watcher’s soul.
Pillars of Eternity II: Deadfire
|
A skeletal figure clutches a scroll in both of his gnarled hands. His skin crinkles like old parchment and with every movement pulls to the point of nearly tearing. He glances up, his eyes burning and severe in their intensity. |
Concelhaut has purchased the services of Torn Bannermen after they demonstrated a sliver of competence at his fortress, and now decided to focus his exploits at tackling Bekarna’s research and finding the deep well of power she detected in the Archipelago — something that’s a bit at odds with the goals of the The Circle of Archmagi.
If he was killed and his skull taken in the first game, he will be shocked that the Watcher survived the fall of Caed Nua and express his frustration and anger at being the Watcher’s pet skull, including «days of bouncing in your shadow or being jostled among spears and daggers». His ressurection is unexplained even when the Watcher asks, only that he was delighted in «slamming the proffered door on the Usher’s hand», referring to Berath. He will also reveal that he had plans for destroying Caed Nua himself, though the opportunity was taken from him by Eothas, indicating that even as a pet skull, he was conscious and sentient the entire time, quietly scheming his revenge.
In the aftermath of the destruction of Caed Nua, having felt the pulse of power from the well of power in the Deadfire (which was described and researched by Bekarna, though discounted by the Archmages), he dragged himself towards the shore of the Dyrwood, and to a dock, as a skull, «one mouthful of soil at a time» to gain passage by boat to the Deadfire.
It appears that he is at odds with the Circle of Archmagi, claiming that the Circle is only after knowledge, but he, power.
In the expansion The Forgotten Sanctum, the Watcher is ultimately faced with an option to restore Concelhaut’s Skull to a body that lasts.
Upon leaving the body of Wael, Concelhaut breaks with his traditional venom and thanks the watcher by saying «you should feel honored to count yourself as a footnote in the legend of my apotheosis» after informing the party that he intends to become a god mighty enough to make the currently panoply look meek.
Faction quests[]
The Dozens questline
| Quest | Given by | Start location | Notes |
|---|---|---|---|
| Rogue Knight | Osric | Copperlane – Admeth’s Den | |
| The Bronze Beneath the Lake | Wenan | Requires completion of Rogue Knight, refused if you’ve accepted The Changing of the Guard or Winds of Steel. |
Knights of the Crucible questline
| Quest | Given by | Start location | Notes |
|---|---|---|---|
| Built to Last | Commander Clyver | First Fires – Crucible Keep | |
| Winds of Steel | Requires completion of Built to Last, refused if you’ve accepted The Bronze Beneath the Lake or The Changing of the Guard. |
House Doemenel questline
| Quest | Given by | Start location | Notes |
|---|---|---|---|
| A Two Story Job | Abrecan Doemenel or by looting Thieves’ Letter | Brackenbury – Doemenel Manor orCopperlane – Thieves’ Hideout | Can be received directly from Abrecan Doemenel or by finding the thieves in Copperlane independently. |
| The Changing of the Guard | Gedmar Doemenel | Brackenbury – Doemenel Manor | Requires completion of A Two Story Job, refused if you’ve accepted The Bronze Beneath the Lake or Winds of Steel. |
Walkthrough[]
Find Sagani in Woodend Plains to begin the quest. She is looking for the reincarnation of a former village elder, Persoq. Your character initially sees a vision of cliffs overlooking water. In order to complete each step of the quest, Sagani must be in your party.
Travel to Searing Falls and walk far West, clicking the compass will reveal Pearlwood Bluff on the global map.
Travel to the cliffs in Pearlwood Bluff to initiate a vision of a forest with an adra arch.
Travel to the adra arch at Elmshore to initiate a vision of a burned forest with ruins.
- With Hiravias in the party, you will get Journal 20006.
- With Lore 9, you will get Journal 20007.
- With Survival 12, you will get Journal 20008.
Travel to the north side of Northweald, near the entrance of Northweald Cave, where hunters (Fang tribe) have mortally wounded the white stag that Persoq’s soul inhabits. You decide what Sagani will say to Persoq, this will influence the game ending.
After the stag dies, Sagani is unhappy with the hunter’s attitude.
- If you say, «You’ve performed your ritual, Sagani. Let them have theirs.» (this will fail if you tell her to tell Persoq about his family impact) or appeal to your reputation with the Fangs, or just say that it doesn’t matter what Sagani tells Persoq you can avoid a fight. First option additionally gives you minor reputation increase with the Fangs.
- Otherwise, a fight follows (loot: only a few fine equipment pieces and some money, around 1,500 all in all), and you lose Moderate Reputation with the Fangs.