Watcher’s keep machine of lum the mad
Содержание:
- Machine of Lum the Mad[]
- Как убить всех лидеров гоблинов
- Best Multi & Dual Classes in Baldur’s Gate 2
- Героями не рождаются?
- Прохождение квеста — Жрица гоблинов
- Throne of Bhaal[]
- The Underdark[]
- Item restrictions[]
- Волшебник
- Каноничный сюжет
- The Guardian’s Chamber[]
- «Citius, Altius, Fortius!»
- Boss Guide
- И его спутники
- Altering the THAC0 of incoming attacks[]
Machine of Lum the Mad[]
Machine of Lum the Mad with Carston inside the glass chamber.
Carston, a mage who explored the place with his apprentices about ten years ago, is imprisoned in the machine, which grants him eternal life, but he can’t get out of it and the machine is immobile. It has nine different levers and buttons, which means there are 729 different combinations in total.
«Handwritten Notes» bearing valid combinations for the machine are hidden throughout the first four levels of Watcher’s Keep.
The glass can only be broken by the Crystal Mallet.
| First action | Second action | Third action | Effect |
|---|---|---|---|
| Blue Dial | Green Dial | Long Lever | Permanent +5% magical resistance |
| Triangular Button | Green Dial | Medium Lever | Character receives the weapon Storm Star |
| Triangular Button | Red Dial | Medium Lever | Teleporter to fifth floor is activated |
| Short Lever | Medium Lever | Square Button | +1 permanent Strength |
| Circular Button | Red Dial | Long Lever | +1 permanent Constitution |
| Square Button | Blue Dial | Short Lever | +1 permanent Dexterity |
| Circular Button | Square Button | Triangular Button | +1 permanent Wisdom |
| Circular Button | Blue Dial | Long Lever | +1 permanent Intelligence |
| Red Dial | Green Dial | Short Lever | +1 permanent Charisma |
All other combinations, or reusing successful combinations, will randomly result into one of ten effects, most of which affect only the character interacting with the machine. These effects are:
| Effect | Description |
|---|---|
| unlike the Imprisonment wizard spell, this effect has a power level of 1, so it can be blocked by spells such as (Minor), Globe of Invulnerability, Spell Deflection or Spell Turning | |
| much like the wizard spell Flesh to Stone, it ignores magic resistance and does not allow a saving throw | |
| Fire damage | 50 pts, can only be mitigated by fire resistance |
| Electricity damage | 75 pts, can only be mitigated by electricity resistance |
| Intelligence Drain | The character loses one point in Intelligence permanently |
| Dexterity Drain | The character loses one Dexterity permanently |
| Poison | 1 point of damage per second for 60 seconds, can only be negated by immunity to poison |
| Level drain | The character loses 15 levels, can be negated by immunity to Level drain |
| Experience Gain | The character gains 100,000 experience points |
| Gain Potion | Main character receives one Potion of Superior Healing |
Как убить всех лидеров гоблинов
Так как мы уже разобрались со жрицей Кишкой, то нам остается убить еще двух лидеров гоблинов. Первая наша цель — дроу Минтара. Она находится за стенкой от зала с медведем. Забираемся на лестницу и попадаем к ней. Вы можете пообщаться с дроу и рассказать, где находится лагерь беженцев, после чего вернуться к последним и помочь им в истреблении гоблинов. Но этот вариант довольно сложен и может закончиться весьма плачевно для тифлингов.
Первым делом уничтожаем барабан, который расположен чуть выше от Минтары, тем самым мы не позволим гоблинам призвать подмогу. Используйте заклинания тишины и Бейн, чтобы сильно ослабить дроу и как можно быстрее вывести ее из строя. Затем добейте остальных врагов и сохранитесь.
Нам осталось добить вожака гоблинов — Дрора Рагзлина. Он находится за стенкой от местонахождения Минтары. Проходим по мосту и попадаем в большой зал. Принимаем участие в обряде воскрешения иллитида и применяем способность паразита, чтобы попасть в голову мертвеца. Ни в коем случае не рассказывайте Дрору об убийце этого иллитида, иначе вы спровоцируете его на бой.
После обряда, поднимайтесь вверх по лестнице. Это самая удобная позиция для убийства вожака. Первым делом стреляйте по жаровням, чтобы их обрушить. Теперь нижний зал будет в огне, что серьезно доставит неудобства врагам. Выбираем режим скрытности и первым делом убиваем людей в левом углу. У них меньше всего здоровья, поэтому у вас есть шанс убить их и остаться незамеченными. Затем спровоцируйте Рагзлина и убивайте его с дальнего расстояния. Не дайте ему дойти до вас вплотную. После убийства вожака, добейте остальных гоблинов.
Когда трое лидеров гоблинов будут мертвы, вы должны вернуться обратно к Халсину. Но на выходе из зала, вас будет поджидать еще парочка гоблинов. Сбросьте их вниз с моста. Остальную работу предоставьте паукам, которые с удовольствием полакомятся зелеными существами.
Возвращаемся к Халсину. Он поблагодарит вас за помощь и отправится обратно в рощу друидов. Откройте карту и используйте быстрое перемещение до рощи Сильвануса. Откажитесь от награды у лидера тифлингов, и поговорите с Халсином по поводу паразита. Он предложит оставить этот вопрос на завтра, и отпраздновать победу над гоблинами. Спускайтесь вниз к друидам и заберите награду у Рата.
Возвращайтесь в лагерь. Пообщайтесь с тифлингами и попробуйте начать романтическую линию с одним из ваших компаньонов. Как это сделать, вы можете узнать из этого гайда. Поговорите с Воло. Он осмотрит вас и попробует собственноручно решить вашу проблему с паразитом. Через несколько дней, он предложит удалить паразита иглой. Ни в коем случае не соглашайтесь, иначе лишитесь глаза.
На утро, поговорите с Халсином. Теперь вы знаете, что ваша личинка в мозгу защищена магией, и чтобы ее убрать вы должны отправиться в Башню Восхода Луны. Друид расскажет о трех различных методах, чтобы туда добраться, включая Воскресшую дорогу, прохождение через горы или путешествие в подземелье. В настоящее время в раннем доступе есть только один путь через подземелье.
- Прохождение Baldur’s Gate 3 — Основные квесты (Обновляется)
- Вот это поворот! Покупатели Baldur’s Gate 3 отдали предпочтение белому мужчине в качестве персонажа
- Это успех! Baldur’s Gate 3 купили более миллиона раз
Best Multi & Dual Classes in Baldur’s Gate 2
As a rule, multi or dual > single or pure. And as a rule, multi > dual. Most of the «builds» listed below are God-tier.
There are many powerful and interesting options in this sphere. Indeed, there are some truly magnificent dual-classes but the downtime is daunting so I’m not going to favor them.
• Fighter / Mage (Illusionist) multi: In the right hands, the F/M is immortal from the Chateau to the god-throne. This is the most powerful class in BG and the most powerful class in BG2 in terms of just crashing through stuff with spells and FoA / Belm. The F/M is OP from start to finish and that makes it the god-class of the Bhaalspawn Saga (especially if we roll with Gnome Illusionist).
• Kensai (7, 9, 13) / Mage dual: Wrecks everything and the dual downtime for 9s is a non-issue thanks to the quest-dense urban hub of Athkatla rewarding heaps of non-combat XP. Again, wield FoA / Belm.
• Ranger / Cleric multi: As per the BG version mentioned above, only epic. A solid newbie multi.
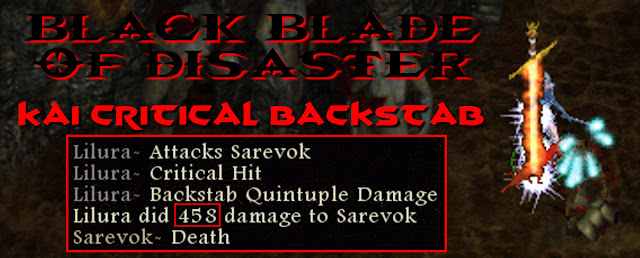
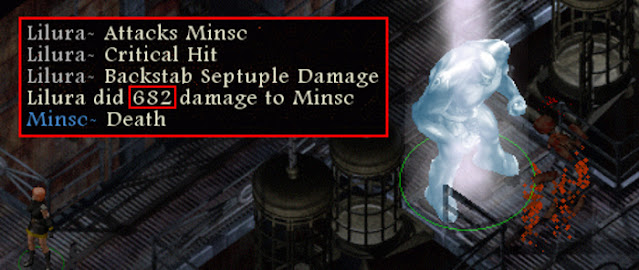
• Kensai (7, 9, 13) / Thief dual: UAI overcomes the Kensai’s strict item restrictions and that’s one prime reason why it’s top-tier. The other is its kai-charged backstabs resulting in chunks galore. Pre-UAI we will want to take advantage of the Spirit Armor buff from one of our spellcasters; post-UAI we’re an AC lord. On stylepoints this is numero uno without question! KAAAAIII!!! *chunk*
• Fighter / Mage / Thief multi: I love triples in BG2. As per the BG version mentioned above, only more versatile due to being higher level. Gets Fighter and Thief HLAs, and is capable of epic assassinations. Ranks high on stylepoints, too. A tactician’s class that can fill in for almost any glaring weakness the party may have; it’s not a mere augmenter.
• Fighter / Mage / Cleric multi: Difficult to roll for but the most complete set-up possible. It’s unstoppable once it gains access to Fighter and Cleric HLAs. The only problem is that they need lots of pre-combat buffing in order to be effective in melee. The limitation in weapon slots can also be annoying when weapon-switching.
• Berserker / Druid dual. Not on par with Mage multis, but can be fun to solo because of their Druid-based restrictions.
• Cleric / Mage (Illusionist) multi: Can cast Animate Dead and Finger of Death as an Illusionist (divine sphere). Gets Energy Blades in both divine and arcane spheres. Can combine arcane and divine spells into sequencers, triggers and contingencies. Ends up with the following arcane and divine spell slots: 6-6-6-6-6-6-5-5-3 and 12-12-11-12-11-7-3. Ends up with the following saving throws: 2-0-5-8-1. Gets Turn Undead 25 and 18 HLAs from the Cleric and Mage pools. Godly in terms of versatility and staying power.
• Fighter / Cleric multi: A great newbie multi. Roll with Dwarf. Call him Durin the Deathless.
• Mage (Illusionist) / Thief multi: Shapeshift backstabs for mega-damage and a whole lot of laughs. One of my fave multis thanks to all the tricks it’s got up its sleeve. Underrated, though note there is already a M/T companion (Jan).
• Fighter / Thief multi. But I prefer the Kensai Thief dual due to its backstabs charged with Kai.
• Cleric / Thief multi. The ability to stealth while under the effect of Globe of Blades is cool (Sanctuary). We can also couple the Assassinate HLA with Righteous Magic for mega-damage. Gnome is better than Half-orc due to superior racial saves and easy access to Str boosts.
Note that class and kit descriptions are quoted verbatim in each entry, even if they are inaccurate. This is not to mislead, but to show dev intent. However, my commentary in each entry is based on in-game tests, not the class and kit descriptions. All tests were conducted on v.2.5.26498 of SoA+ToB, which is the final official version by BioWare that has been standard for 20 years.
Baldur’s Gate Index Classes
Weapons Spells Items
THAC0 AC ApR
Героями не рождаются?
В случае BG за номером 2 персонаж не может не радовать. Bioware догадались, что во вторую часть вполне может перекочевать аватар, коим игрок проходил 1-ую. Сработает при наличии финального сохранения. Не играли, или нет финального сохранения, или это было так давно, что даже компа не сохранилось? Тогда создадим новенького!
При создании аватара традиционно для серии выбираем:
- пол – Мэ или Жэ;
- аватарка – красиво нарисованные лица персонажей, в зависимости от выбранного пола;
- раса – 7 на выбор, от человека до полуорка (у каждого свои плюшки!);
- класс – включая мультиклассы, от воинов до монахов, со своими подклассами;
- мировоззрение – по сути, характер героя;
- основные параметры – силы со всякими харизмами и интеллектом, с перераспределением очков и получением бонусов от перебрасывания кубика (у автора получилось выкинуть аж 88 очков!);
- навыки в оружии – внушительный список из разного рода убийственных предметов;
- заклинания – для магов и иже с ними;
- внешность – традиционные для серии окраски кожи, волос, одежды;
- имя – то, как будут обращаться к главгерою NPC.
Если вы думаете, что пол не имеет значения – глубоко заблуждаетесь
Одна из квестовых NPC, эльфийка Аэри (позже – компаньон) обращает на это внимание в своеобразной манере:
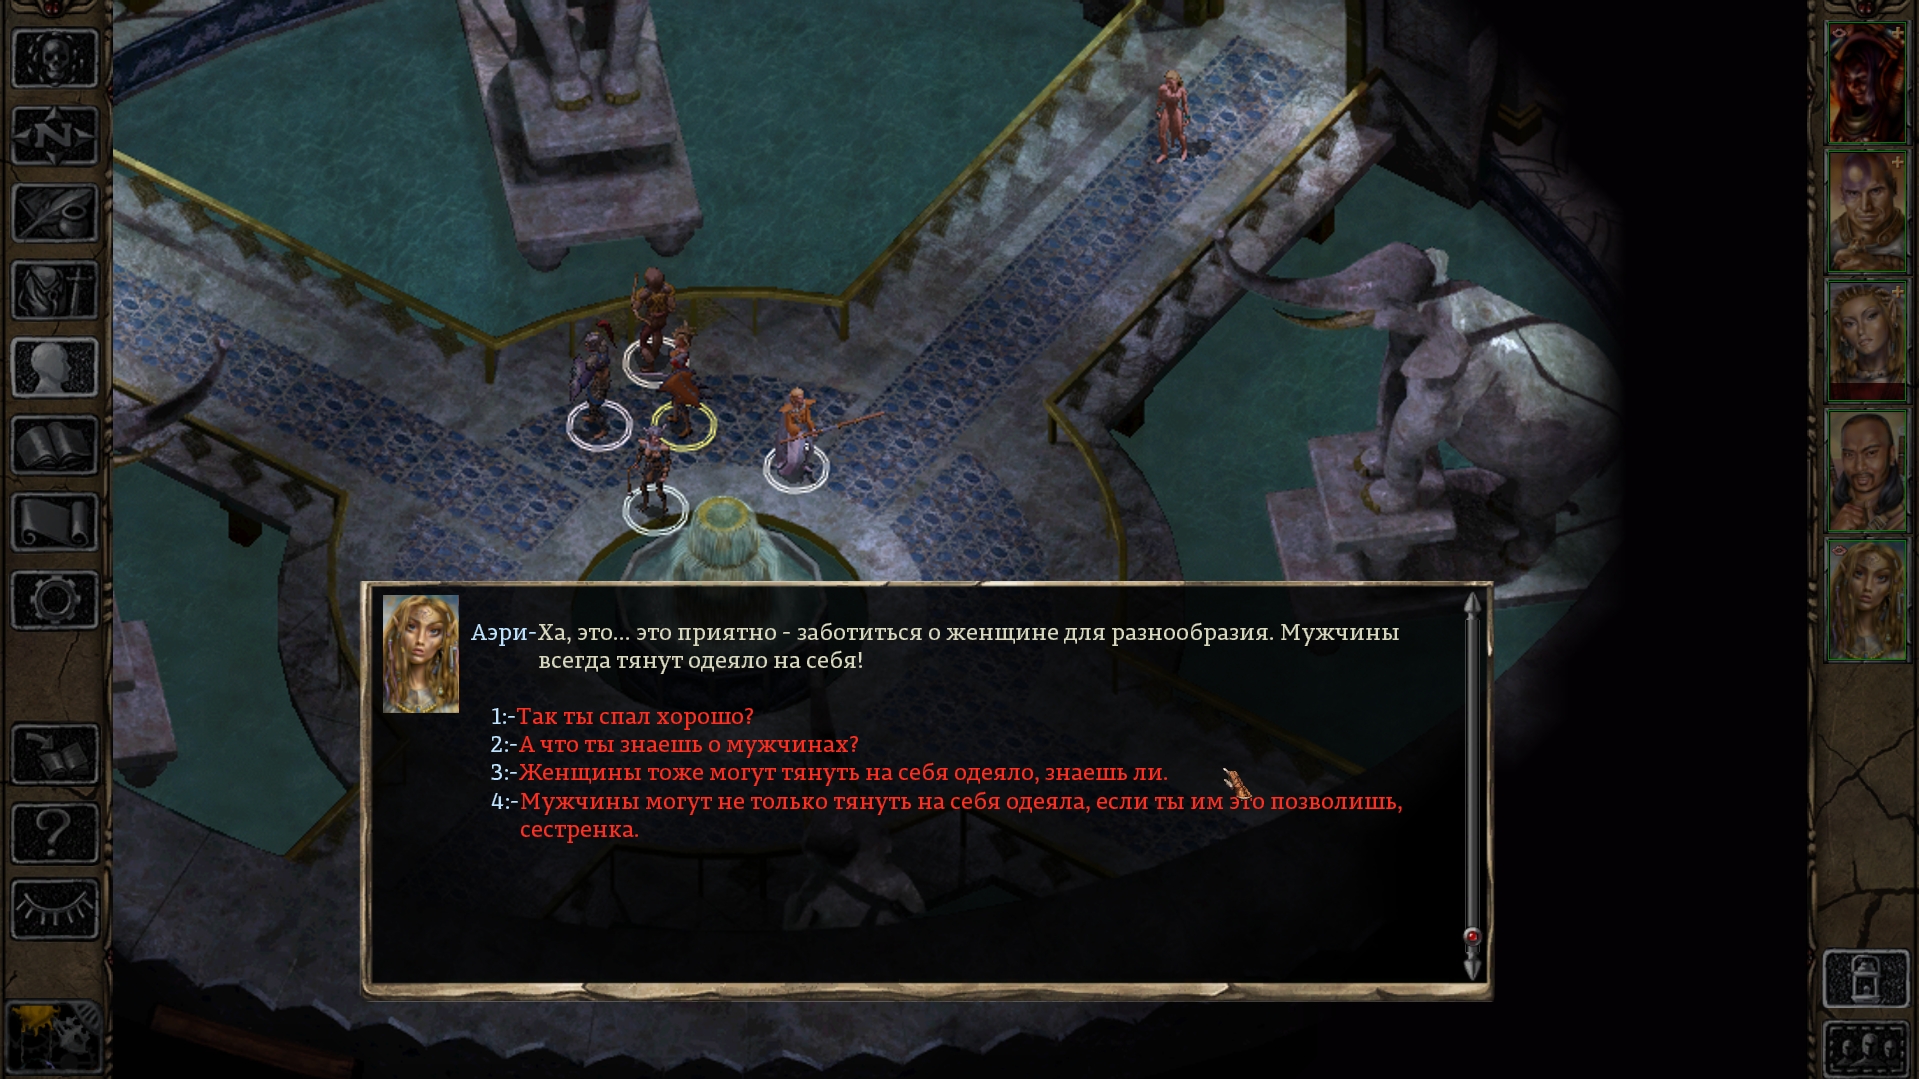
И это не единственное упоминание о половой принадлежности аватара. Легко можно нарваться на откровенно шовинистские комментарии, что автоматически запустит сайдквест наподобие боя 1 на 1 на арене.
Прохождение квеста — Жрица гоблинов
В роще друидов, двигайтесь на север до горного углубления. Заходите вовнутрь и просмотрите катсцену, в которой девушка тифлинг пытается застрелить из арбалета плененного гоблина. Закройте пленника своим телом и методом убеждения спасите его от смерти. Спасенная гоблинша Сазза расскажет вам о жрице своего племени, которая может вылечить абсолютно любую заразу. Она попросит освободить её из клетки, и взамен отведет вас к целительнице. Отказываемся от её предложения и выходим из рощи.
Движемся на восток в сторону вымершей деревни. Сражаемся с гоблинами, или обходим их скрытно, после чего идем дальше на восток. Пройдя через мост, вас будут поджидать патрульные гоблины. При помощи навыка чтения мыслей, выдаем свою группу за последователей Абсолюта и проходим лагерь. Далее, движемся прямиком в храм и заходим вовнутрь.
В центральном зале стоит трон, а рядом с ним стоит та самая жрица. Знакомимся с ней и узнаем, что её зовут Кишка и она также заражена паразитом. Убеждаем ее помочь и просим личной аудиенции.
Заходим в личные покои Кишки и соглашаемся выпить сонное зелье. Далее наш герой просыпается в темнице. Не тратим силы и не предпринимаем действия к побегу. В какой-то момент Кишка попытается вас убить, но на помощь придет неизвестный маг, который убьет жрицу и её телохранителя, а вас освободит из заточения. Таким образом вы избавитесь от целительницы (в дальнейшем, это потребуется по другому квесту) и завершите квест — «Жрица гоблинов».
Throne of Bhaal[]
This part of the quest begins much with a good old fashioned ambush as you traverse the world map. Sharran assassins will attack you; after they are dead, a note on one of them adds Deepstone Clanhold to your map, which is where the rest of the quest takes place.
The dwarven Deepstone clan has had its mines and fort taken over by Alorgoth and his Sharran followers. Upon entering the map, a dwarf named Lemp Coldhearth will ask you what your business here is. If you indicate to him that you are an enemy of the Sharrans, he will take you to a camp to speak with Meems Dugdeep, who asks you to free some of her fellow dwarves from their Sharran captors in the northeast part of the map.
There are three ways to get into the fort from here: You can rescue the captive dwarves and take one of them up on his offer to use a downstream entrance; you can use Meems’ idea of a tunnel; or you can simply barge through the front gate.
Going through the front gate is by far the hardest way in. The gate is heavily guarded and you need the Intricate Key to open it. The key can be found at the very beginning of the map where you first enter. There a group of Sharran guards will ambush you. The key can be looted from the Sharran guard Ovidiu. Once inside you will have to face multiple strong enemies on your way to the mines. If you rescue the captive dwarves that Meems told you about you can ask them to join you and help you inside Deepstone. You can find more allies to help you right after you enter to the left in the first room. This method of entering is challenging but provides additional XP from all the enemies.
Using Meems method to enter requires to find 2 items she needs — Meems’s Special Grog and Rock Salt. The Rock Salt can be looted from a barrel at the Lumber camp where the captive dwarves are. Meems’s Special Grog can be obtained from Tallus who is guarding close to the main entrance of Deepstone. You need to approach him without anyone else at the front gate seeing you otherwise a battle is unavoidable and you can no longer use this method to enter the mines (Meems won’t give you the option anymore). Invisibility works perfectly here. You can either ask Tallus to hand over the Grog or you can kill him and take it while avoiding the other guards seeing you. As soon as you have the items you can ask Meems to proceed with her plan to make a tunnel. The tunnel leads right to the mines skipping all the enemies on the ground floor of Deepstone which makes this method easier. Most of the dwarves at the camp will also join you in the mines. If you want you can still go back to the ground floor and clear all the enemies for additional XP while taking advantage of the massive group of allies you have on your side.
The third way is very similar to the outcome of Meems’s plan. The dwarves you rescued can get you inside Deepstone using a secret entrace to the kitchen. There you will meet Fillis and Killis. If you ask them for advice how to proceed they will suggest you using the Dumbwaiter to get down to the mines and free some of their friends to help you. If you agree you will enter the mines close to the place where Meems tunnel ends.
Once inside the mines be sure to pick up the dwarf named Bentaxe for a gold reward at the end of the quest. No matter which method of entry you use, Alorgoth will be waiting on the bottom floor of the fort, in the mine area.
Unfortunately, as soon as he spots you, he flees to the Shadow Plane along with his subordinate Yxtrazzal. Follow him through the portal he creates, and corner him in the southern part of the map. Undaunted, Algoroth reveals Yxtrazzal to be a Shadow Dragon, and both attack along with several Shadow Creatures. During this battle, Alorgoth cannot be killed, so focus your attacks on Yxtrazzal and the Shadow Creatures instead.
Once Yxtrazzal is dead, she drops an item called the Wheel of Obliteration, and the Shadow Plane begins to deteriorate. You must return to the crystals near where you appeared in the Shadow Plane and use the Wheel of Obliteration (via quick item slot) to create a new portal home. Before you enter this portal, Alorgoth appears, only to fall at the hands of many Shadow Creatures. The Wheel is destroyed when you step through the portal.
Upon returning to the mine, a dwarf named Bentaxe will reward you with 7,500 gold. Finally, Rasaad declares his revenge to be complete at long last, which ends the quest and grants 20,000 XP.
On your way back outside make sure to check the ground floor of Deepstone again. If you have not cleared the place before now all the enemies will be dead and you can loot their bodies. Also in the the northeast corner in the Alorgoth’s Quarters you can find three very interesting unique items — Cloak of the Dark Moon, Headband of the Devout and the Night Walkers.
The Underdark[]
Go to the northwest corner of the Underdark and speak to the Svirfneblin leader Goldander Blackenrock. He will agree to help you enter the drow city if you destroy a beast for them.
Go northeast from him and enter the room with the big pit. Click on the pit and Balor will appear. He is an extremely difficult opponent and can only be hurt by +3 magical weapons. There are several drow in the area who have +3 longswords or +3 flails.
Once you have defeated Balor, use the Stoneshape Scroll to seal the pit. Return to Goldander Blackenrock and he will give you the Light Gem.
Enter Adalon’s lair on the east side of the area. She will ask you to retrieve her eggs which were stolen by Irenicus and Bodhi and in return she will help you leave the Underdark. She will transform your party into drow so that you can enter the city. Leave Adalon’s lair and approach the gates of the drow city of Ust Natha. The gates will open and you will be questioned. Say you are Veldrin from Ched Nasad and you will be allowed entrance into the city.
Item restrictions[]
Ideally, we want to stack AC bonuses from as many items as possible, but in reality many of the items may not be worn together. Based on ITEMEXCL.2da, you cannot combine any of the items from the following sections.
Armor
- Aeger’s Hide
- Armor of Deep Night
- Armor of Faith
- Armor of Missile Attraction
- Armor of the Hart
- Armor of the Viper
- Ashen Scales
- Aslyferund Elven Chain
- Big Metal Unit
- Bladesinger Chain
- Bloody Bone Plate
- Blue Dragon Plate
- Chain Mail +1
- Chain Mail +2
- Chain Mail +3 (Throne of Bhaal)
- Chain Mail +3
- Changeling’s Vest
- Commander’s Chain Mail
- Cornugon’s Revenge
- Corthala Family Armor
- Corwin’s Armor
- Crimson Chain
- Daeros’s Full Plate
- Darkmail
- Delver’s Plate
- Doomplate
- Drow Adamantine Chain +5
- Drow Elven Chain
- Drow Full Plate
- Elven Chain +1
- Enkidu’s Full Plate
- Fallorain’s Plate
- Firecam Full-Plate Armor
- Full Plate Mail +1
- Full Plate Mail +2 (PLAT19)
- Full Plate Mail +2 (PLAT23)
- Goblin Hide Armor
- Goblin Leathers
- Gorgon Plate
- Grandmaster’s Armor
- Hide Armor +1 (BDLEAT08)
- Hide Armor +1 (OHLEAT50)
- Hide Armor +2 (OHLEAT51)
- Hide Armor +3 (OHLEAT52)
- Human Flesh +5
- Jegg’s Leathers
- Jester’s Chain
- Karajah’s Life and Death
- Kruntur’s Armor
- Leather Armor +1
- Leather Armor +2
- Leather Armor +3
- The Magma Bulwark
- Mail of the Dead
- Mail of the Hallowed Hero
- Melodic Chain
- Mithral Chain Mail
- Mithral Field Plate (BRUENPLA)
- Orc Leather
- Plate Mail +1
- Plate Mail +2 (OHPLAT50)
- Plate of Balduran
- Plate of the Dark
- Pride of the Legion
- Protector of the Second
- Raconteur’s Regalia
- Red Dragon Scale
- Rugged Leathers
- Shadow Armor
- Shadow Dragon Scale
- Shuruppak’s Plate
- Silver Dragon Scale
- Skin of the Ghoul
- Splint Mail +1
- Splint Mail +2 (ohchan50)
- Stalwart Scales
- Studded Leather Armor +1
- Studded Leather Armor +2
- Studded Leather of Thorns
- Sylvan Chain
- T’rachie’s Plate
- The Night’s Embrace
- The Night’s Gift
- The Practical Defense
- White Dragon Scale
Волшебник
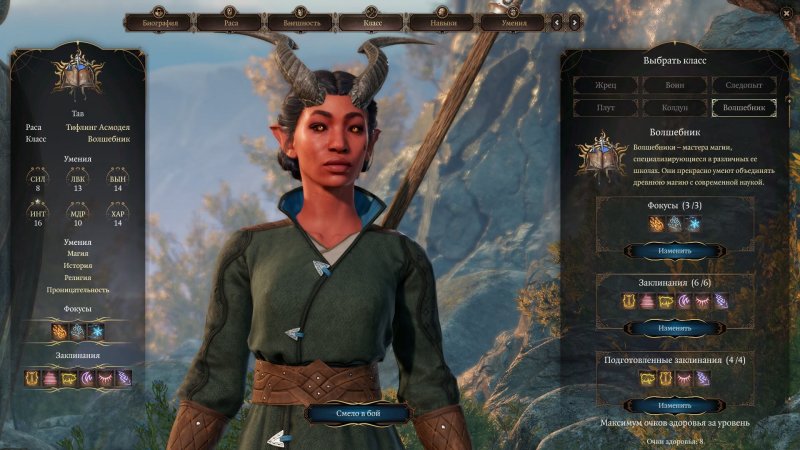
Поставив волшебника в тыл вашей группе, защищайте его любыми способами — он «отвалится» сразу, если к нему вплотную подойдет даже самый хилый враг. Вкладываться в телосложение в нашем случае бесполезно, а потому лучше всего сконцентрироваться на максимальном увеличении наносимого урона.
Таким образом нам нужно прокачивать интеллект и мудрость, на которых основана вся магия в игре. При выборе сабкласа рекомендую остановиться на отречении, так как это хоть немного повысит защиту (в таком билде можно и немного в телосложение вкинуть).
Лучшая раса для волшебника — высшие эльфы с бонусом к интеллекте. Можно также выбрать людей в качестве альтернативы.
Каноничный сюжет
Игре в фэнтези-сеттинге обязательно требуется каноничный сюжет, иначе она не сможет не просто войти в историю, но и вообще продастся. И к чести сценаристов BioWare, Baldur’s Gate показывает эталонную сюжетную линию.
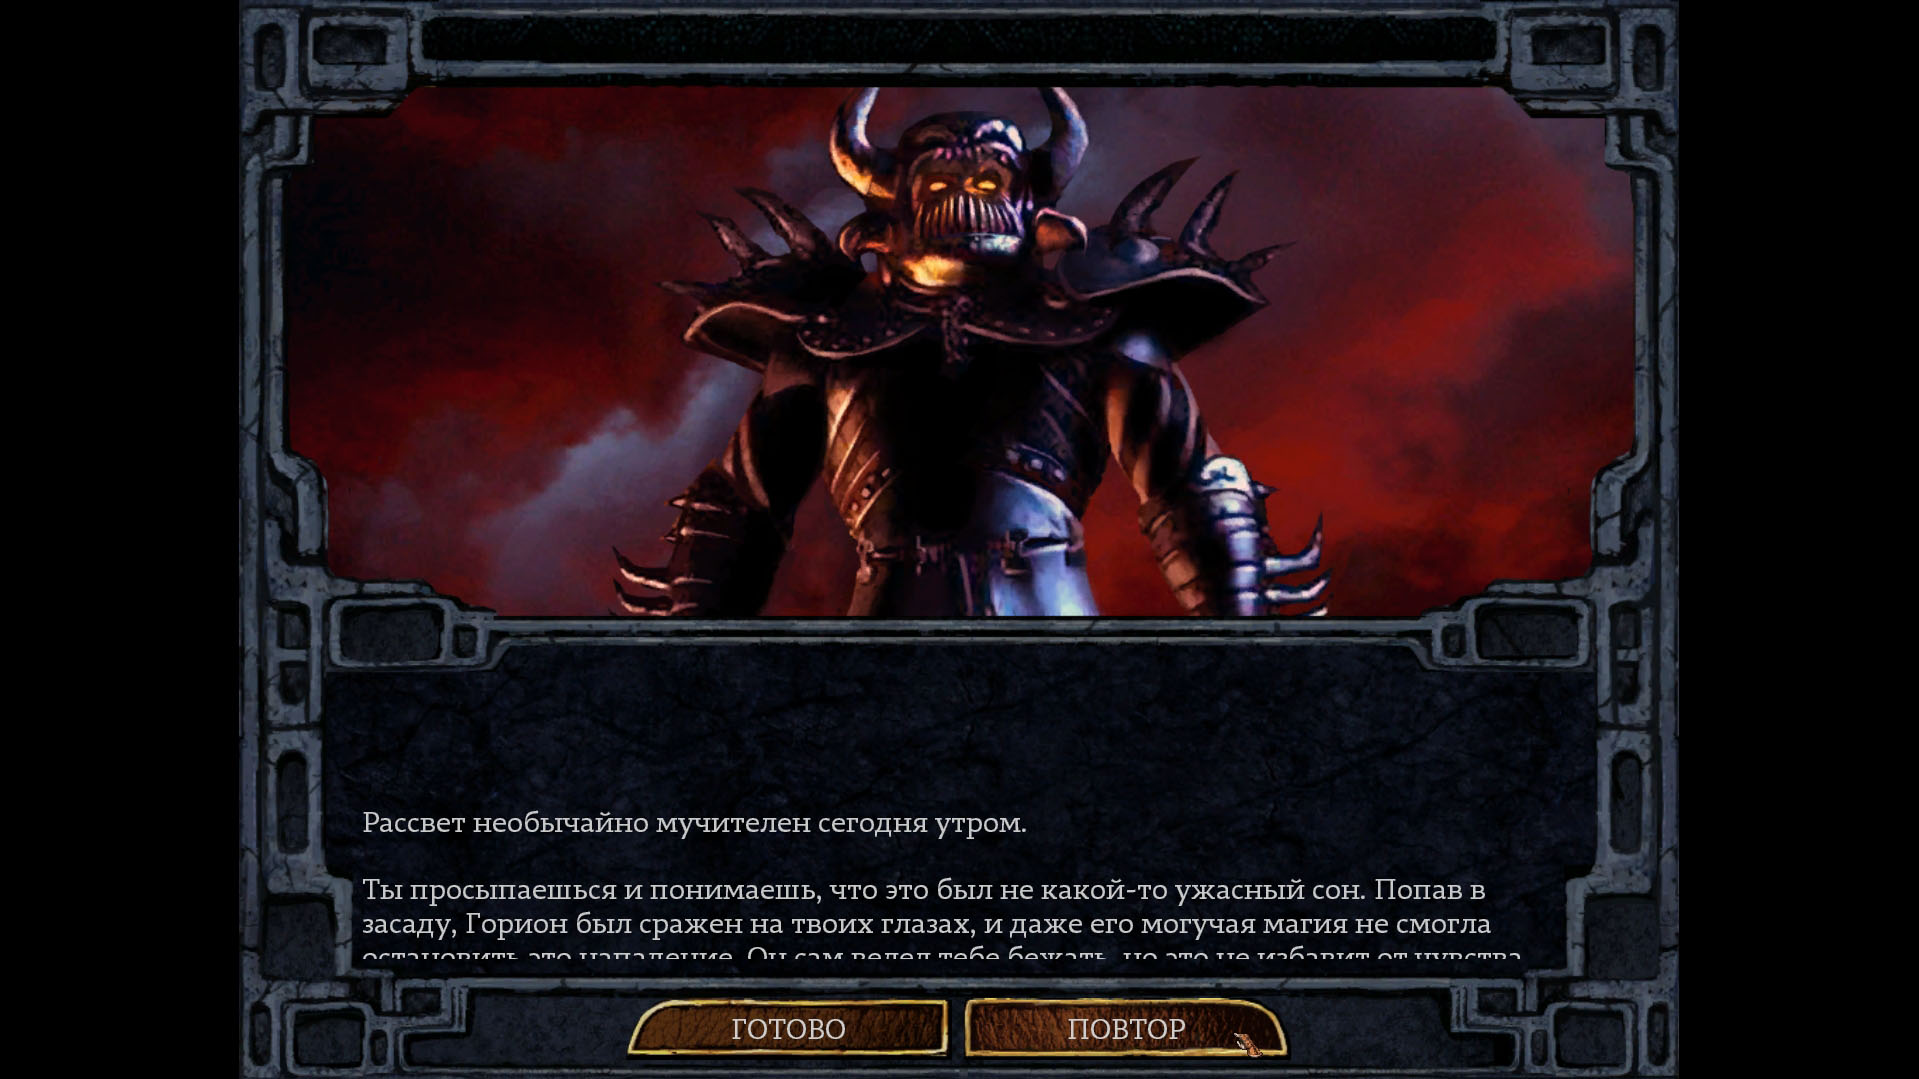
Начинаются приключения в самой проработанной AD&D-вселенной – в «Забытых королевствах», на Побережье мечей. Герой – сирота, которого приютили в защищенной от внешних угроз крепости Кэндлкип. Все шло просто отлично – опекун Горион холил и лелеял воспитанника (-цу). Внезапно (!) он выдал полбуханки красного и рупь на дорогу, велел собрать вещи и бежать. Почему – не уточнил.
И вот, наш подопечный стоит перед гостиницей крепости и соображает, чего бы ему прикупить. А потому события несутся вскачь: на главгероя совершают нападение, причем не местный забулдыга, а вполне профессиональный наемный убийца. Чудом выжив, герой немедленно мчит к Гориону, вместе они срываются с места, попадают в засаду и опекун погибает. А наш аватар остается с ворохом проблем и мучительно соображает: куда грести?
The Guardian’s Chamber[]
The first line of defense for the Sphere is the intruder-slaying Clay Golem that resides in this room. Once killed, its treasures may be taken. Scrolls of Breach, Haste, Polymorph Other, Minor Spell Turning and Conjure Lesser Air Elemental, some Arrows +2, some Bullets +2, some Bolts +2, and three key items may be found here; a Golem Arm and Coal , needed for a sub-quest, and the Planar Key, without which the party cannot proceed.
Return to the Entrance Hall and open the north-west door (with the Planar Key). You feel the Sphere shudder and lurch; you have triggered an anti-intruder mechanism, causing the Sphere to planeshift away from Athkatla. If you return to the Viewing Room you see that the sphere is now in «a demonic valley». You are now trapped inside the sphere.
«Citius, Altius, Fortius!»
В целом, опыта для прокачки в BG стабильно не хватает, что с учетом невероятной сложности (в сравнении с современными проектами любого уровня) представляется проблемой. Браться приходится за любой квест, стремиться выпилить любого моба, дабы получить хоть крупицу экспы. Но как только будет набрана «критическая масса» (от 1500 экспы на 1 перса), происходит левел-ап. Т.е., как вы понимаете, бывает сие событие нечасто.
Повышение уровня означает получение дополнительных пунктов HP, но не это главное
Важно, что при левел-апе
открываются дополнительные способности, что особенно критично для всех, якшающихся с магией. Да, это не
Готика, где уровень можно «прикупить» у
инструктора
Здесь все по «взрослому», т.е. по AD&D’шному.
Boss Guide
I look forward to dedicating this section to all the cheesiest ways to beat bosses/difficult encounters on LoB difficulty. Unfortunately I don’t have near enough experience with LoB to do an adequate job of this at the moment. I would very much appreciate help from more experienced players with this section. I’ll absolutely credit the first person to send me any specific tactic that I include here. Otherwise, as I cheese fights and feel I have something relevant to offer I’ll start filling this section in. Spamming summons and Web are considered standard tactics and will not be included here (and incidentally will probably also be adequate for most fights).
И его спутники
Естественно, к нашему аватару будут присоединяться союзники, относящиеся к разным расам, классам и со своим мировоззрением. В итоге игрок должен «сколотить» отряд, который будет показывать максимальную эффективность. И это приводит к необходимости в микроменеджменте – жаждущих составить компанию нашему аватару «пруд пруди». И не все спутники будут нужны. Но уже здесь можно применять «финт ушами»: если в отряде есть лишнее место, а очередной просящийся не нужен, то можно:
- включить его в отряд;
- раздеть до нитки;
- при случае отправить на убой или заменить при найме следующего сопартийца.
Таким нехитрым способом можно обзавестись золотишком и бесплатным шмотом, которого вечно не хватает. А вот таскать балласт из ненужных спутников – недальновидно. Экспа распределяется на весь отряд.
Altering the THAC0 of incoming attacks[]
In three cases, a characteristic of the defender will affect the THAC0 of incoming attacks. The Inventory screen and the Record screen’s Combat Stats tab make no mention of them.
| Improved invisibility bonus | A defender that benefits from the type of Invisibility effect — as granted by e.g. Mass Invisibility or Mislead, but not Stealth or Potion of Invisibility — will inflict a +4 THAC0 penalty to all physical attacks against them. Attacks from creatures able to see the invisible are exempted from this penalty. |
|---|---|
| Protection from creature type bonus | A defender protected from certain types of opponents — thanks to e.g. Protection From Evil or Spirit Ward, but not Protection From Undead — will inflict a +2 THAC0 penalty to all physical attacks against them if they’re coming from the right type of attackers. |
| Unarmed or ranged penalty in melee | A defender not wielding a weapon (Monk excepted) or wielding a ranged weapon will grant a -4 THAC0 bonus to all melee attacks against them |
Minor note: All three modifiers will be included in the second value of the .