10 essential monster hunter world: iceborne tips for embracing master rank
Содержание:
- Field Rows
- Tips For Crafting And Upgrading
- New world, new moves
- Monster Hunter World Iceborne Great Sword Progression Build
- Why Raise Master Rank Levels?
- View Mode is your photo mode
- Hammer Meta Builds for Monster Hunter World Iceborne
- Celestial Illusion — Wintermoon Nettle
- Become a Clutch Claw master
- Monster Hunter World Iceborne Charge Blade Progression Build
- What is Pokke Farm?
- Monster Hunter World Iceborne Hammer Progression Build
- Улучшайте своего верного друга
- Monster Hunter Snap! Aka the Surveyor Set
- Let go of your old gear
- Great Sword Cave
- Friendly Pointer — Arrowhead Gekko
- Farming Frozen Foliage
- Monster Hunter World Iceborne Great Sword Endgame Meta Build
- Videos
- Insect Thicket
- Всегда носите с собой «Горячие напитки» (Hot Drinks) и «Пустоягоды» (Nulberries)
Field Rows
| Items’ Role | Items |
|---|---|
| Plantable Items | Antidote Herb, Armor Seed, Green Seed, Herb, Hot Pepper, Huskberry, Needleberry, Paintberry, Power Seed, Red Seed, Sleep Herb, Yellow Seed(MHFU-Exclusive) |
| Fertilizer Items | Worm x5(Fertilizer Level +1, One Row.), Dung(Fertilizer Level +3, One Row.), Wyvern Droppings(Fertilizer Level +3, All Rows.) |
| Obtainable Items | Armor Seed,Power Seed, Bomberry, Cactus Flower, Cricket, Dosbiscus (Field Row-Exclusive), Dragon Seed, Felvine, Fire Herb, Green Seed, Herb, Hot Pepper, Huskberry, Ivy, Paintberry, Power Seed, Red Seed, Sap Plant, Scatternut, Sleep Herb, Sunset Herb, Yellow Seed, Giant Corn (Can only be obtained by planting Yellow Seed in MHFU), Worm |
Tips For Crafting And Upgrading

Armor / Weapons / Decorations
Keeping a steady supply of materials for crafting and upgrading an exhaustive list of different weapons and armor in Iceborne can feel overwhelming at first. The game doesn’t always do a great job at indicating how to get certain materials or which armor you should consider investing in, so we’re here to help by recommending you do the following:
- Invest in Elemental Damage – Elemental weapons got a major buff in Iceborne and are now more viable than their non-elemental brethren. Before setting off on a hunt, refer to your Hunter Notes to find out what element a particular monster is weak to. If you find you don’t have a weapon of that elemental typing, consider crafting one. Avoid crafting hidden elemental weapons in the early goings, as they’ll require you to dedicate precious skill slots towards unlocking their elemental damage.
- Don’t Make Every Armor Set – The completionist in you may be tempted to try and craft a full set of every armor in the event you’ll need it for a particular monster. This is completely unnecessary since each set has unique skills that may not apply to your weapon type or playstyle. Instead, we recommend making specific builds designed for specific situations (i.e. farming materials, dealing maximum elemental damage, fighting Velkhana).
- Max Out Your Armor – If you’re a returning player, chances are you’ve accumulated a bunch of Armospheres that are just waiting to be used. If you’re new, you’re going to want to pick up and complete bounties from the Resource Center, as they’ll reward you with Armorspheres of varying sizes. Once you’ve crafted a useful set of armor, try to upgrade it as much as you can to increase your defense.
- Assess Your Decoration Situation – For new players, it can be hard remembering to swap out decorations between quests or even equip them at all. To make things easier, we recommend creating and saving different load-outs for specific situations. You can always make adjustments if you obtain a new decoration that makes more sense for a certain build.
Consumables / Materials

Obtaining enough materials to maintain a steady supply of potions, buffs, ammo, and coatings can feel like a never-ending quest. Thankfully, Iceborne features many ways to expedite the process, freeing up some time that can be better-spent hunting. To set you up for success, we recommend doing the following:
- Make Cultivation Your Motivation – The Cultivation Box is a useful tool that allows you to collect a variety of different seeds, insects, and plants while you’re out hunting. You can assign up to three different items to be cultivated and use Research Points to increase the quantity harvested or reduce the amount of time needed to harvest.
- Tailriders to the Rescue – Talking to the Housekeeper in your room allows you to deploy Tailriders in any locale of your choosing. Once deployed, the Tailriders will begin gathering materials while you’re out hunting which you can later choose to keep or sell.
- Gather Materials During Hunts – It can be easy to get wrapped up in fighting a monster and forget about the varety of materials available in each environment. During downtime when you’re tracking a monster or traveling between areas, pick up any materials you find along the way. Combine this with a well-managed Cultivation Box and you may never need to go on an Expedition again.
- Visit The Argosy – The Argosy is a useful way to obtain a variety of items in exchange for Research Points. The ship docks every three quests so make sure to visit the Captain in Astera or his steward in Seliana to see what’s in stock.
- Play the Steamworks Minigame – New for Iceborne is the Steamworks mini-game, which rewards you with a variety of items for completing a timed mini-game. The amount as well as which items you receive depends on your performance.
- Set and Forget – Similar to armor/weapon load-outs, Iceborne allows you to set load-outs for your item box as well as for the game’s Radial Menu. Once you know which consumables are essential, (Mega-Potions, Life Powders, Demondrugs, etc.) create a loadout to serve as a foundation that you can add more items to later on; this will decrease the amount of time spent prepping before a hunt.
New world, new moves
Speaking of practice, it’s time to hit the training room, young hunter. Capcom has added at least one new move to all of the weapon types that you need to get a handle on if you want to succeed.
(Image credit: Capcom)
For example, my lovely Switch Axe has a new move called Heavy Slam, which gets comboed in from Wild Swing. That move activates a red buff on my axe. According to the Hunter’s Notes, this is called Axe Mode, and it’ll make it easier to flinch monsters.
If you’re wondering what’s new with your weapon, take a look at your Hunter’s Notes. New modes and combos are displayed with light blue text, while new button inputs are listed in a light gray.
Monster Hunter World Iceborne Great Sword Progression Build
Starter Iceborne Build
| Weapon | Decorations | |
|---|---|---|
|
Defender Great Sword V |
—— | |
| Armor | Decorations | |
| Head |
Bazel Helm Beta |
Critical Jewel 2 x1Vitality Jewel 1 x1 |
| Armor |
Damascus Mail Beta |
Protection Jewel 1 x3 |
| Vambraces |
Bazel Vambraces Beta |
Critical Jewel 2 x1 |
| Waist |
Damascus Coil Beta |
Steadfast Jewel 1 x3 |
| Legs |
Empress Greaves Beta |
Critical Jewel 2 x2 |
| Charm |
Earplugs Charm III |
none |
Starter Iceborne Skill List
| Skills | |
|---|---|
| Divine Blessing 3 | Health Boost 3 |
| Stun Resist 3 | Earplugs 5 |
| Critical Draw 3 | Focus 3 |
| Critical Boost 3 |
| Game8 strategy team | A starter set that pretty much covers what the Great Sword needs! Focus, Critical Draw, and Critical Boost is pretty much the game for a greatsword’s hit and run playstyle. It’s also coupled with some defensive skills to avoid an untimely death. The Earplugs skill also allows a greatsword user to start the fight with a full combo while a monster roars. |
|---|
Early Iceborne Progression Build
| Weapon | Decorations | |
|---|---|---|
|
Jagras Deathclaw I |
Tenderizer Jewel 2 x2 |
|
| Armor | Decorations | |
| Head |
Jagras Helm Alpha + |
Tenderizer Jewel 2 x1 |
| Armor |
Elementless Jewel 2 x1 |
|
| Vambraces |
Kulu Vambraces Alpha + |
Expert Jewel 1 x1Maintenance Jewel 1 x1 |
| Waist |
Beo Coil Beta + |
Challenger Jewel 2 x1 |
| Legs |
Rath Heart Greaves Alpha + |
Challenger Jewel 2 x1Maintenance Jewel 1 x1 |
| Charm |
Earplugs Charm III |
none |
Early Iceborne Skill List
| Skills | |
|---|---|
| Attack 4 | Speed Eating 2 |
| Health Boost 3 | Weakness Exploit 3 |
| Critical Boost 1 | Pro Transporter |
| Earplugs 5 | Tool Specialist 3 |
| Agitator 2 | Critical Eye 1 |
| Non-elemental Boost |
| Game8 strategy team | A great beginner greatsword loadout. It comes with the staple non-elemental boost for elementless weapons as well as earplugs 5 and tool specialist 3 to get free true charge slashes while monsters roar. All the critical skills summed up totals to 65% on wounded parts so make sure to wound the monster on its weak parts before going for the kill! |
|---|
Mid-Late Iceborne Progression Build
| Weapon | Decorations | |
|---|---|---|
|
Hidden Blade II |
Expert Jewel 1 x1 |
|
| Armor | Decorations | |
| Head |
Pride Helm Alpha + |
Tenderizer Jewel 2 x1Vitality Jewel 1 x1 |
| Armor |
Damascus Mail Beta + |
Handicraft Jewel 3 x1Tenderizer Jewel 2 Expert Jewel 1 x1 |
| Vambraces |
Damascus Vambraces Alpha + |
Tenderizer Jewel 2 x1Expert Jewel 1 x1 |
| Waist |
Beo Coil Alpha + |
Critical Jewel 2 x1 |
| Legs |
Pride Greaves Beta + |
Elementless Jewel 2 x2 |
| Charm |
Master’s Charm IV |
none |
Mid-Late Iceborne Progression Build Skill List
| Skills | |
|---|---|
| Earplugs 5 | Critical Boost 2 |
| Weakness Exploit 3 | Critical Eye 7 |
| Handicraft 3 | Health Boost 3 |
| Focus 2 | Jump Master |
| Non-elemental Boost | Guts (secret) |
| Speed Sharpening 1 |
| Game8 strategy team | With the innate affinity from Hidden Blade II, Critial Eye and Weakness exploit alone is enough to exceed 100% affinity when striking wounded weakspots. Furthermore, Hiddenblade II is a non elemental weapon which is why an elementless jewel is equipped for more DPS. It also has the staple Great Sword Skills like Focus and Handicraft skills. Guts is there to avoid accidental deaths and can even allow you for some risky plays using tackle moves. |
|---|
Why Raise Master Rank Levels?
Raise Region Level Cap In Guiding Lands

The upper limit of region levels in the Guiding Lands is locked behind your Master Rank. To raise region levels higher, you also need to raise your Master Rank.
Region Level Master Rank Limits
| Master Rank | Region Level |
|---|---|
| MR 24 — 49 | Region Level 4 |
| MR 50 — 69 | Region Level 5 |
| MR 70 — 99 | Region Level 6 |
| MR100 — | Region Level 7 |
Unlock More Monsters In Guiding Lands

When you raise your Master Rank, you’ll also be able to spawn more challenging monsters in the Guiding Lands. These monsters are extremely powerful and are usually at the top of the food chain.
Region Level Needed Per Monster
| Monster | Region Level |
|---|---|
| Zinogre | Forest Region Level 3 |
 Yian Garuga Yian Garuga |
Forest Region Level 3 |
| Scarred Yian Garuga | Forest Region Level 5 |
| Gold Rathian | Desert Region Level 5 |
| Silver Rathalos | Coral Region Level 5 |
| Brute Tigrex | Rotten Region Level 5 |
Check Out How To Increase Guiding Lands Region Level Here!
Unlock More Optional Quests In-Game
When your Master Rank is higher, you will also be able to unlock more Optional quests in Iceborne. These can lead to further upgrades or new specialized tools.
Check Out All Iceborne Master Rank Optional Quest Here!
View Mode is your photo mode
Finally! There’s a photo mode to capture all of those ridiculously cinematic moments throughout Monster Hunter World.
(Image credit: Capcom)
It’s incredibly limited, but it does exist. You can access it by going to the System tab in the menu (you can also assign it to your Radial Menu, which is neat).
The camera can only go a certain distance from your body, but you can perform gestures as well as poses, such as a Powerful Pose and a Cutesy Pose. You can also adjust the camera speed as well as the camera controls. Unfortunately, there aren’t any filters to choose from. Hopefully, Capcom will add to View Mode as time goes on.
Regardless, I’m super excited for the content that the community comes up with.
Hammer Meta Builds for Monster Hunter World Iceborne
Raging Brachy Hammer Build
| Raging Brachy Hammer Build | |
| Weapon | Decorations | |
|---|---|---|
|
Lightbreak Hammer |
Expert Jewel+ 4 x1Charger Jewel 2 x1 |
|
| Armor | Decorations | |
| Head |
Kaiser Crown Beta + |
Expert Jewel+ 4 x1 |
| Armor |
Brachydium Mail Beta + |
Attack Jewel+ 4 x1Attack Jewel 1 x1Attack Jewel 1 x1 |
| Vambraces |
Kaiser Vambraces Beta + |
Critical/Vitality Jewel 4 x1Brace Jewel 3 x1 |
| Waist |
Kaiser Coil Beta + |
Critical/Vitality Jewel 4 x1Attack Jewel 1 x1Expert Jewel 1 x1 |
| Legs |
Brachydium Greaves Beta + |
Critical/Vitality Jewel 4 x1Attack Jewel 1 x2 |
| Charm |
Challenger Charm V |
None |
Raging Brachy Hammer Build Skill List
| Skills | |
|---|---|
|
Attack Boost 7 |
Critical Eye 7 |
|
Agitator 7 |
Health Boost 3 |
|
Critical Boost 3 |
Weakness Exploit 3/td> |
|
Blast Attack 2 |
Heat Guard 1 |
|
Latent Power 1 |
Flinch Free 1 |
|
Focus 1 |
Teostra Technique |
| Brachydios Will |
| A full offensive hammer build featuring the Raging Brachy set and the Teostra Set. The amount of affinity gained makes sharpness not an issue due to master’s touch so hammer away! |
Awakened Slugger Hammer Build
| Awakened Slugger Hammer Build | |
| Weapon | Decorations | |
|---|---|---|
| Safi’s Shattercrusher |
Brace/Vitality Jewel 4 x1— |
|
| Armor | Decorations | |
| Head |
Frostfang Helm Beta + |
Challenger Jewel+ 4 x1 Tenderizer Jewel 2 x1 Maintenance Jewel 1 x1 |
| Armor |
Brachydium Mail Beta + |
Critical/Vitality Jewel 4 x1 Tenderizer Jewel 2 x1 Attack Jewel 1 x1 |
| Vambraces |
Frostfang Braces Alpha + |
Tenderizer Jewel 2 x1 Critical Jewel 2 x1 |
| Waist |
Brachydium Faulds Beta + |
Critical/Vitality Jewel 4 x1 Expert Jewel 1 x1 |
| Legs |
Frostfang Greaves Alpha + |
Expert Jewel 1 x2 |
| Charm |
Attack Charm V |
None |
| Awakened Ability | |
|---|---|
| Attack Increase VI | Attack Increase V x4 |
Awakened Slugger Hammer Build Skill List
| Skills | |
|---|---|
|
Attack Boost 7 |
Critical Eye 7 |
|
Agitator 7 |
Slugger 5 |
|
Critical Boost 3 |
Weakness Exploit 3 |
|
Health Boost 3 |
Flinch Free 1 |
| Brachydios Will 2 | Frostfang Absolute Art 3 |
| A Stunner armor set featuring the frostfang barioth set and raging brachy set. It makes stunning monsters faster and is ideal for coop play. Make sure to hit those draw attacks to maximize the punishing draw bonus stun rate! |
Awakened Blast Hammer Build
| Awakened Blast Hammer Build |
| Weapon | Decorations | |
|---|---|---|
| Safi’s Shattercrusher |
Expert Jewel+ 4 x1— |
|
| Armor | Decorations | |
| Head |
Kaiser Crown Beta + |
Expert Jewel+ 4 x1 |
| Armor |
Brachydium Mail Beta + |
Attack Jewel+ 4 x1 Attack Jewel 1 x1 Attack Jewel 1 x1 |
| Vambraces |
Kaiser Vambraces Beta + |
Critical/Vitality Jewel 4 x1 Brace Jewel 3 x1 |
| Waist |
Kaiser Coil Beta + |
Critical/Vitality Jewel 4 x1 Attack Jewel 1 x1 Expert Jewel 1 x1 |
| Legs |
Brachydium Greaves Beta + |
Critical/Vitality Jewel 4 x1 Attack Jewel 1 x2 |
| Charm |
Challenger Charm V |
None |
Awakened Blast Hammer Build Skill List
| Skills | |
|---|---|
|
Attack Boost 7 |
Critical Eye 7 |
|
Agitator 7 |
Health Boost 3 |
|
Critical Boost 3 |
Weakness Exploit 3 |
|
Blast Attack 2 |
Heat Guard 1 |
|
Latent Power 1 |
Flinch Free 1 |
| Teostra Technique 3 | Brachydios Will 2 |
| Highly similar to the lightbreak Raging Brach/Teostra set above but with the weapon getting changed into the safi blast hammer. This build offers higher damage due to the awakening bonus so if you have the safi hammer, make sure to augment it ASAP! |
Guiding Lands Sleep Hammer Build
| Guiding Lands Sleep Hammer Build |
| Weapon | Decorations | |
|---|---|---|
| Safi’s Dreamcrusher |
Handicraft Jewel+ 4 x1— |
|
| Armor | Decorations | |
| Head |
Golden Lunehelm Beta + |
Earplugs Jewel+ 4 x1 Tenderizer Jewel 2 x1 |
| Armor |
Damascus Mail Beta + |
Earplugs Jewel+ 4 x1 Critical Jewel 2 x1 Expert Jewel 1 x1 |
| Vambraces |
Golden Lunebraces Beta + |
Brace/Vitality Jewel 4 x1 Charger Jewel 2 x1 |
| Waist |
Stygian Coil Beta + |
Expert Jewel+ 4 x1 Expert Jewel 1 x2 |
| Legs |
Golden Lunegreaves Beta + |
Expert Jewel+ 4 x1 |
| Charm |
Tranq Charm IV |
None |
| Awakened Ability | ||
|---|---|---|
| Gold Rathian Essence | Status Effect Up VI | Status Effect Up V x3 |
Guiding Lands Sleep Hammer Build Skill List
| Skills | |
|---|---|
|
Critical Eye 7 |
Earplugs 5 |
|
Sleep Attack 4 |
Focus 3 |
|
Health Boost 3 |
Critical Boost 1 |
|
Weakness Exploit 3 |
Latent Power 3 |
|
Handicraft 2 |
Flinch Free 1 |
|
Resentment 2 |
Gold Rathian Essence |
| A Sleep build using the gold rath set for increased ailment bonus. Stuns and sleeps for double damage makes this a great coop hammer build. Just remember that coop has a higher ailment threshhold so be prepared to hammer more when playing multiplayer! |
Celestial Illusion — Wintermoon Nettle

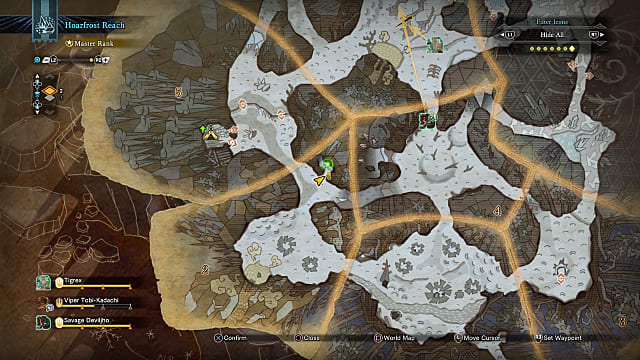
This one is probably the trickiest to find. Not only will it only spawn at the Hoarfrost Reach’s summit — an area that many players are undoubtedly going to miss — but it also only spawns on clear nights when the swarms of Moon Slugs aren’t hanging around the caves. Spawn into the Northeast Camp, and immediately look upwards toward’s the peak — give it a few seconds, but it should be obvious if it’s up there. If it is, make the trek up the mountain and capture it. It’ll circle above the highest point of the summit with the three mining outcrops eventually. No Ghillie Mantle required — it doesn’t even have eyes. Just throw your Capture Net at it. If you need help making it up to it in the first place, you can check out our guide on how to reach the summit.
Advertisement. Keep scrolling for more
Become a Clutch Claw master
Mounting monsters has never been easier — well, sort of. This is a different kind of mounting.
(Image credit: Capcom)
With the Clutch Claw, you can attach yourself to a monster and perform several actions. While on top of the monster, you can move yourself to the desired position. From there, you can go for a simple weapon attack (Y or triangle) and wound the monster, which will make that part more susceptible to critical attacks (you’ll notice a different texture on the monster part as well).
If you manage to grapple on the monster’s head, you can get them to change direction with a claw attack (B or circle), which can be crazy useful to control the environment. While on a monster’s head, you can also fire the entirety of your slinger ammo (RT or R2) into their skull for some extra damage.
However, keep in mind that Clutch Claw moves takes a lot out of your stamina bar, so keep an eye on that when you’re trying to grapple your opponent.
If you’re having trouble mastering the Clutch Claw, the developers added a section just for that in the training room.
Monster Hunter World Iceborne Charge Blade Progression Build
Starter Iceborne Build
| Weapon | Decorations | |
|---|---|---|
|
Defender’s Shield V |
—— | |
| Armor | Decorations | |
| Head |
Guild Cross Circlet Beta |
Steadfast Jewel 1 x3 |
| Armor |
Damascus Mail Beta |
Artillery Jewel 1 x3 |
| Vambraces |
Kaiser Vambraces Alpha |
Vitality Jewel 1 x1 |
| Waist |
Damascus Coil Beta |
Ironwall Jewel 1 x2Protection Jewel 1 x1 |
| Legs |
Empress Greaves Beta |
Tenderizer Jewel 2 x1Magazine Jewel 2 x1 |
| Charm |
Ironside Charm III |
None |
Starter Iceborne Skill List
| Skills | |
|---|---|
|
Guard 5 |
Divine Blessing 3 |
|
Focus 3 |
Health Boost 3 |
|
Weakness Exploit 3 |
Artillery 3 |
|
Stun Resistance 3 |
Capacity Boost 1 |
| A defensive endgame build from MHWs base game for the charge blade. It also has Artillery to improve the impact phial’s damage so you can take down MR rank monsters much faster, |
Early Iceborne Progression Build
| Weapon | Decorations | |
|---|---|---|
|
Wild Force I |
Sharp Jewel 2 x1— |
|
| Armor | Decorations | |
| Head |
Jagras Helm Alpha + |
Tenderizer Jewel 2 x1 |
| Armor |
Banbaro Mail Alpha + |
Tenderizer Jewel 2 x1 |
| Vambraces |
Banbaro Vambraces Alpha + |
Tenderizer Jewel 2 x1 |
| Waist |
High Metal Coil Alpha + |
Vitality Jewel 1 x1Grinder Jewel 1 x1 |
| Legs |
Alloy Greaves Alpha + |
Shield Jewel 2 x1 |
| Charm |
Artillery Charm III |
None |
Early Iceborne Skill List
| Skills | |
|---|---|
|
Attack Boost 2 |
Speed Eating 3 |
|
Offensive Guard 2 |
Health Boost 3 |
|
Weakness Exploit 3 |
Speed Sharpening 2 |
|
Windproof 1 |
Protective Polish 1 |
|
Capacity Boost 1 |
Defense Boost 2 |
|
Guard Up 1 |
| Block those hits perfectly but make sure to polish your weapon first! A block oriented build that makes use of QoL skills to make you last long into the fight. |
Mid-Late Iceborne Progression Build
| Weapon | Decorations | |
|---|---|---|
|
Chrome Fortress III |
Attack Jewel 1 x2— |
|
| Armor | Decorations | |
| Head |
Zorah Headgear Alpha + |
Challenger Jewel 2 x2 |
| Armor |
Zorah Hide Alpha + |
Handicraft Jewel 3 x1Attack Jewel 1 x1 |
| Vambraces |
Banbaro Vambraces Alpha + |
Magazine Jewel 2 x1 |
| Waist |
Zorah Spine Alpha + |
Handicraft Jewel 3 x1Elementless Jewel 2 x1 |
| Legs |
Uragaan Greaves Alpha + |
Attack Jewel 1 x1 |
| Charm |
Handicraft Charm III |
None |
Mid-Late Iceborne Progression Build Skill List
| Skills | |
|---|---|
|
Artillery 5 |
Tremor Resistance 3 |
|
Health Boost 2 |
Guard 2 |
|
Offensive Guard 2 |
Flinch Free 1 |
|
Quick Sheath 1 |
Handicraft 5 |
|
Capacity Boost 1 |
Agitator 2 |
|
Non-elemental Boost 1 |
Attack Boost 4 |
| Zorah Magdaros Essence |
| An Artillery build setup for the Charge Blade and its Impact Phial. We utilzed the secret of the Magdaros set to raise the artillery skill to 5. Non-Elemental Boost was also mixed to further your weapon damage. Just don’t add in some free elem skills or you’ll ruin it! |
What is Pokke Farm?
Pokke Farm’s caretaker.
Pokke Farm is a farm located in Pokke Village that can be used to gain several items after the completion of a quest. The farm is made up of several item collection points similar to what players find in the wild. These include areas to mine, fish, gather mushrooms, gather honey, and catch bugs — there’s even an area where players can plant various seeds to raise different crops for harvesting. Most areas of the farm have a Felyne farmhand to explain how each gathering point operates.
Generally, tools are not needed to use these collection spots, with some exceptions. Seed planting requires plantable herbs or seeds; the Casting Machine requires a Net; Bomb Mining requires Bombs; using the Bug tree costs 300z; sending Trenya on a journey requires Pokke points; the Great Sword Cave requires 2 Elder Dragon Bone for mining. These plantable fields may be made even more bountiful with the use of fertilizers (Dung, Wyvern Droppings, Worms).
To get better and rarer items, the player must upgrade the Farm. To upgrade the farm, the Hunter must unlock and then purchase these upgrades, with Pokke points, from the Pokke Farm Caretaker. To unlock better upgrades, as well as gain access to exclusive items, the Hunter must complete Urgent Quests from the Village Chief and the Guild.
One can also trade Pokke Points with the Pokke Farm Caretaker for items not found at stores.
Monster Hunter World Iceborne Hammer Progression Build
Starter Iceborne Build
| Weapon | Decorations | |
|---|---|---|
|
Defender Warhammer V |
—— | |
| Armor | Decorations | |
| Head |
Guild Cross Circlet Beta |
Steadfast Jewel 1 x3 |
| Armor |
Diablos Mail Beta |
Evasion Jewel 2 x1 |
| Vambraces |
Kaiser Vambraces Alpha |
Protection Jewel 1 x1 |
| Waist |
Bazel Coil Beta |
KO Jewel 2 x1 |
| Legs |
Empress Greaves Beta |
Tenderizer Jewel 2 x1Vitality Jewel 1 x1 |
| Charm |
Earplugs Charm III |
None |
Starter Iceborne Skill List
| Skills | |
|---|---|
| Health Boost 3 | Divine Blessing 3 |
| Stun Resist 3 | Slugger 3 |
| Weakness Exploit 3 | Earplugs 5 |
| Evade Window |
| A standard hammer build set with a heavy emphasis on Slugger for more KO against monsters when hitting their heads. |
Early Iceborne Progression Build
| Weapon | Decorations | |
|---|---|---|
|
Anja Fiercemaul I |
—— | |
| Armor | Decorations | |
| Head |
Jagras Helm Alpha + |
Tenderizer Jewel 2 x1 |
| Armor |
Tenderizer Jewel 2 x1 |
|
| Vambraces |
Pukei Vambraces Alpha + |
Expert Jewel 1 x1 |
| Waist |
Beo Coil Alpha + |
Tenderizer Jewel 2 x1 |
| Legs |
Rathalos Greaves Alpha + |
Flawless Jewel 2 x1Expert Jewel 1 x1 |
| Charm |
Earplugs Charm III |
none |
Early Iceborne Skill List
| Skills | |
|---|---|
| Speed Eating 2 | Attack Boost 4 |
| Health Boost 3 | Earplugs 5 |
| Handicraft 1 | Weakness Exploit 3 |
| Critical Eye 2 | Peak Performance 3 |
| A more damage focused hammer build to carry you into midgame. The attack boost and critical eye can offset the negative affinity of the anjanath hammer and striking its wounded part can even put your affinity into positive (and even further when wounding it). |
Mid-Late Iceborne Progression Build
| Weapon | Decorations | |
|---|---|---|
|
Chaos Shatterer |
KO Jewel 2 x2Augment:Recovery |
|
| Armor | Decorations | |
| Head |
Tigrex Helm Alpha + |
Grinder Jewel 1 x1 |
| Armor |
Kushala Cista Beta + |
Tenderizer Jewel 2 x2 |
| Vambraces |
Damascus Vambraces Alpha + |
Tenderizer Jewel 2 x1Maintenance Jewel 1 x1 |
| Waist |
Odogaron Coil Alpha + |
Sharp Jewel 2 x1 |
| Legs |
Death Garon Greaves Beta + |
Attack Jewel 1 x2Elementless Jewel 2 x1 |
| Charm |
Earplugs Charm III |
none |
Mid-Late Iceborne Progression Build Skill List
| Skills | |
|---|---|
| Handicraft 4 | Critical Eye 3 |
| Earplugs 5 | Attack Boost 4 |
| Speed Sharpening 3 | Tool Specialist 3 |
| Protectice Polish | Weakness Exploit 3 |
| Slugger 2 | Non-Elemental Boost |
| A more offense oriented hammer build. While we highly focused on improving affinity rate and damage to offset the Chaos Shetter’s negative affinity. We also slotted in more handicraft to increase the hammer’s tiny purple sharpness to make the bonus damage it provides last longer. Additionally, more KO Jewels were slotted to increase the hammer’s effectiveness and a single non-elementless jewel to further increase its damage. |
Улучшайте своего верного друга
Охота в одиночку в Monster Hunter: World может карать очень сильно, ведь у вас нет союзников, на которых можно положиться. Однако в такие моменты с вами всегда присутствует Палико — ваш верный кот-компаньон.
Если вы охотитесь в одиночку или в группе из двух человек, обязательно создавайте новые инструменты для своего мохнатого товарища. Не сосредотачивайтесь лишь на своей собственной броне и оружии. Создавайте новые и для своего Палико, ведь разница между обмундированным и слабым котом невероятно большая в Monster Hunter World: Iceborne. Сами сражения не являются чем-то лёгким, и вы определённое заметите разницу, если сможете заставить своего компаньона нести ответственность на поле битвы за самого себя.
Каждое устройство Палико в Iceborne несёт в себе новую способность. Для их разблокировки вам нужно повышать уровень своего инструмента. Выберите те, которые вам нравятся больше всего, после чего придерживайтесь их. Рекомендовано использовать «Коралловый оркестр» (Coral Orchestra) для снятия дебаффов или «Спрей исцеляющей осы» (Vigorswap Spray), чтобы сохранить как своё здоровье, так и Палико.
Monster Hunter Snap! Aka the Surveyor Set
Iceborne throws a sprinkle of Pokémon Snap into the mix of Monster Hunter World via the Surveyor Set.
(Image credit: Capcom)
The Surveyor Set allows you to take pictures out in the wild to be saved to an album. Your goal with the Surveyor Set is to complete Research Requests that task you to capture Lynians on camera under certain conditions, such as: Captured as large as possible, subject in front, and subject sniffing the surroundings. Capturing them with these conditions will award you items like Steel Eggs and a First Wyverian Print. You’ll know you made good on your request when a red paw print appears after you shoot the photo.
You can also simply capture epic moments and save them in your album for your own personal findings.
Let go of your old gear
Trust me, I feel your pain. I was probably one of the many hunters fighting alongside you to get those monster parts for that badass gear you’re hauling around. I have an entire set revolving around my Empress Axe “Styx,” and I’m having trouble parting with it. But I have to, and so do you.
(Image credit: Capcom)
Iceborne introduces an entire new rank, so all those hard-fought hours we spent farming are moot. For example, the very first piece of gear that becomes available to you in Master Rank is the Bone A+ armor, which starts off at a whopping 114 defense at level 1. In comparison, my Empress Crown B helmet has 90 defense, at level 11.
My tip is to get over it. This is a whole new game. Focus on getting new gear to embrace this new, dangerous world. Otherwise, you won’t survive. We’ll figure out new and improved builds in time, my friend.
Great Sword Cave
The Great Sword within the cave.
Obtained when you reach Elder Quest Level 5* (beat the Tigrex Urgent Quest). Inaccessible otherwise.
To use this feature you must have 2 Elder Dragon bones, give them to the Felyne and your character will mine the gigantic Greatsword.
According to the story, they found an item called Tigrex Screamer on the Tigrex the player hunted, and that will shatter the ice wall. The Great Sword is too large for anyone to wield, but giving 2 Elder Dragon Bones to the Felyne beside it, the Felyne can make a pickaxe and mine it. Its also rumored that the sword belongs to the ancestor of the Elder of Pokke.
Obtainable Items
Friendly Pointer — Arrowhead Gekko

Advertisement. Keep scrolling for more
This one can be found in every map, apparently, but it’s also seemingly a guaranteed — or near-guaranteed — spawn in the Event Quest, «The Lord of the Underworld Beckons». Drop down from the Central camp, head into Area 10, and hug the left wall with your Ghillie Mantle on. You’ll spot the Gekko before it’ll dash up a wall. Follow it, and you’ll find it «pointing» at one of the objectives for the quest, an Underground Fruit gathering point. Nab it with your Capture Net. If the Event Quest isn’t in rotation while you’re searching for it, just repeat these steps a few times and hopefully you’ll find it.
Farming Frozen Foliage
Your best bet for getting all the canteen ingredients you need in the Hoarfrost Reach is going on an expedition while Frozen Foliage is flourishing. Time of day and weather conditions don’t matter.
Your primary farming zones will be Area 7 and Area 15, where a total of nine patches of foliage grow. So long as they’re flourishing, you’ll only need to wait about five minutes or so between gathering.
Farming Moonlight and Snowpeak Icebloom
Neither of these materials will take you too long to farm. You’ll be able to collect either ingredient from any Frozen Foliage you come across.
Moonlight Icebloom is relatively common, and you’re liable to get your hands on it within your first few gathers. Snowpeak Icebloom will take you more time. It’s a rare gather, but you’ll know you’ve got it when your hunter digs excitedly twice and raises their arm high.
You’ll only need one instance of both plants. Once you have them, it’s time to move onto the tough part.
Where to Find Petalcryst
The final ingredient on your list only appears during flourishing Frozen Foliage, and only in a single small cave in Area 2.
I only had luck finding petalcryst on the lower levels, and there’s still a chance you might not get it. Thankfully, the plants here respawn at the same rate as their non-cavebound counterparts.
Once you’ve managed to nab a sprig of petalcryst, you should have every ingredient you need to activate Felyne Zoomaster. Now go out and get those pets!
—
That’s all you need to know about the Felyne Zoomaster skill in Monster Hunter: World Iceborne. Here are some other great Iceborne articles while you’re at it:
- Iceborne Not Loading on PC Fix
- Iceborne Greatsword Builds
- Iceborne: How to Find Hot Spring Stones
- Iceborne Save Overwrite Fixes
- Iceborne Monster Slogbone Farming Guide
- Keep an eye on our Iceborne guide hub for even more.
Monster Hunter World Iceborne Great Sword Endgame Meta Build
Full Fatalis Armor Build
| Weapon | Decorations | |
|---|---|---|
|
Black Fatalis Blade |
Attack Jewel+ 4 x2 |
|
| Armor | Decorations | |
| Head |
Dragonhead Beta + |
Critical/Protection Jewel 4 x3 |
| Armor |
Dragonhide Beta + |
Mighty/Maintenance Jewel 4 x3 |
| Vambraces |
Dragonclaws Beta + |
Mighty/Maintenance Jewel 4 x 2 Expert Jewel+ 4 x1 |
| Waist |
Dragonbarbs Alpha + |
Expert Jewel+ 4 x1Handicraft Jewel 3 x1Charger Jewel 2 x1 |
| Legs |
Dragonfeet Beta + |
Challenger Jewel+ 4 x1Charger/Protection Jewel 4 x2 |
| Charm |
Challenger Charm V |
None |
Fatalis Armor Build Skill Set
| Critical Eye 7 | Agitator 7 |
| Maximum Might 5 | Tool Specialist 5 |
| Divine Blessing 5 | Attack Boost 4 |
| Stun Resist 3 | Weakness Exploit 3 |
| Critical Boost 3 | Focus 3 |
| Handicraft 1 |
| Game8 strategy team | An endgame Great Sword set featuring all Fatalis Armor pieces. It’s set allows us to run Agitator 7 and Maximum Might for a full 100% affinity together with Critical Eye. Making use of Weakness Exploit allows users to offset the True Fatalis Blade’s negative affinity while Critical Boost further augments its damage. Feel free to switch the Handicraft Jewel with a Shaver Jewel to get monster ammo. |
|---|
Videos

Monster Hunter World Iceborne reveal
Monster Hunter World Iceborne — Gameplay Reveal Trailer
Monster Hunter World Iceborne — Story Trailer
Monster Hunter World Iceborne — Glavenus Trailer
Monster Hunter World Iceborne — Gamescom 2019 Trailer HD 1080P
Monster Hunter World Iceborne — Old Everwyrm Trailer
Monster Hunter World Iceborne — Zinogre Trailer
MHW Iceborne — Rajang Trailer (Release Date)
Monster Hunter World Iceborne — Stygian Zinogre
MHW Iceborne — Safi’jiiva Siege Trailer
MHW Iceborne — Raging Brachydios & Furious Rajang
Monster Hunter World Iceborne — Alatreon Trailer
Frostfang Barioth — Gameplay
Monster Hunter World Iceborne — Welcome To Hoarfrost Reach
Monster Hunter World Iceborne — A tour with the Handler
Monster Hunter World Iceborne – Heavy Weapons
Monster Hunter World Iceborne – Light Weapons
Monster Hunter World Iceborne – Technical Weapons
『モンスターハンターワールド アイスボーン』WEBCM ティザー篇
『モンスターハンターワールド アイスボーン』テレビCM ティザー篇(15秒)
【MHWI】新要素「クラッチクロー」アクション紹介動画
【MHWI】武器アクション紹介動画「大剣」
【MHWI】武器アクション紹介動画「太刀」
【MHWI】武器アクション紹介動画「双剣」
【MHWI】武器アクション紹介動画「片手剣」
【MHWI】武器アクション紹介動画「狩猟笛」
【MHWI】武器アクション紹介動画「ハンマー」
【MHWI】武器アクション紹介動画「ランス」
【MHWI】武器アクション紹介動画「ガンランス」
【MHWI】武器アクション紹介動画「スラッシュアックス」
【MHWI】武器アクション紹介動画「チャージアックス」
【MHWI】武器アクション紹介動画「弓」
【MHWI】武器アクション紹介動画「操虫棍」
【MHWI】武器アクション紹介動画「ヘビィボウガン」
【MHWI】武器アクション紹介動画「ライトボウガン」
Insect Thicket
Obtainable Bugs:
| Thicket | Obtainable Bugs |
|---|---|
| Insect Thicket | Spiderweb, Cricket, Worm, Firefly, Insect Husk, Yambug, Bughopper, Bitterbug, Flashbug, Carpenterbug |
| Insect Thicket +1 | Worm, Godbug, Bitterbug, Flashbug, Thunderbug, Carpenterbug, Killer Beetle, Great Hornfly, Great Ladybug, Vespoid Wing, Hornetaur Wing |
| Insect Thicket +2 | Mega Fishing Fly, Godbug, Flashbug, Thunderbug, King Scarab, Killer Beetle, Hercudrome, Great Hornfly, Great Ladybug, Vespoid Shell, Hornetaur Shell |
| Insect Thicket +3 |
Spiderweb, Mega Fishing Fly, Godbug, Bitterbug, Flashbug, King Scarab, Hercudrome, Rare Scarab, Emperor Cricket, Rainbow Insect, Vespoid InnrWing, HornetaurInnrWing |
| Insect Thicket +4 (MHFU-Exclusive) | Phantom Butterfly, King Scarab, Emperor Cricket, Vespoid RazorWing, Hornetaur RazorWing, Hornetaur Carapace, Vespoid Carapace, Flashbug |
Bug Tree
- To use the bug tree, go to the back of the farm where you’ll find a cat in front of a tree with a large scar on it. Talk to the cat and he’ll ask for 300z in order to swing a hammer. Pick the hammer of your choice (you can choose either white/black/gold) and you’ll be taken to a scene of your character charging up for a swing.
- The goal is to release the hammer by pressing right when the white charge goes off. If you’re still new and not used to the timing, you might considering letting go right before otherwise if you wait right after the white burst you may get a very weak swing and almost no items.
- Similar to Bomb Mining, more insects become unlocked as you unlock more Insect Thickets.
- White Cat Hammer: good for beginners, but not many rares.
- Black Cat Hammer: an intermediate’s hammer, gets at least 1 rare bug.
- Gold Cat Hammer: for experts, almost all bugs are rare, very hard to use.
- Remember, each hammer costs 300z to use, regardless of its «color».
Obtainable Bugs
| Hammer | Obtainable Items |
|---|---|
| White Hammer | Godbug, Bitterbug, Flashbug, Carpenterbug, King Scarab, Killer Beetle, Hercudrome, Rare Scarab, Vespoid Wing, Vespoid Shell, Hornetaur Wing, Hornetaur Shell, Huskberry, Power Seed, Armor Seed, Scatternut. |
| Black Hammer | Mega Fishing Fly, Yambug, Bughopper, Godbug, Bitterbug, Flashbug, Thunderbug, Carpenterbug, King Scarab, Killer Beetle, Hercudrome, Rare Scarab, Rainbow Insect, Great Hornfly, Great Ladybug, Vespoid Wing, Vespoid Shell, Vespoid InnrWing, Hornetaur Wing, Hornetaur Shell, HornetaurInnrWing, Huskberry, Power Seed, Armor Seed. |
| Gold Hammer | Insect Husk, Yambug, Bughopper, Thunderbug, Emperor Cricket, Rare Scarab, Rainbow Insect, Great Hornfly, Great Ladybug, Vespoid Wing, Vespoid Shell, Vespoid InnrWing, Vespoid RazorWing, Hornetaur Wing, Hornetaur Shell, Hornetaur Crapce, HornetaurInnrWing, Hornetaur RazorWing, Power Seed, Armor Seed, Phantom Butterfly. |
Всегда носите с собой «Горячие напитки» (Hot Drinks) и «Пустоягоды» (Nulberries)
В самом начале обучения Monster Hunter World: Iceborne проинструктирует вас носить с собой «Горячие напитки» (Hot Drinks), чтобы вы могли сохранять тепло своего тела. Оставаясь в тепле (что вы также можете делать, стоя в горячем источнике) вы предотвращаете снижение уровня выносливости.
Если вы не взяли с собой достаточное количество напитков, то потом будет весьма проблематично выйти из боя, чтобы сходить за «Острыми перцами» (Hot peppers) и сделать себе ещё. Поэтому носите как можно больше «Горячих напитков» (Hot Drinks), чтобы избежать потерю выносливости в середине боя.
Подобно «Горячим напиткам» (Hot Drinks), «Пустоягоды» (Nulberries) тоже бесценны в Monster Hunter World: Iceborne. Некоторые монстры применяют различного рода эффекты (отравления), вроде «Ледяного сияния» (Iceblight), и «Пустоягоды» (Nulberries) могут вылечить вас от них. Каждый раз, когда вступаете в бой, убедитесь, что ваши карманы полностью забиты этими ягодами.
«Горячим напиткам» (Hot Drinks) и «Пустоягоды» (Nulberries) — это тот тип предметов, которые вы не замечаете до тех пор, пока они не исчезнут. Поэтому всегда проверяйте их наличие, чтобы не оказаться в безвыходной ситуации.