Morrowind:tribunal temple
Содержание:
- Trivia
- Tribunal Temple Ranks[edit]
- Notes[]
- Notes[edit]
- Character Information
- Дальнейший сбор информации о Нереварине и Шестом Доме
- Служение Храму Альмалексии
- Wolves[edit]
- Mods and Modding
- Визит в Министерство Правды – поиск Мехры Мило
- Trivia
- Living as a Werewolf[edit]
- Краткий гайд по расам и классам
- References
- Contents[]
- Horkers[edit]
- Stats[edit]
- Нападение оборотней на деревню нордов
Trivia
- An odd exception to the Blood Moon failing to trigger at midnight while in is during the first fight against . If midnight strikes on a Blood Moon night during this first battle, Calamity Ganon’s health will refill to maximum as if neither nor the had done him any damage. Strangely, this exception does not apply to the battle against .
- The sky turning red at 11:50 PM also occurs when Dark Beast Ganon reveals its core, allowing Link to deal the final blow.
- When the console is using 90% or more of its system memory, a panic Blood Moon can be triggered as part of a garbage collection routine. This allows the console to clean up its system memory and restore performance to an optimal state. This can occur at any time of day and is otherwise no different than a naturally occurring blood moon.
Tribunal Temple Ranks[edit]
| Rank | Required Attributes | Required Skills | Required Reputation |
|---|---|---|---|
| 0. Layman | Intelligence 30 Personality 30 | — | |
| 1. Novice | Intelligence 30 Personality 30 | One skill at 10 | 5 |
| 2. Initiate | Intelligence 30 Personality 30 | One skill at 20 | 10 |
| 3. Acolyte | Intelligence 30 Personality 30 | One skill at 30 and two at 5 | 20 |
| 4. Adept | Intelligence 30 Personality 30 | One skill at 40 and two at 10 | 30 |
| 5. Curate | Intelligence 31 Personality 31 | One skill at 50 and two at 15 | 45 |
| 6. Disciple | Intelligence 32 Personality 32 | One skill at 60 and two at 20 | 60 |
| 7. Diviner | Intelligence 33 Personality 33 | One skill at 70 and two at 25 | 80 |
| 8. Master | Intelligence 34 Personality 34 | One skill at 80 and two at 30 | 100 |
| 9. Patriarch* | Intelligence 35 Personality 35 | One skill at 90 and two at 35 | 125 |
* Patriarch doesn’t actually require the listed skills and attributes, as the final promotion is automatically given from the final Temple quest, Ebony Mail.
Notes[]
- The Blood Moon’s effects on enemy spawn rates stack with that of the Water Candle and Battle Potion.
- A Blood Moon only affects spawn rates above the surface. Spawn rates below the surface remain the same.
- Whether or not a Blood Moon will occur is determined at dusk each night.
- Every nightfall has an equal chance of being a Blood Moon and does not change if the previous night was a Blood Moon. It is possible to have four or more Blood Moons in a row and, conversely, a Blood Moon will not necessarily occur even over the course of many in-game weeks.
- In a multiplayer game, using the time adjustment server commands (dawn, noon, dusk, midnight) will not trigger the Blood Moon check, and so using «dusk» repeatedly does not force a Blood Moon to occur.
- Water in an Ocean biome will not turn red even though all other water in biomes will. However, the blue water is still affected by the red shader, giving it a purple color.
- If a player chooses to, they can cancel a Blood Moon by summoning the Pumpkin Moon or Frost Moon.
- A Blood Moon can happen in the middle of a Pirate Invasion. The invasion will still go on until it ends, then the Blood Moon starts. A Blood Moon can also occur during Slime Rain.
- Blood Moons occur more often than Solar Eclipses, as Solar Eclipses have a
5*1/20 (5%) chance to happen each day (when the criteria are met). - If a Blood Moon and Full Moon coincide, Werewolves will spawn with increased frequency, rather than Zombies, but the special Zombies will still spawn.
- Similar to the Solar Eclipse, a Blood Moon will increase the spawn rate of Truffle Worms once in Hardmode.
- The player cannot speed up a Blood Moon by sleeping.
- At daybreak, all unkilled special enemies will attempt to flee the screen.
Notes[edit]
- Even if a Werewolf is under the influence of a player’s Command Humanoid spell, there is a high chance that a nearby NPC will attack the brainwashed Werewolf and vice-versa, even if the other NPC is itself a Werewolf. To avoid potential bloodshed, cast a Calm Humanoid or Command Humanoid spell with a radius effect at all participating combatants.
- Other than the player and a few other NPCs, the majority of the Werewolves present in the Bloodmoon expansion are permanently trapped in beast form and never revert to a humanoid shape, whether it is day or night.
- Any NPC will engage in combat with you on sight if you are a werewolf, regardless of their . This even includes those with a fight value of zero, who would normally only engage if attacked first. Lower level NPCs or those with a high may run away instead, but a combat situation is always unavoidable when encountering NPCs as a werewolf.
Character Information
- Attributes — A guide to the character attributes
- Birthsigns — A guide to the birthsigns, their granted abilities and in-game influence, in Morrowind
- Classes — Guide to the game’s built-in character classes, both for the player and NPCs
- Diseases — A complete catalogue of all diseases contractable within the bounds of Morrowind
- Level — Explains how your character gains levels, and how to make the most of each one
- Races — A thorough explanation of the defining characteristics of each race found within Morrowind, including their starting attributes and special abilities
- Skills — A definitive guide to character-based skills, with descriptions where applicable
- Vampires — Complete guide to vampires in Morrowind featuring information on becoming a vampire, vampire clans, how to cure vampirism, and vampire-based quests
Дальнейший сбор информации о Нереварине и Шестом Доме
Мастер Клинков отправит героя на поиски трех личностей, которые, по всей видимости, имеют схожие с ним взгляды на историю об Нереварине и Шестом Доме. Все они расположены в Вивеке – столице Морровинда.

- Мехра Мило. Она является жрицей Храма и все свое время проводит в библиотеке Зала Мудрости. Мехра поведает вам, что существует мнение о ложности трех богов Трибунала. Для подробного ознакомления с этой точкой зрения вам необходимо найти книгу под названием Продвижение Истины. Первый экземпляр находится в Тайной библиотеке храма. Отправляйтесь в Зал справедливости. Там найдите Канцелярию Ордена Дозора, вход в Тайную библиотеку будет в полу под паласом, в правом дальнем углу этой комнаты. Аналогичный люк есть в Судебных канцеляриях Зала Мудрости. Книгу вы найдете на ближнем от входа из Судебной канцелярии стеллаже. Еще одна копия есть у Джобаши. Его магазин находится в Квартале чужеземцев, на Нижнем поясе, в западной его стороне.
- Хулейя. Вы найдете его в трактире Черный Шалк, располагающемся на Нижнем поясе Квартала Чужеземцев. Взамен на информацию он попросит вас сопроводить его к своему другу в Книжную лавку Джобаши. Однако не все так просто. Хулейю в трактире подстерегают два, по его словам, расиста. Если вам не нужны лишние неприятности, то просто подкупите их. В противном случае вы будете вынуждены прорываться до книжного магазина с боем. Проводив Аргониана до нужного места, магазин, если вы забыли, находится на этом же поясе, в противоположной от трактира стороне, расспросите у Хулейи о культе Нереварина, и получите от него записку с интересующей вас информацией.
- Аддхиранирр. Найти ее вы можно в подземельях Округа святого Олмса, а если быть точнее, в северо-восточной их части. Что она там делает? Все просто – прячется от сборщика налогов, и чтобы Аддхиранирр помогла вам, нужно каким-то способом заставить этого агента по сбору налогов убраться подальше. Сборщика зовут Дувианус Платориус. Он расхаживает в платье и дорогой рубашке по Поясу округа Святого Олмса, на два этажа выше подземелий в которых прячется Аддхиранирр. Говорим с надоедливым агентом и отправляем его по ложному следу скрывающейся аргонианки. Якобы взяла она гондолу до материка и была такова. После всего проделанного возвращаемся к Аддхиранирр. В награду за помощь она поделится с вами информацией о Культе Шестого Дома (главное не забыть выбрать нужную строчку в диалоге).
Готово. Собрав всю нужную информацию возвращайтесь к Каю Косадесу с докладом.
Служение Храму Альмалексии
После разговора с Барензией вы завершите выполнение заданий Монархии и приступите к поручениям Храма, которые будете получать от Федриса Хлера, находящегося в Приемной Храма.
Угроза нападения Армии Гоблинов
Хлер полагает, что король Хелсет в тайне от храма готовит армию гоблинов. Ваша же задача найти и уничтожить предводителей этой армии. Помимо всего прочего, Хлер намекнет на то, что было бы неплохо разобраться и с двумя альтмерами, которые выступают у гоблинов в роле учителей. Альмалексия, по его словам, будет приятно удивлена такими результатами зачистки.
Отправляйтесь в Годсрич. Через Канализацию жилого района следуйте в Западную Канализацию. В юго-западной ее части расположен проход на Поле боя. Вам необходимо найти здесь вход в Городские врата старого Морнхолда (южная часть Поля боя). Далее двигайтесь в юго-восточную часть Руин Арсенала. Там вы найдете проход в Слезы Амун-Ша. В этой локации находятся два предводителя гоблинов: Дургок и Кургок.
Разобравшись с предводителями гоблинов отправляйтесь в Руины жилых зданий. Вход туда вы найдете в локации Слезы Амун-Ша. Учителя гоблинов альтмеры Ярнар и Армион находятся в Залах Терана (восточные помещения). Покончив с неприятелями возвращайтесь к Федрису Хлеру.
Освящение Алтаря Мертвых
Федрис Хлер сообщит, что Гавас Дрин желает видеть вашу персону у себя. Благо вход в его кабинет расположен совсем рядом, в западной части Приемной Храма.
Архиканоник попросит выполнить задание Альмалексии. Нужно освятить древнее святилище под названием Алтарь Мертвых, которое уже бог знает сколько лет никто не посещал. Альмалексия полагает, что это святилище можно использовать в своих целях. Однако для этого нужно избавиться от захватившей его нежити и произвести обряд очищения, тем самым восстановив силу древнего поприща. Освящение Алтаря Мертвых происходит в два этапа.
Зачистка нежити
Отправляйтесь в северную часть Зала Духовенства. Оттуда через люк в полу спускайтесь в Канализацию Храма. Здесь необходимо найти вход в восточную часть Канализации. Оказавшись на месте, двигайтесь по восточному коридору, который затем плавно повернет на север и приведет вас ко входу в локацию Сад Храма, на юге которого вы найдете проход к Алтарю Мертвых. Зачистите эту местность от всех темных прислужников до появления соответствующей записи в дневнике, после чего возвращайтесь в Храм за Урвелом Дулни.
Сопровождения Урвела Дулни к Алтарю Мертвых
С этим проблем возникнуть не должно. После зачистки Алтаря от темных приспешников, возвратитесь в Храм и поговорите с Дулни, а затем по старому изведанному на первом этапе пути, проведите его к Алтарю Мертвых. После того как Дулни очистит алтарь, а вы получите запись в дневнике, возвращайтесь в Храм к Гавасу Дрину и доложите об успешном выполнении задания. В награду вы получите Благословенное копье – древковое оружие со средними характеристиками (Колющий урон 5-32). После доклада Гавас снова отправит вас к Федрису Хлеру.
Поиски Ленты Лабиринта Барилзара
Поговорите в Приемной Храма с Федриком Хлером. Он сообщит, что Альмалексия довольна проделанной работой и в награду за потуги, готова дать еще одно поручение. Да не простое, а особенное. Вам необходимо найти для нее Ленту Лабиринта Барилзара.
Отправляйтесь в Зал Духовенства (пройти туда можно либо через кабинет Архиканоника, либо через больницу), а затем спускайтесь на нижние уровни Храма. Там найдите люк в полу, который приведет вас в Канализацию Храма. Вообще стоит отметить, что 80% игры проходит в шастаньях по канализации.
Спустившись в Канализацию Храма двигайтесь на северо-запад пока не наткнетесь на вход в Заброшенный склеп. Здесь нужно отыскать древнего лича Барилзара. Он расположился в северной части Заброшенного склепа. Как завелось, отдавать кольцо без боя он откажется, поэтому придется упокоить ходячий мешочек с костями. Забрав с его тела кольцо возвращайтесь в Приемную Храма к Федрику Клеру. Тот в свою очередь отправит вас к Архиканонику Гавасу Дрину. Вы найдете его в своем кабинете, пройти в который можно через западную дверь приемной.
Гавас Дрин сообщит о том, что Ленту Лабиринта нужно отдать Альмалексии, которая пребывает в Высокой Капелле. Попасть туда можно непосредственно из Офиса Архиканоника, либо из Приемной храма. Альмалексия в награду за переданный артефакт наградит героя способностью Свет Альмалексии (восстанавливает по 25 пунктов каждой характеристики).
На этом задания Храма в привычном их виде закончатся, а вам необходимо покинуть святилище Альмалексии и прогуляться по Морнохлу. Нет, не полюбоваться видами. Это необходимо чтобы начался следующий виток в сюжете.
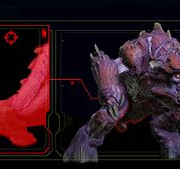
Wolves[edit]
Wolfedit
|
Wolf |
A typical wolf pack approaching |
- «Wolves are one of the most blessed of the All-Maker’s creations. They are fast and agile, and they are careful and clever hunters.» — A Skaal
Description: Next to the plague wolf the most common animal on Solstheim and they often travel in packs.Found: Common all over Solstheim apart from the coldest northern region.
| Creature | Drops | Attacks | Soul | ||||
|---|---|---|---|---|---|---|---|
| WolfBM_wolf_grey_lvl_1 | Wolf Pelt | 40 | — | — | — | 50 (Lesser) |
|
| WolfBM_wolf_grey | 60 | ||||||
| WolfBM_wolf_hroldar(Pets of Hroldar the Strange) | |||||||
| WolfBM_wolf_grey_summon(Created by the Call Wolf spell) | |||||||
|
Caenlorn WolfBM_wolf_caenlorn1, BM_wolf_caenlorn2(Appear in Skaal Village to kill Rigmor Halfhand during The Skaal Test of Wisdom quest) |
nothing | 800 | 100 (Common) |
||||
|
Caenlorn WolfBM_wolf_caenlorn3(Appears in Skaal Village to kill Rigmor Halfhand during The Skaal Test of Wisdom quest) |
50 (Lesser) |
Plague Wolfedit
Plague Wolf
- «They’re all over this island. Some travel in packs, which makes them especially dangerous. I’ve heard some carry disease, as well.» — A guard at Fort Frostmoth
Description: This natural hunter likes to attack in packs, surrounding the prey. These creatures can spread diseases and should be treated carefully.Found: Common all over Solstheim apart from the coldest northern region.
| Creature | Drops | Attacks | Soul | ||||
|---|---|---|---|---|---|---|---|
| Plague WolfBM_wolf_red | Wolf Pelt | 120 | — | — | 50 |
|
50 (Lesser) |
* It’s likely the plague wolf was given this spell by mistake instead of the Resist Paralysis ability, since the wolf does not have enough magicka for this or even the ability to cast spells.
Snow Wolfedit
Snow Wolf
- «Funny you should mention it. I’d swear I saw one the other day. But maybe it was just my eyes playing tricks on me. All this snow all the time, and you’re bound to start thinking you’re seeing things in it.» — A Miner at Raven Rock
Description: This rare creature is the toughest of its kind and often sought after because of its fur.Found: Five locations in and near the Moesring Mountains :
- The narrow passage through the Moesring Mountains that leads from the Harstrad River toward Hrothmund’s Barrow, located in the northwestern corner of the island.
- Outside of Hrothmund’s Barrow.
- Near Captain Roberto Jodoin amid the wreckage of the Dwemer Airship, in the Isinfier Plains.
- Just a little southwest of the airship.
- Southwest of the Water Stone.
| Creature | Drops | Attacks | Soul | ||||
|---|---|---|---|---|---|---|---|
| Snow WolfBM_wolf_snow_unique | Snow Wolf Pelts | 200 | −50 | 20 | — |
|
50 (Lesser) |
Mods and Modding
-
Mod Assets
Tamriel Data — The shared asset data repository used by Tamriel Rebuilt, Project Tamriel and other compatible mods.
-
Mods — Content and gameplay information about player-created mods for Morrowind
- OpenMW — A new game engine for The Elder Scrolls III: Morrowind and associated file formats
- Tamriel Rebuilt — A major work to create mainland Morrowind
- Project Tamriel — A collection of province mods to create the rest of Tamriel
- Morrowind Rebirth — A total overhaul for Morrowind adding a lot of new locations, NPCs, creatures and items
-
Modification
Quickstart Guide — Start using mods
— Information about installation and management of player-created mods
-
Modding — Technical information about creating your own mods for Morrowind
- Construction Set — The official Morrowind modding application
- Mod File Format — Information on the file formats used for game data
Визит в Министерство Правды – поиск Мехры Мило
После полученных известий Кай повысит героя до Агента и назначит главой Клинков в Вварденфелле. Также Мастер-Шпион даст последнее свое поручение. Вы должны отправить в Залы Мудрости, расположенные в храме Вивека, и встретиться там с Мехрой Мило. В библиотеке вы ее не обнаружите. Поэтому следует поискать Мехру в ее апартаментах, которые располагаются тут же в Залах мудрости.
Видимо что-то пошло не так. В покоях Мехры Мило ее тоже нет. Однако на комоде слева от входа лежит записка, адресованная «Амайе». Вспомнив то, что сказал Мастер-Шпион, делаем вывод, что Мехра Мило попала в беду. Единственное место куда могли запереть бедняжку – Министерство Правды. Прежде чем отправиться выручать заключенную, возьмите с собой два свитка Божественного Вмешательства.
Министерство Правды – это парящая крепость, находящаяся прямо над храмом. Поэтому кроме как при помощи левитации туда не попасть. Собрав необходимые для спасения вещи, отправляйтесь на выручку Мехры Мило. Левитировав в Министерство, поговорите с Альвелой Сарам у нижнего входа в «Зал обработки». Скажите ей, что у вас назначена встреча. После этого склонный к сотрудничеству ординатор поделится с вами ключом от дверей Министерства Правды. Также если ваш персонаж обладает соответствующими навыками, можно просто открыть дверь отмычкой или заклинанием.
Попав внутрь вы станете объектом нападения Ординаторов. Наконец-то можно отомстить за их напыщенные речи типа «Мы следим за тобой ничтожество». Разобравшись с обидчиками, отправляйтесь в тюрьму Министерства правды. Мехра находится в южной камере. Поделитесь с ней свитком Божественного вмешательства, после чего она назначит вам встречу в Монастыре Жрецов-Отступников, который расположен на Холамаяне. Туда вам и следует отправляться.
Храм Жрецов отступников Холамаян

Холамаян находится на юге от Садрит Моры и на северо-востоке от двемерских развалин Нчурдами. Храм открывает магический щит только на закате и рассвете. Дождавшись нужного времени суток входите вовнутрь. Мехра Мило будет ждать вас в восточной части Храма. Она посоветует поговорить о пророчествах с настоятелем храма Жрецов отступников – Гильвасом Барело, благо тот стоит рядом. Он то и поделится с героем Потерянным пророчеством, которое следует доставить в Лагерь Уршилаку Нибани Месе.
Отдав пророчества, снова поговорите с Нибани Месе и вы услышите ее вердикт о том, что герой действительно может являться Нереварином. Однако впереди еще предстоят пять испытаний.
Trivia
- The Blood Moon theme shares a lot of similarities to most of the Shadow Isles
The symbol of the Blood Moon is a recolored upside down version of the Lunari symbol.
thematic, but with an Ionian twist.
- There are two versions of Blood Moon in League of Legends, one is a celebration in Ionia in the main canon and the other is the alternate fantasy skin universe.
In the original lore, Blood Moon Shen and Blood Moon Akali represent the outfits Shen and Akali wear during the festival.
- Blood Moon Zilean is the figurehead of the Blood Moon cult.
- Blood Moon Twisted Fate is their true leader.
- Blood Moon Jhin is an ink-mage and the master of ceremonies presiding over summoning rituals.
- Blood Moon Sivir, Blood Moon Elise, and Blood Moon Akali are priestesses.
- Blood Moon Yasuo is the ceremonial executioner.
- Blood Moon Shen is a bodyguard to important persons.
- Blood Moon Diana is a cultist who carries lost secrets that even demons don’t know.
- Blood Moon Pyke, Blood Moon Evelynn, Blood Moon Kennen, Blood Moon Talon, Blood Moon Thresh, and Blood Moon Kalista are demons summoned on the night of the Blood Moon.
- Blood Moon Aatrox is the progenitor of all demons: the world-ending creature birthed directly from the Blood Moon.
- The Blood Moon is among the most powerful entities of the multiverse.
Blood Moon Aatrox
Blood Moon Aatrox Prestige Edition
Blood Moon Akali
Blood Moon Diana
Blood Moon Elise
Blood Moon Evelynn
Blood Moon Jhin
Blood Moon Kalista
Blood Moon Katarina and Master Yi
Blood Moon Kennen
Blood Moon Pyke
Blood Moon Shen
Blood Moon Sivir
Blood Moon Talon
Blood Moon Thresh
Blood Moon Tryndamere
Blood Moon Twisted Fate
Blood Moon Yasuo
Blood Moon Zilean
Living as a Werewolf[edit]
Solstheim is a good place to live as a werewolf because Berserkers and Fryse Hags make great re-spawning sacrifices. You can leave your house at eight (an hour before you become a werewolf), and sit around for a while away from anybody that may spot you. When you transform, you can maul a couple of Fryse Hags or Berserkers, and then wait until you become human again and resume your normal life.
Using any non-instant transport can be tricky because you may transform during the journey. Travel early in the day.
As a Werewolf your athletics are increased, so swimming becomes a viable method of travel.
Back on Vvardenfell, living as a werewolf is not as tough as it might seem. There are plenty of places to hide and plenty of people to kill, but there are fewer bandits and re-spawning no-name NPCs. Guards, though, if lured from the safety of their towns, make good victims.
Living as both a werewolf and a vampire is tough, as the disadvantages of both add up. Travel and general interaction with people become pretty limited, for instance, and you take sun damage and must kill every night. The stat increases, however, are considerable.
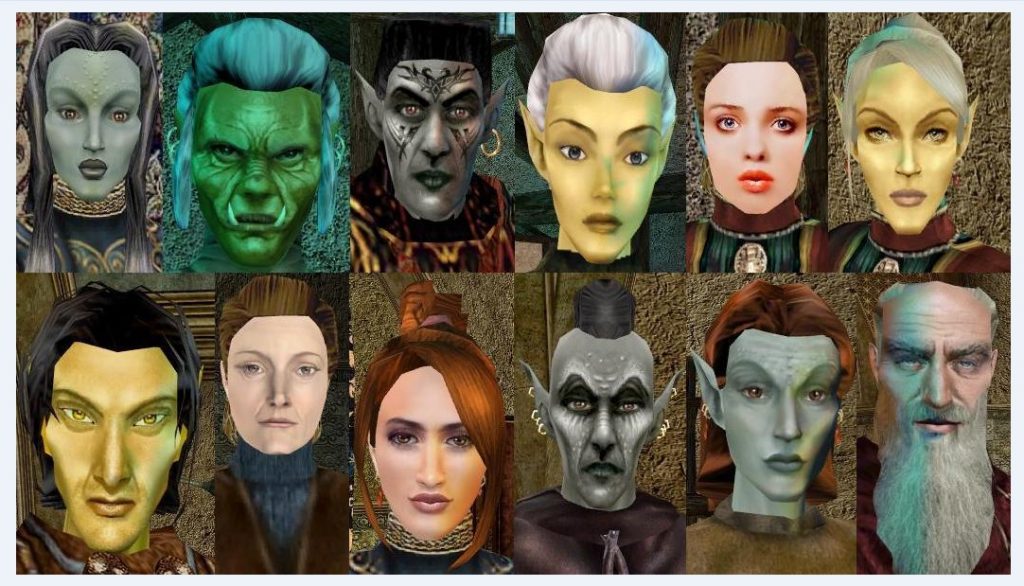
Краткий гайд по расам и классам
Сразу же после выхода из тюрьмы главного персонажа игроку предлагается сделать выбор, касающийся его расы, класса, а также гороскопа. Перед тем как сделать это, стоит изучить особенности каждого из них. Главное помнить, что изменить гильдию или группировку возможно далеко не всегда.
Выбор расы
Всего на Морровинде проживает 10 рас, среди которых игроку необходимо выбрать наиболее подходящую ему. Вот некоторые из них:
- Раса Данмеров. Темные эльфы и коренные жители острова. Отличаются заносчивостью и высокомерным нравом. Недолюбливают другие расы (особенно звероподобные). Они являются хорошими магами и торговцами. Используют в сражениях холодное оружие.
- Раса Альтмеров. Светлые эльфы, прибывшие с другого острова. Интеллигентны и воспитаны. Являются хорошими магами и алхимиками.
- Раса Бретонцев. Имеют особые магические способности. Выбрав эту расу, главный персонаж может стать отличным жуликом или магом.
- Раса Каджитов. Звероподобная раса. Ее представители имеют острый ум и хитрый характер. Из них получаются отличные жулики и разведчики.
- Раса Имперцев. Одна из основных рас. Ее представители очень дисциплинированны, а также имеют большие дипломатические способности. Выбрав ее, главный герой может стать воином, рыцарем или вором.
Важно! От выбора расы дальше будет зависеть очень многое, например, стиль боя, вес доспехов (кольчуга или латы), бонусы и секреты. При выборе расы игрок должен внимательно изучить особенности каждой из них
 При выборе расы игрок должен внимательно изучить особенности каждой из них
От этого во многом зависит прохождение основной сюжетной линии, способности, а также доступ к побочным квестам.
Выбор класса
При выборе класса также стоит заранее изучить способности каждого из них. Они влияют на навыки и умения персонажа. При прохождении основного квеста игры «Морровинд» на выбор предлагаются классы, вот некоторые из них:
- акробаты – ловкие и выносливые;
- шпионы – гибкие и привлекательные;
- ассасины – обладают высоким интеллектом.
Важно! Показатель каждого из классов может быть различным даже в одной расе и зависит от пола выбранного персонажа
References
- ↑ «Whenever the clock strikes midnight on unlucky nights, the sky turns blood red. That’s the blood moon. When that happens, monsters come back to life, no matter how many times you’ve defeated them. It’s happened for so long now that no one really pays it any mind, but I have no plans to give up on my research.» — (Breath of the Wild)
- «Under a Red MoonHyrule Ridge» — (Breath of the Wild)
- ↑ Creating a Champion pg. 406
- «… Link… Link… Be on your guard. Ganon’s power grows…it rises to its peak under the hour of the blood moon. By its glow, the aimless spirits of monsters slain in the name of the light return to flesh. Link…please be careful.» — (Breath of the Wild)
- «The blood moon rises once again. Please be careful, Link…» — (Breath of the Wild)
- «Sometimes you’ll witness incredible success in your cooking adventures. When this happens, the strength and duration of your cooked food’s effects will increase well beyond normal. Using more than the usual number of ingredients is a sure way to boost the effects of your food. But I’ve also heard rumors that the light of the red moon can have a positive effect on your cooking as well.» — (Breath of the Wild)
- , YouTube.
- «The hour of the Blood Moon… it is then that Calamity Ganon’s power waxes fully. Stronger enemies await in these extremely grueling battles. Do you dare challenge them?» — (Hyrule Warriors: Age of Calamity)
- , YouTube.
- Leoetlino, , Zeldamods.com (Wiki Webpage).
Contents[]
Characters
Anytime:
- The Groom
- The Bride
- Blood Zombie
- Drippler
On a Corruption world:
- Corrupt Bunny
- Corrupt Goldfish
- Corrupt Penguin
On a Crimson world:
- Vicious Bunny
- Vicious Goldfish
- Vicious Penguin
From Fishing:
- Wandering Eye Fish
- Zombie Merman
During Hardmode:
- Clown
- Chattering Teeth Bomb
From Fishing during Hardmode:
- Hemogoblin Shark
- Blood Eel
- Dreadnautilus
- Blood Squid
Unique Drops
Banners:
- The Groom Banner
- The Bride Banner
- Corrupt Bunny Banner
- Corrupt Goldfish Banner
- Corrupt Penguin Banner
- Blood Zombie Banner
- Drippler Banner
- Vicious Bunny Banner
- Vicious Goldfish Banner
- Vicious Penguin Banner
- Wandering Eye Fish Banner
- Zombie Merman Banner
Hardmode Banners:
- Clown Banner
- Hemogoblin Shark Banner
- Blood Eel Banner
- Dreadnautilus Banner
- Blood Squid Banner
From Corrupt Bunnies and Vicious Bunnies:
From Corrupt Penguins and Vicious Penguins:
From Corrupt Bunnies during Windy Days:
From Vicious Bunnies during Windy Days:
From The Groom:
- Top Hat
- Brain
From any Enemy or NPC (Dropped in Hardmode only):
From Dreadnautilus:
- Sanguine Staff
- Blood Moon Monolith
From Hemogoblin Shark:
From Blood Eel:
From The Bride:
- Wedding Veil
- Wedding Dress
From any Blood Moon Enemy:
From any Blood Moon Enemy caught during fishing:
From Hemogoblin Shark & Blood Eel:
From Wandering Eye Fish & Zombie Merman:
- Blood Rain Bow
- Vampire Frog Staff
- Chum Caster
From Drippler & Blood Zombie:
- Money Trough
- Shark Tooth Necklace
From Clown (In Hardmode only):
- Bananarang
- Trifold Map
From Vegetation:
From Fishing:
For Sale
From Clothier:
- Mime Mask
- Fallen Tuxedo Shirt
- Fallen Tuxedo Pants
- George’s set
- Fabulous set
From Zoologist:
From Dryad:
- Vile Powder(if world has Corruption)
- Corrupt Seeds(if world has Corruption)
- Corrupt Grass Wall(if world has Corruption)
- Vicious Powder(if world has Crimson)
- Crimson Seeds(if world has Crimson)
- Crimson Grass Wall(if world has Crimson)
- Sparkly Wings(if world is Hardmode)
From Arms Dealer:
- Silver Bullet
- Tungsten Bullet
From Dye Trader:
From Cyborg:
- Rocket II
- Cluster Rocket II
From Merchant:
From Painter:
From Steampunker:
- Purple Solution(if world has Corruption)
- Red Solution(if world has Crimson)
From Skeleton Merchant:
Music
- https://terraria.fandom.com/wiki/File:Music-Eerie.mp3
- https://terraria.fandom.com/wiki/File:Music-Eerie_(Otherworldly).mp3
Horkers[edit]
|
Horker in its habitat |
The Swimmer |
- «Another of the All-Maker’s wondrous creations. These creatures provide a great deal for our people. They are strong swimmers and fierce fighters, on land and in the sea.» — A Skaal
Description: A peaceful sea animal that is typical for the seaside of Solstheim. However, it will turn hostile if you get too close and will chase you even onto land.Found: Common at the northern seaside, in the rivers and the lakes.
| Creature | Drops | Attacks | Soul | ||
|---|---|---|---|---|---|
| HorkerBM_horker | Horker Tusk | 100 | 100 | 80 (Common) |
|
| HorkerBM_horker_large | |||||
|
The SwimmerBM_horker_swim_UNIQUE(Island off-shore from Moesring Mountains during The Ritual of Water) |
500 | — | 50 (Lesser) |
||
|
HorkerBM_horker_deadThese begin showing up in Moesring Mountains and Felsaad Coast regions duringThe Ristaag or Disrupt the Skaal Hunt quests |
— | 0 (None) |
Stats[edit]
Most Werewolves seen in the game are actually NPCs, not creatures.
Creature Werewolvesedit
| Creature | Drops | Attacks | Soul | ||||
|---|---|---|---|---|---|---|---|
| Werewolf InnocentBM_werewolf_ritual(Involved in the Rite of the Wolf Giver) | Guar Hide (40% chance) | 300 | — | — | — | 20 (Petty) |
|
| Werewolf *BM_werewolf_default | nothing | 38 | 20 (Petty) |
* This one seems to be a non-implemented test creature. It doesn’t even have any attack animations, so all it can do is walk around. It is also not referenced within the construction set.
NPC Werewolvesedit
All NPC Werewolves are scripted, mainly for changing their form during nighttime. Because they are NPCs, they cannot be soultrapped, but they can fulfill your need for a nightly kill if you are in werewolf form. Apart from being werewolves, they all keep their individual abilities during their transformation.
NPCs marked with disease are contagious with Sanies Lupinus, the Werewolf Blood disease, which not only drains the fatigue but also infects one with Lycanthropy.
| Creature | Attacks | ||||||||
|---|---|---|---|---|---|---|---|---|---|
| Werewolves found in the wilderness Script:Werewolfwilderness | |||||||||
| Wandering Lunaticbm_werewolf_wild01, Level 65, Nord Barbarian | 420 | 1 | — | 100 | — | 50 | — | — | |
| Wandering Lunaticbm_werewolf_wild02, Level 65, Orc Barbarian | 420 | 1 | — | — | — | — | 25 | — | |
| Insane Wandererbm_werewolf_wild03, Level 99, female Dark Elf Barbarian | 590 | 1 | 75 | — | — | — | — | — | |
| Insane Wandererbm_werewolf_wild04, Level 65, female Nord Barbarian | 500 | 1 | — | 100 | — | 50 | — | — | |
| Gibbering Lunaticbm_werewolf_wild05, Level 87, Breton Barbarian | 530 | 1 | — | — | — | — | 50 | — | |
| Gibbering Lunaticbm_werewolf_wild06, Level 88, Breton Barbarian | 535 | 1 | — | — | — | — | 50 | — | |
| Wandering Idiotbm_werewolf_wild07, Level 75, Imperial Barbarian | 535 | 1 | — | — | — | — | — | — | |
| Confused Lunaticbm_werewolf_wild08, Level 55, Imperial Battlemage | 500 | 1 | — | — | — | — | — | — | |
| Wandering Lunaticbm_werewolf_wild09, Level 55, Nord Barbarian | 500 | 1 | — | 100 | — | 50 | — | — | |
| Confused Lunatic *bm_werewolf_wildernessC, Level 65, Nord Barbarian | 500 | 1 | — | 100 | — | 50 | — | — | |
| *Only ever found in Connorflenge Barrow | |||||||||
| 2 Wolves during the Skaal attack inside the Greathall are based on: | |||||||||
| WerewolfBM_werewolf_skaal2a, Level 50, Argonian Acrobat | 337 | — | — | — | 100 | — | — | 75 | |
| 10 Wolves during the Ceremony in the Tombs of Skaalara, Quest:BM_Ceremony1, The Totem of Claw and Fang are based on: | |||||||||
| Werewolfwerewolf_ceremony, Level 35, Argonian Acrobat | 255 | — | — | — | 100 | — | — | 75 | |
| 3 Wolves during the Bearhunt, The Ristaag are based on: | |||||||||
| Werewolfwerewolf_bearhunt, Level 35, Argonian Acrobat | 255 | — | — | — | 100 | — | — | 75 | |
| 4 Wolves capture the player in his/her sleep for the start of the hunt, Quest:BM_WildHunt, Hircine’s Hunt | |||||||||
| WerewolfBM_werewolf_wildhunt, BM_werewolf_wildhunt2, BM_werewolf_wildhunt3, BM_werewolf_wildhunt4, Level 50, Argonian Acrobat | 337 | — | — | — | 100 | — | — | 75 | |
| 31 Wolves during Hircine’s Hunt inside the Labyrinth, Hircine’s Hunt are based on: | |||||||||
| Hound of HircineBM_werewolf_maze1, Level 70, Argonian Acrobat | 700 | — | — | — | 100 | — | — | 75 | |
| 1 Wolf at the Altar of Thrond, Rite of the Wolf Giver is based on: | |||||||||
| Female Nord Innocentwolfender_f_nord, Level 1, Nord Commoner | 1 | — | — | 100 | — | 50 | — | — |
Нападение оборотней на деревню нордов
По приходу в деревню скаалов попытайтесь поговорить с Клыком Сердца в Большом зале. Чинуша вас не примет и попросит зайти попозже. Выйдя из помещения, вы столкнетесь с непонятной ситуацией. Все вокруг суетятся и ругаются матом. Оказывается, на деревню было совершено нападение. Одичавшие от жажды крови оборотни посягнули на жизни обитателей поселения.
Если нападения не происходит и прохождение Bloodmoon застряло на этом моменте, после выхода из дома Клыка Сердца нужно немного побегать по деревне скаалов.

Разобравшись с нарушителями спокойствия, возвращайтесь в главное здание деревни. Там вы увидите, как два оборотня доедают Почетного Стража. А вот Клыка Сердца в Большом зале и след простыл. Либо удрал, почуяв неладное, либо одно из двух. Покиньте резиденцию местного мэра. На выходе вас повстречает Ветроглазый шаман и поставит герою диагноз ликантропии. После такого заявления перед Нереварином открываются два пути: вылечиться и пройти дальнейшую сюжетную ветку за человека, или же оставить все как есть, и попробовать свои силы в роли Вервольфа.