Android x86
Содержание:
- О проекте Android-x86
- The branches in Android-x86 tree
- PrimeOS
- Development
- Новости и улучшения Android 9.0 в проекте Android-x86
- Bliss OS-x86
- Android-x86 Review
- Установка Android 6.0
- Виды дистрибутивов
- Программистам
- Что такое Android x86
- Multi-Boot
- Issues
- Key Features
- Solving conflicts
- Key Features
- Testing
- ОС Андроид
- Установка эмулятора
- BlueStacks
О проекте Android-x86
Разработка проекта Android-x86 ведется с июля 2009 г, то есть в этом году он отметит свое 10-летие. Самой первой версией Android, портированной на архитектуру x86, стала Android 1.6 Donut, анонсированная Google 15 сентября 2009 г. Релиз х86-версии системы состоялся 20 ноября 2009 г. Столь быстрому портированию способствовали наработки девелоперов, основанные на Android 1.5 Cupcake, увидевшей свет в апреле 2009 г.
Следующие крупные релизы Android-x86 – это Android 2.2 в январе 2011 г., Android 4.0 в июне 2013 г., Android 4.4 в августе 2014 г., Android 6.0 в сентябре 2016 г. и Android 7.1r2 в мае 2018 г. Для разработчиков из Android-x86 перенос Android на архитектуру х86 – это самоцель, которую они регулярно достигают с каждой новой версией мобильной ОС. Следующий этап – портирование Android 9 Pie, выпущенной летом 2018 г.
The branches in Android-x86 tree
Since AOSP evolves very quickly, we have created different branches corresponding to different releases of AOSP:
-
q-x86
Based on Android 10.0 release -
pie-x86
Based on Android 9.0 release (Pie QPR2) -
oreo-x86
Based on Android 8.1 release (Oreo MR1) -
nougat-x86
Based on Android 7.1 release (Nougat MR2) -
marshmallow-x86
Based on Android 6.0 release (Marshmallow) -
lollipop-x86
Based on Android 5.1 release (Lollipop) -
kitkat-x86
Based on Android 4.4 release (KitKat) -
jb-x86
Based on Android 4.3 release (Jelly Bean) -
ics-x86
Based on Android 4.0 release (Ice Cream Sandwich) -
honeycomb-x86
Based on Android 3.2 release (Honeycomb) -
gingerbread-x86
Based on Android 2.3 release (Gingerbread) -
froyo-x86
Based on Android 2.2 release (Froyo) -
eclair-x86
Based on Android 2.1 release (Eclair) -
donut-x86
Based on Android 1.6 release (Donut) -
cupcake-x86 (aka android-x86-b0.9)
Based on Android 1.5 release (Cupcake)
PrimeOS
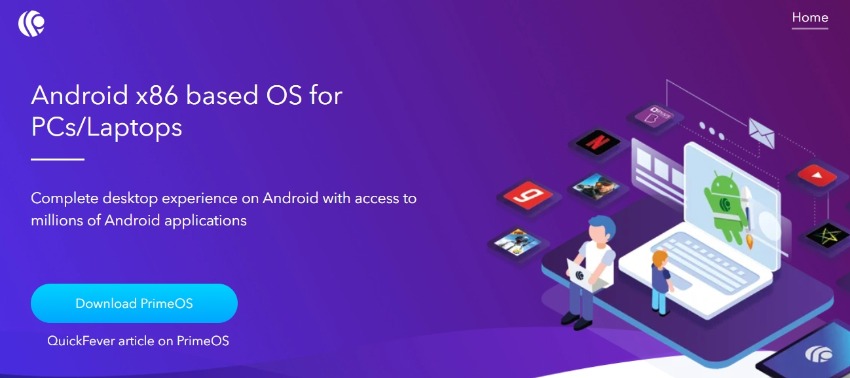
PrimeOS is basically a desktop optimized version of Android for laptops and desktops. Their mission is to liberate the power of Android and empower everyone with its productivity.
This software is using Android x86 based OS for PCs to give a complete desktop experience similar to Windows or MacOS with access to millions of Android applications.
You can play any Android games with a keyboard and mouse to get full comfort. The software is designed to give you the best of both worlds (Android flexibility with million of apps and power of a PC or laptop computer).
With the key mapping functionality, you can assign keyboard keys to Android game controls.
What I like about PrimeOS is that you can install it on your computer in dual-boot mode together with your Windows OS. This means that you will create a separate disk partition for PrimeOS so that every time you power up your computer you will have the option of booting into either Windows or PrimeOS.
Development
improvements/request for changes
set «settings/sound & display/screen timeout» to «never timeout» as for an x86 system there is no need to timeout an new users don’t know what happens.
keyboard layouts see /system/usr/keylayout/
command to get events: getevent
File Infos
- system.sfs — squash filesystem
- system.img — ext2 file Image
- ramdisk.img — gzip cpio file — extract in an empty folder with «gzip -d < ramdisk.img |cpio -id»
- initrd.img — gzip cpio file — extract in an empty folder with «gzip -d < initrd.img |cpio -id»
hand made changes on an usb-Stick Android 1.6 r2
File content of an usb-stick
├── android-system
│   ├── initrd.img
│   ├── install.img
│   ├── kernel
│   ├── ramdisk.img
│   └── system.sfs
├── android-x86.xpm.gz
├── cmdline
├── grub4dos
├── kernel -> grub4dos
├── lost+found
├── menu.lst
└── ramdisk
.
2 directories, 11 files
steps to change files in system.sfs (system.img)
* Ubuntu 10.4 box
* change to shell, press strg+alt+F1
* sudo -i
* aptitude and install squashfs-tools
* modprobe squashfs
* cd /home/administrator
* copy system.sfs (squash file system) to harddisk, in /home/administrator
* mkdir systemsfs
* mount ./system.sfs ./systemsfs -t squashfs -o loop
* copy ./systemsfs/system.img /home/administrator/
* mkdir systemimg
* mount ./system.img ./systemimg -t ext2 -o loop
now cd to systemimg directory and make the changes
eg. change *.kl files for sound F7 (scanncode=65) = mute; F8 (scanncode=66) = volume_down; F9 (scanncode=67) = volume_up
* cd usr/keylayout
* vi *.kl
* change lines
  key 113   VOLUME_MUTE
  key 114   VOLUME_DOWN
  key 115   VOLUME_UP
  key 65   VOLUME_MUTE
  key 66   VOLUME_DOWN
  key 67   VOLUME_UP
Новости и улучшения Android 9.0 в проекте Android-x86
Прежде всего, разработчики обновили ядро дистрибутива с Android-x86 до Android 9.0 «Пирог»», включая все новости и улучшения, которые Google представил в своей операционной системе.
В дополнение к этому руководители проектов представили другие изменения и разработки в этой версии Android для ПК:
- Он совместим как с 32-битными, так и с 64-битными системами.
- Ядро Linux 4.19.80 с поддержкой LTS было включено.
- Он имеет аппаратное ускорение в Intel, AMD и NVIDIA благодаря OpenGL ES 3.x.
- Кодеки аппаратного ускорения для графики Intel HD и G45.
- Поддержка безопасной загрузки и установки через UEFI.
- Текстовый установщик с новым графическим интерфейсом.
- Поддержка тем в GRUB-UEFI.
- Совместим с мультитач, аудио, Wi-Fi, Bluetooth, камерой и различными датчиками.
- Позволяет автоматически монтировать USB-накопители и SD-карты.
- Панель задач была добавлена, чтобы приложения, которые мы используем чаще всего, всегда были под рукой.
- ForceDefaultOrientation включен для компьютеров с неизвестными датчиками.
- Поддержка нативных приложений для ARM.
- Это позволяет обновляться до неофициальных релизов.
- Добавить экспериментальную поддержку для Vulkan.
- Имитация адаптера Wi-Fi через Ethernet для улучшения совместимости с приложениями.
- Большая интеграция с виртуальными машинами.
Конечно, мы должны учитывать, что эта версия все еще является RC, то есть в ней все еще может быть ошибка или проблема, которая будет решена в будущих обновлениях. Но в целом RC1 полностью функционален.
Некоторые известные сбои в RC1
Его разработчики предупреждают о некоторых известных ошибках в этой версии операционной системы ПК:
- Сервисы Google Play иногда блокируются в 32-битной версии.
- Функция приостановки и возобновления не работает на некоторых компьютерах.
- Драйверы NVIDIA Nouveau иногда плохо работают.
- Поддержка ускорения VMware 3D не работает должным образом.
- Если Vulkan активирован, фотографии не могут быть сделаны.
Bliss OS-x86
Bliss OS-x86 is an open source Android-based operating system for PC computers and tablets. Hardware wise, this Android OS flavor can be installed and run on any Windows/Linux PC, Chromebook, Macbook or Tablet released in the last 4 years (i.e 2016 and later).
The current version of Bliss uses the Android 9.0 Pie codebase and is designed to work with both the mobile systems as well as with desktop and laptops. The new Bliss OS 12 will be based on Android 10.
Their main focus of Bliss OS is to provide quality ROMs that can be installed on as many hardware platforms as possible. This can run on most of your devices, preserving customizations and options. The x86 variant is of course for Desktop PC computers that are equipped with x86/x86_64 compatible CPUs.
The User Interface can be configured as either Desktop UI or Tablet UI based on the launcher being used.
Android-x86 Review
The new Android-x86 software helps people use the Android operating system on a laptop or desktop computer. Though the software has its merits, it is also somewhat flawed. Let’s dig into the details of Android-x86.
Who It is For
The Android-x86 software allows the mobile Google Android operating system to function on devices that are powered by AMD x86 / Intel processors rather than RISC-based ARM chips. Those who would like a single Linux-based operating system to run on all of their devices will find that Android-x86 is a solid alternative.
The Installation Process
Android-x86 contains two files. The first is the ISO file that can be booted on any device with legacy BIOS. The second is an EFI image that one can be used on contemporary computing devices that have UEFI firmware. Select the one that is appropriate for your hardware. You will be taken to a screen where you can run the software in a live session without actually installing it or choose a direct installation. You can even install Android-x86 onto a USB drive so you have a bootable USB stick at your disposal. Opting for this installation route is quite convenient as it will allow your USB drive to save some of its memory capability. All in all, the Android-x86 installation process is quite easy. The one minor fault with the installation process is that the installer is not capable of formatting ext3 file systems.
Ease of Use
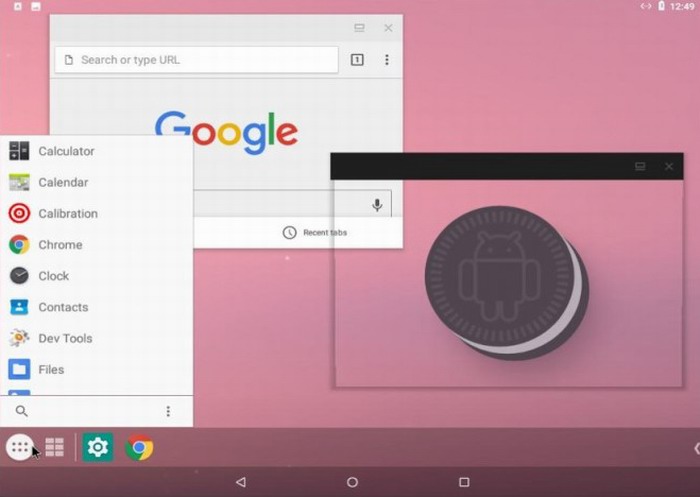
Run Android-x86 on all of your computers and you will likely be fairly impressed with its performance. The software requires that you create / sign into your Google account when first using it on a PC. However, a plan vanilla Android will load if you fail to sign in through a Google account. This allows you to access the world wide web through the standard Android web browser. You will also have to configure your WiFi. When the program is up and running, you will use a ring-shaped mouse-like pointer as the indicator for clicks. Certain navigation functions require that the user holds down a key on the keyboard or click to transition from one desktop to another. Go ahead and access the Google Play store as well as your Google Chrome / mobile Android settings to populate your PC’s new operating system.
The software features two home screens and six different wallpapers. Both home screens have a Google search box and a voice input icon toward the center of the screen. The bottom of the screen has a see-through dock row with the typical “home”, “return” and “recent apps” buttons. Above this row are five conveniently placed icons.
Benefits
The benefit to running Android on each device is that it allows you to keep all of your apps, settings and Google services aligned. Thankfully Android-x86 makes this happen without too many major obstacles. The new version of Android-x86 is fairly intuitive and easy to learn. It runs much faster than previous versions of Android on dedicated hardware. Use it on a variety of computing devices from netbooks to tablets and beyond and you’ll likely be content with its performance Hardware acceleration is now available for Vmware ad Nvidia chips. A new Hal sensor even supports GPS.
Drawbacks
The software’s download page isn’t the easiest to use as it shows earlier versions of the software. Many users have complained that they had to resort to the «release notes web page» to access the download. Some users have reported that there are issues with the software’s suspend and resume features. Others have complained about the software being limited to strictly the Android web browser.
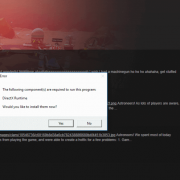
In some instances when a live session is occurring, the web browser will fail to start and an error window will pop up. Yet some users have stated that after they rebooted the same hardware, this browser problem goes away. Many users have complained that the app has failed to launch or completely failed to even open at all. Some report that the apps open but crash shortly afterward. If this occurs, go ahead and reboot your computer. It just might provide a temporary fix until Android-x86 developers come up with a permanent solution to this widely reported problem.
The Verdict
Android-x86 should be lauded for its ability to seamlessly run the Android operating system on a laptop or desktop powered by AMD x86 / Intel processors. However, some users will be frustrated with the software’s flaws and unreliability. If you aren’t in any hurry to use your Android system on your traditional computers, it might be prudent to wait until the next version of Android-x86 is released.
Установка Android 6.0
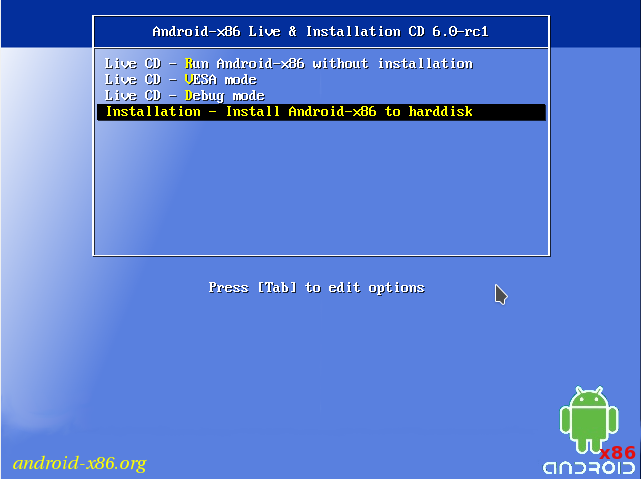
Шаг 1. Начало установки
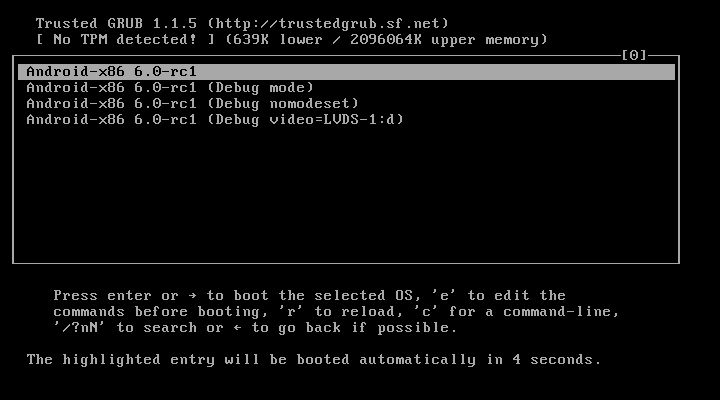
Сразу же после перезагрузки компьютера вы увидите такое окно загрузчика. Тут вы можете либо загрузиться в Live систему, либо перейти к ее установке. Нас будет интересовать последний пункт, установка:
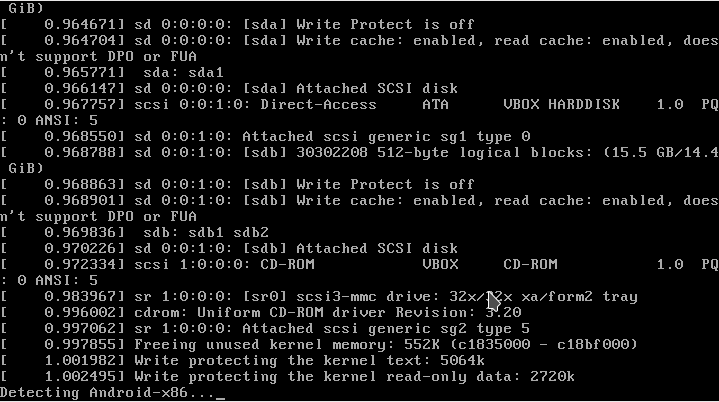
Установщик запуститься очень быстро:
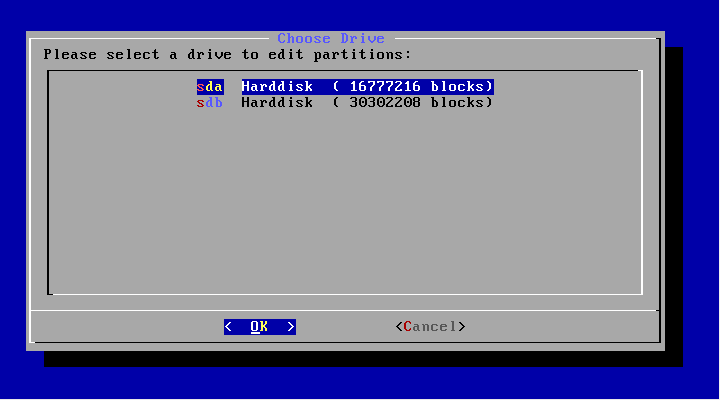
На первом шаге вам предстоит выбрать диск, на который будете выполнять установку:
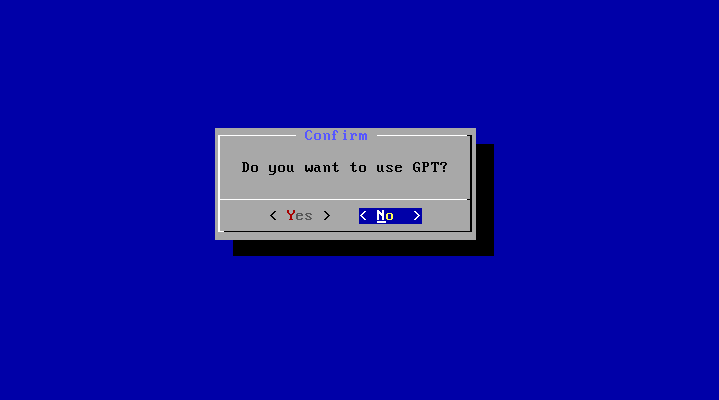
Шаг 4. Таблица разделов
Дальше, если этот диск еще не размечен необходимо выбрать таблицу разделов. Можно использовать GPT, но я не рекомендую это делать, поскольку большая вероятность того, что установка просто зависнет. Поэтому на этом шаге выбираем No. В таком случае будет использована MBR:
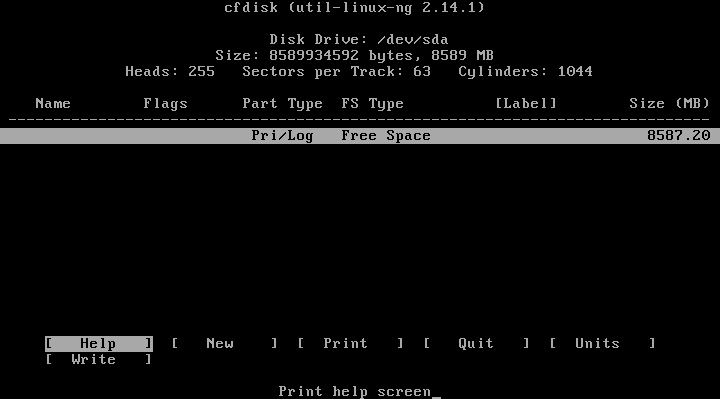
Шаг 5. Создание раздела
Установка Android x86 6.0 выполняется только на один раздел. И на этом шаге нам предстоит его создать. Для этого будет использоваться утилита cfdisk. Сначала нажмите New, чтобы создать новый раздел. Перемещаться по кнопкам можно стрелками влево/вправо, а нажимать с помощью Enter:
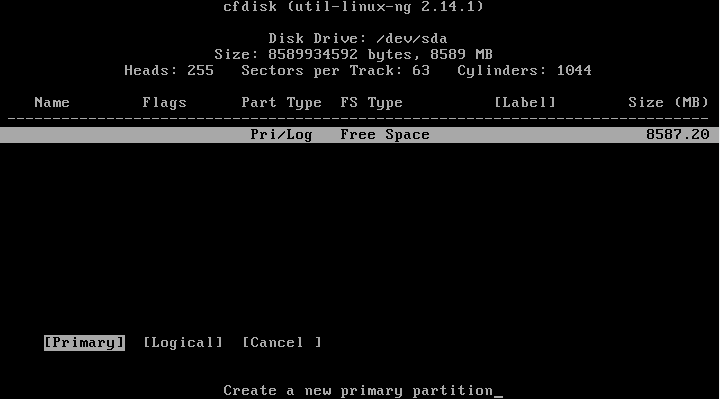
Выберите тип primary, первичный:
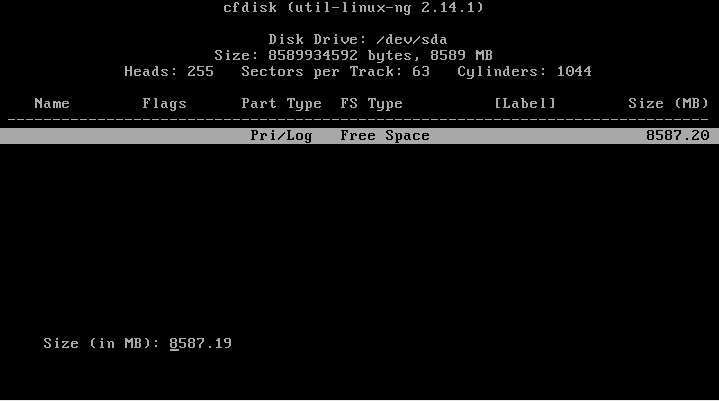
Дальше укажите размер, вернее, согласитесь с тем, что указала программа нажатием Enter:
Найдите кнопку Bootable и нажмите Enter, чтобы сделать этот раздел загрузочным:

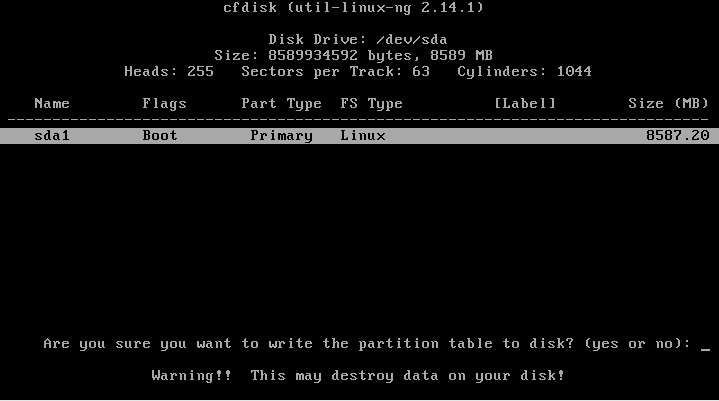
Найдите и нажмите кнопку Write, чтобы записать изменения на диск. Для подтверждения наберите yes:
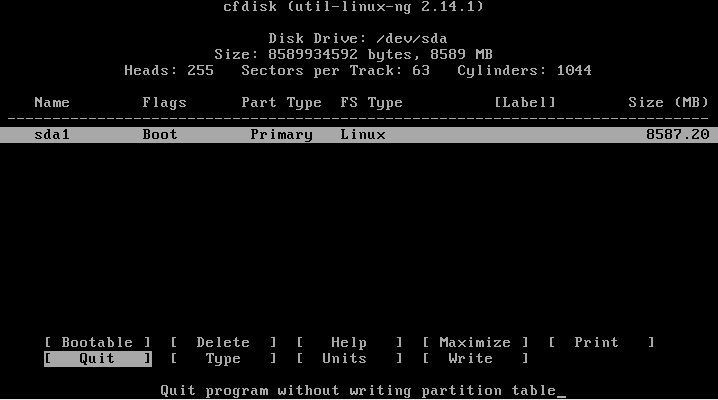
Осталось нажать кнопку quit для выхода из программы:
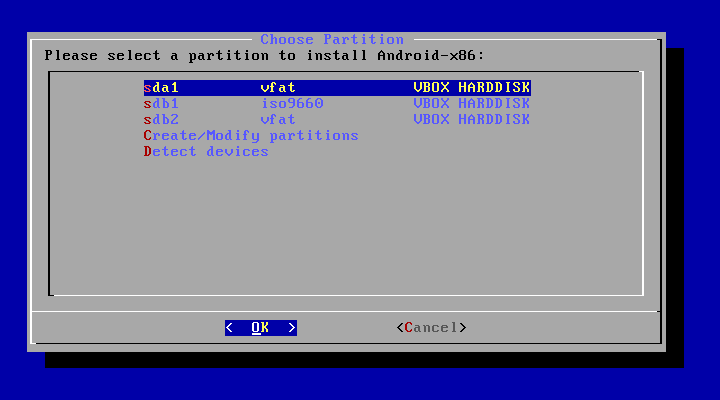
После завершения разметки вам нужно выбрать только что созданный раздел:
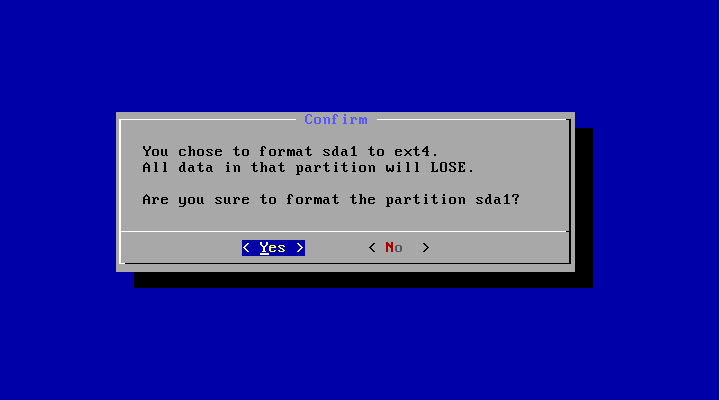
Выберите файловую систему, например, ext4
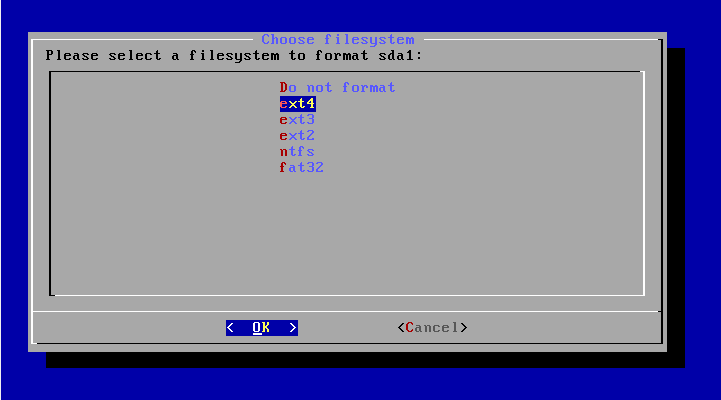
Поскольку нам нужен чистый раздел, соглашаемся с тем, что он будет отформатирован:
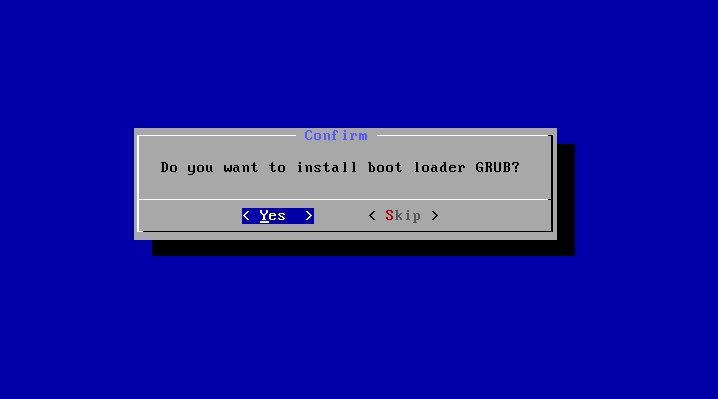
Загрузчик нам понадобится, поэтому выберите Yes:
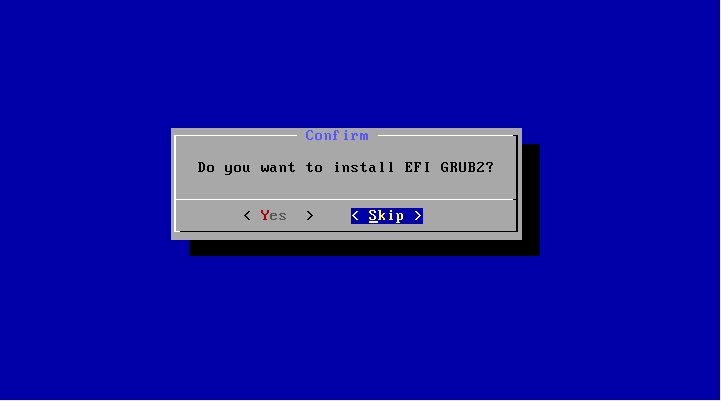
А вот EFI загрузчик нам не нужен, учитывая, что мы использовали MBR. Выберите Skip:
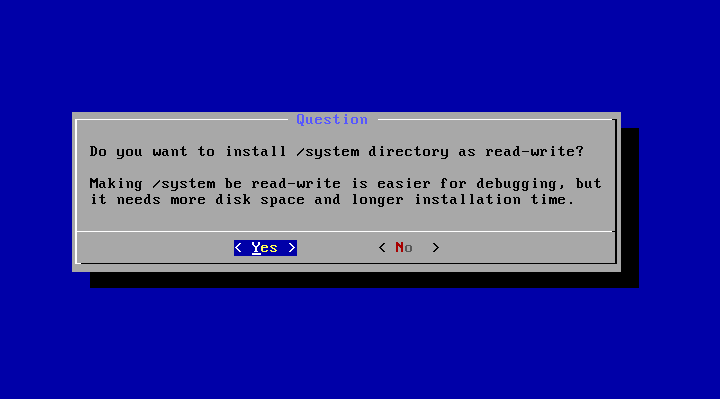
Шаг 11. Режим доступа
В этом окне нужно выбрать нужно ли монтировать системный раздел /system в режиме чтения и записи. Это будет полезно для установки новых программ, поэтому выберите Yes:
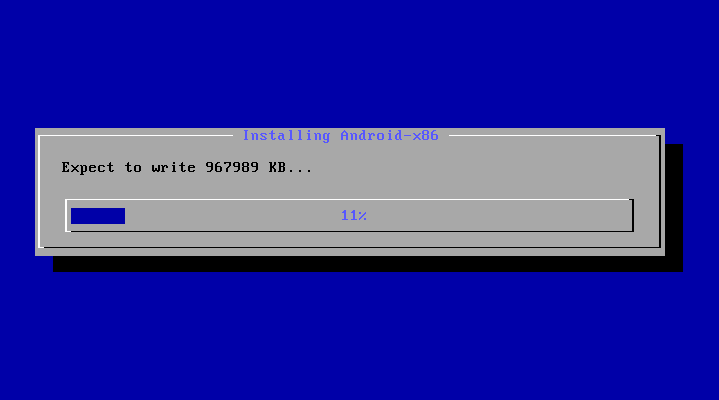
Дождитесь распаковки всех файлов:
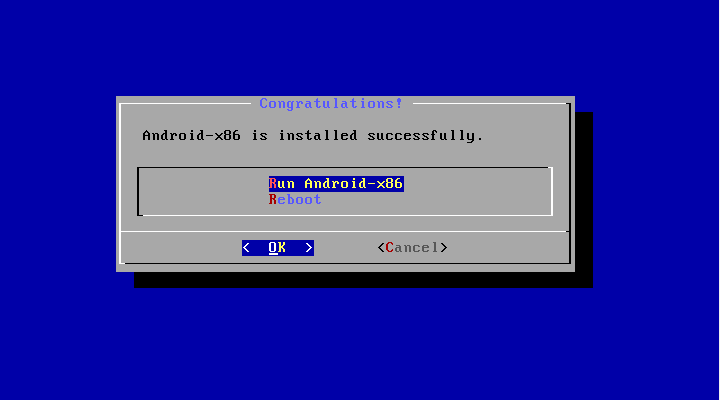
Шаг 13. Перезагрузка
Когда установка Android на компьютер будет закончена выберите пункт Reboot, чтобы перезагрузить компьютер и войти в новую систему:
Выберите первый пункт загрузчика:
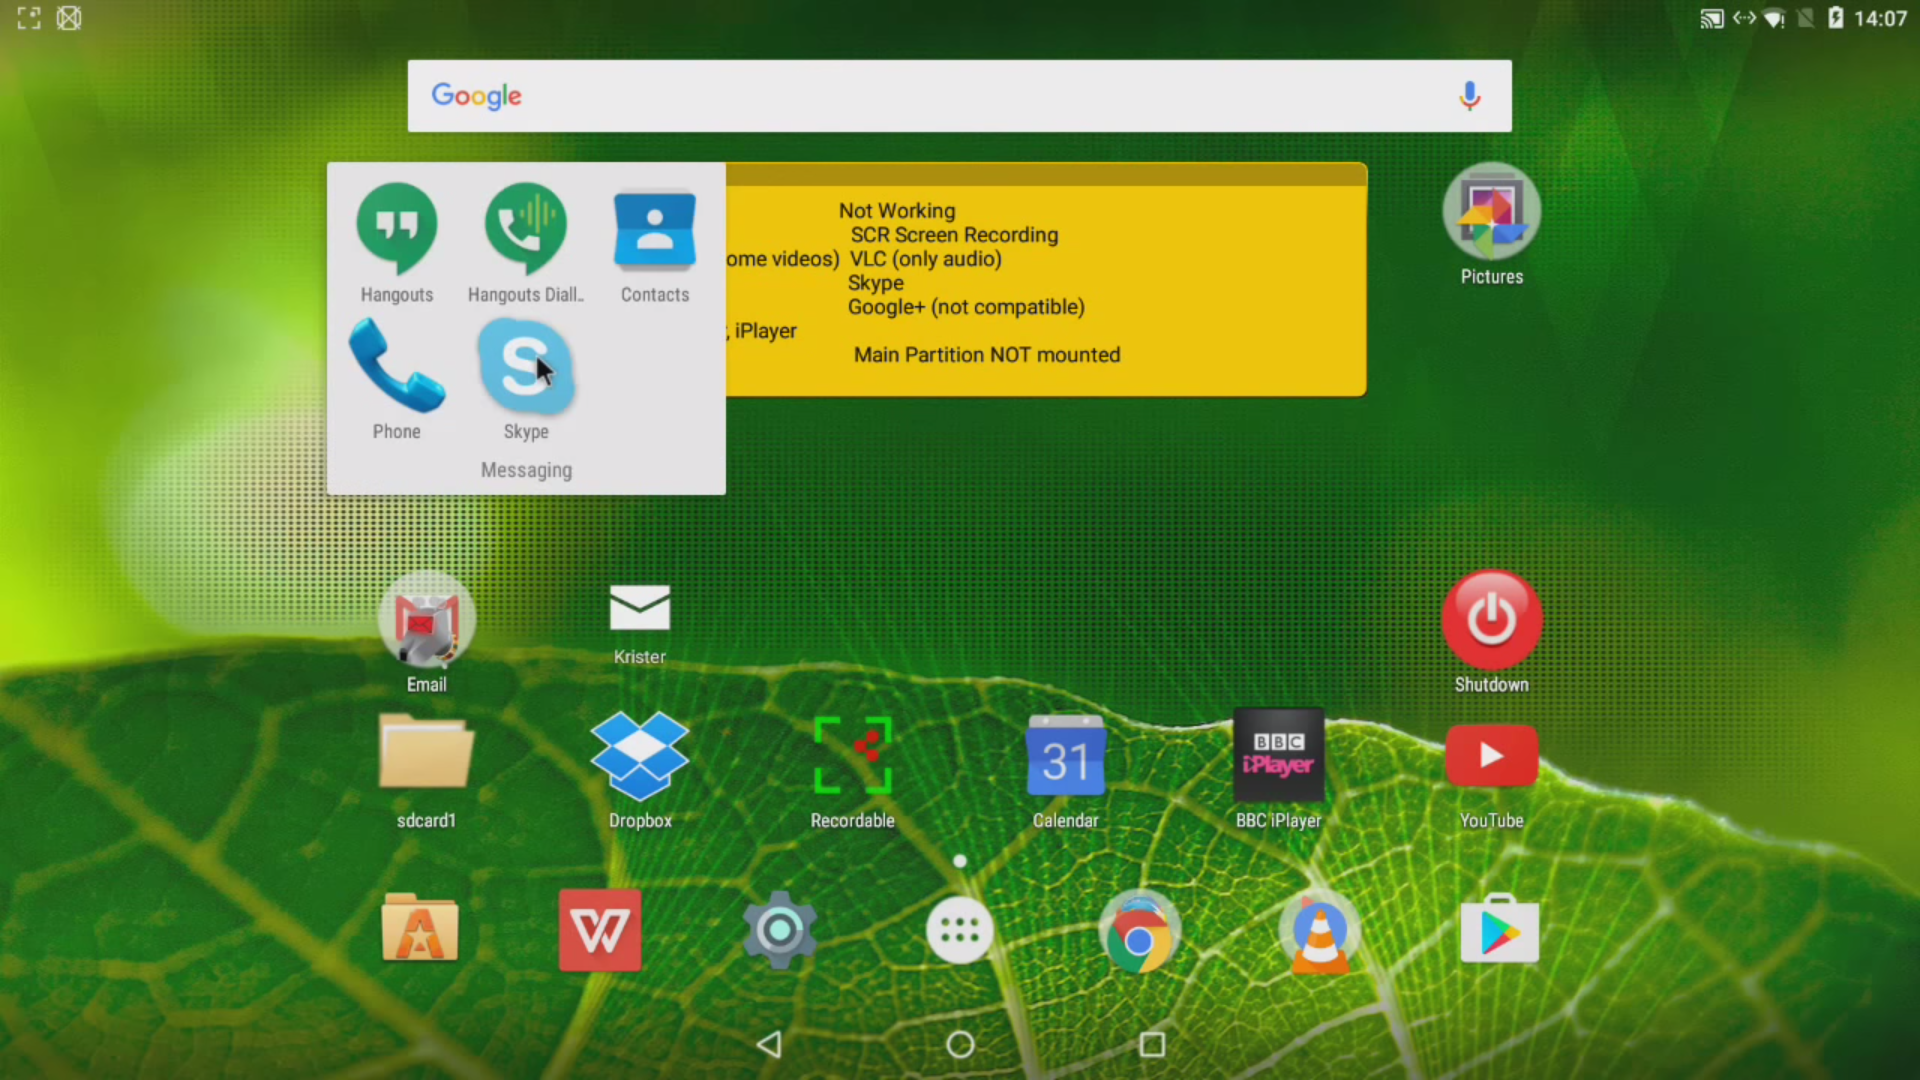
Шаг 16. Готово
Вот и все, установка Android x86 на компьютер завершена. Теперь вы можете использовать Android прямо на своем компьютере. Вы можете устанавливать и запускать Android-приложения, играть игры:
Виды дистрибутивов
В рамках проекта Android-x86 портированный Android 8.1 доступен в двух основных модификациях – универсальных Live-сборках для 32- и 64-битных компьютеров, планшетов и ноутбуков. Размеры дистрибутивов, уже доступных для скачивания и установки, составили 675 МБ и 856 МБ соответственно. Также эти сборки можно запускать и на планшетных компьютерах на базе процессоров Intel и AMD.
Вместе с обычными Live-сборками девелоперы выпустили их модификации в виде rpm-пакетов. Они нужны для распаковки Android-окружения в среде Linux.
Android-x86 8.1 Oreo позволяет менять «обои» и поддерживает прозрачные окна
Все сборки распространяются на бесплатной основе, а пользователи ранних версий Android от Android-x86 могут обновиться до Android 8.1 без переустановки.
Программистам
Помимо софта, который предназначен для обычных пользователей, которым хочется в свободную минуту поиграть в любимые мобильные игры на большом экране, существуют средства для программистов, которые поддерживают:
- Отладку
- ADB
- Взаимодействие с Android Studio
Отмечу, что если задача состоит в том, чтобы как можно быстрее запустить софт на компьютере, остановитесь на одном из предложенных выше решений. Профессиональные эмуляторы могут не запускать некоторые программы. Многочисленные, предназначенные для программистов, настройки только помешают обычному пользователю
Эффективность таких программных средств ниже, ведь в них основное внимание уделено тому, что нужно разработчику, а не пользователю
Знать о них необходимо по двум причинам. Чтобы не скачать его вместо необходимого и в итоге не потратить драгоценное время на попытки разобраться в хитросплетении меню. Вторая ситуация, когда профессиональные инструменты окажутся полезны — начинающий разработчик ищет подходящее ему решение.
Что такое Android x86
Android x86 представляет собой неофициальный порт операционной системы Android для запуска на процессорах Intel и AMD. Android x86 основана на Android Open Source Project (AOSP). AOSP — это проект открытого исходного кода операционной системы Андроид. Он позволяет получить доступ к исходному коду ОС, системе сборки, документации, сообществам и другим необходимым компонентам.
Проект по созданию Android x86 берет свое начало с 2009 года. Его родоначальниками были тайваньский инженер-программист Chih-Wei Huang и Yi Sun (позже Yi Sun покинул проект по личным мотивам). Сначала проект развивался как набор патчей для исходного кода Андроид, который позволял запускать Андроид на некоторых нетбуках, планшетах и мобильных ПК. Но затем разработчики поняли, что проект имеет потенциал и его можно развить в нечто большее, чем набор патчей. Была создана и размещена на GIT-репозитории база исходного кода для распространения и разработки поддержки различных платформ x86. Исходный код распространяется под лицензией Apache Public License 2.0 и GNU General Public License (GPL) 2.x.
Multi-Boot
To boot other operating systems, you have to add items for them to /grub/menu.lst. For example, to boot Windows, add the following:
title Windowsrootnoverify (hd0,0)chainloader +1
This assumes Windows is installed to the first partition of the first hard disk. Alternatively, you need to change rootnoverify to the appropriate value. See Grub Manual for details.
froyo
Issues
VMware
You have to change your virtual disk type to be IDE because the default type in VMware is SCSI, and Android-x86 kernel is not configured to support SCSI. You can follow these steps:
- Create a virtual machine.
- Edit virtual machine settings after the virtual machine created.
- Choose the hard disk and remove it.
- Add a hard disk to create a new virtual disk, then you can choose IDE as your virtual disk type.
- When finished, you can install android-x86 normally.
Key Features
The 9.0-r1 release is based on the latest Android 9.0.0 Pie release (android-9.0.0_r53). The features include:
- Support both 64-bit and 32-bit kernel and userspace with latest LTS kernel 4.19.105.
- Support OpenGL ES 3.x hardware acceleration for Intel, AMD, Nvidia and QEMU(virgl) by Mesa 19.3.4.
- Support OpenGL ES 2.0 via SwiftShader for software rendering on unsupported GPU devices.
- Support hardware accelerated codecs on devices with Intel HD & G45 graphics family.
- Support secure booting from UEFI and installing to UEFI disk.
- A text based GUI installer.
- Add theme support to GRUB-EFI.
- Support Multi-touch, Audio, Wifi, Bluetooth, Sensors, Camera and Ethernet (DHCP only).
- Simulate WiFi adapter on devices with Ethernet only to increase app compatibility.
- Auto-mount external usb drive and sdcard.
- Add Taskbar as an alternative launcher which puts a start menu and recent apps tray on top of your screen and support freeform window mode.
- Enable ForceDefaultOrientation on devices without known sensors. Portrait apps can run in a landscape device without rotating the screen.
- Support arm arch apps via the native bridge mechanism. (Settings -> Android-x86 options, 64-bit only)
- Support to upgrade from non-official releases.
- Add experimental Vulkan support for newer Intel and AMD GPUs. (Boot via Advanced options -> Vulkan support)
- Mouse integration support for VMs including VirtualBox, QEMU, VMware and Hyper-V.
Solving conflicts
There are several reason to have conflicts during repo sync, say
- You modify your tree locally.
- The upstream changed. Since we usually keep syncing with original Android repository, sometimes we have to rebase with it. That changes the history and may cause conflicts.
In this section we assume you have conflicts due to the upstream changed. That is, you don’t have local modifications. If you do, you have to solve conflicts yourself. If you follow the procedures in this section, you may lose your local modifications.Here is an example of a conflict in mainfest:
remote: Counting objects: 71, done.
remote: Compressing objects: 100% (41/41), done.
remote: Total 65 (delta 25), reused 28 (delta 9)
Unpacking objects: 100% (65/65), done.
From git://git.tarot.com.tw/android-x86/platform/manifest
d53e6c1..2de7a11 android-1.5r2 -> origin/android-1.5r2
* android-1.5r3 -> origin/android-1.5r3
* android-sdk-1.5_r3 -> origin/android-sdk-1.5_r3
d53e6c1..c544020 cupcake -> origin/cupcake
* cupcake-release -> origin/cupcake-release
f4d79b1..6f7e0dd donut -> origin/donut
+ 7308d31…4a4f936 lan -> origin/lan (forced update)
+ b480a6d…d82496e local -> origin/local (forced update)
+ 11c9d96…84345fb master -> origin/master (forced update)
+ 5bcbf93…66e92cc mirror -> origin/mirror (forced update)
+ 9f3092f…665f9e8 ssh -> origin/ssh (forced update)
+ c6037be…d70927f ssh-mirror -> origin/ssh-mirror (forced update)
+ 00a823f…3ddaf66 test -> origin/test (forced update)
* android-1.5r3 -> android-1.5r3
* android-sdk-1.5_r3 -> android-sdk-1.5_r3
Fetching projects: 100% (128/128), done.
project .repo/manifests/
First, rewinding head to replay your work on top of it…
Applying: merge donut, change or add the projects to x86 port
error: patch failed: default.xml:3
error: default.xml: patch does not apply
Using index info to reconstruct a base tree…
Falling back to patching base and 3-way merge…
Auto-merging default.xml
CONFLICT (content): Merge conflict in default.xml
Failed to merge in the changes.
Patch failed at 0001 merge donut, change or add the projects to x86 port
When you have resolved this problem run «git rebase —continue».
If you would prefer to skip this patch, instead run «git rebase —skip».
To restore the original branch and stop rebasing run «git rebase —abort».
repo sync stopped due to conflicts. Since we don’t have local modifications, just ignore it by git rebase --skip:
HEAD is now at 4a4f936 add branch for local lan
Applying: add platform/frameworks/policies/base to x86
error: patch failed: default.xml:18
error: default.xml: patch does not apply
Using index info to reconstruct a base tree…
Falling back to patching base and 3-way merge…
Auto-merging default.xml
No changes — Patch already applied.
Applying: add branch for local lan
error: patch failed: default.xml:1
error: default.xml: patch does not apply
Using index info to reconstruct a base tree…
Falling back to patching base and 3-way merge…
Auto-merging default.xml
No changes — Patch already applied.
If it complains about another conflict, do git rebase --skip again, until the rebase procedure completes. Usually it is enough, but if you hope to be absolute clean, you can ignore the current branch and checkout a new one like (suppose you’re using oreo-x86 branch):
This may not be the best approach to solve conflicts, but should be easy enough for beginners. If you have better suggestions, just tell us.
Key Features
The 9.0-rc1 release is based on the latest Android 9.0.0 Pie release (android-9.0.0_r50). The features include:
- Support both 64-bit and 32-bit kernel and userspace with latest LTS kernel 4.19.80.
- Support OpenGL ES 3.x hardware acceleration for Intel, AMD, Nvidia and QEMU(virgl) by Mesa 19.0.8.
- Support OpenGL ES 3.0 via SwiftShader for software rendering on unsupported GPU devices.
- Support hardware accelerated codecs on devices with Intel HD & G45 graphics family.
- Support secure booting from UEFI and installing to UEFI disk.
- A text based GUI installer.
- Add theme support to GRUB-EFI.
- Support Multi-touch, Audio, Wifi, Bluetooth, Sensors, Camera and Ethernet (DHCP only).
- Auto-mount external usb drive and sdcard.
- Add Taskbar as an alternative launcher which puts a start menu and recent apps tray on top of your screen and support freeform window mode.
- Enable ForceDefaultOrientation on devices without known sensors. Portrait apps can run in a landscape device without rotating the screen.
- Support arm arch apps via the native bridge mechanism. (Settings -> Android-x86 options)
- Support to upgrade from non-official releases.
- Add experimental Vulkan support for newer Intel and AMD GPUs. (Boot via Advanced options -> Vulkan support)
- Simulate WiFi adapter by Ethernet to increase app compatibility.
- Mouse integration support for VMs including VirtualBox, QEMU, VMware and Hyper-V.
Testing
The generated image is located at
out/target/product/$TARGET_PRODUCT/$TARGET_PRODUCT.iso
You can easily test the iso file by a virtual machine like virtual box or qemu. Alternatively, on a Linux host you can use the qemu-android script (available since nougat-x86) to run android-x86 in qemu directly:
To test the image on a real x86 hardware, you can burn the iso to a compact disc (CD), then boot it on the target device. Check the manual of your vendor to see how to boot from a CD. On booting it will automatically detect your hardware and load necessary modules.
Since honeycomb-x86, we support the hybrid iso format. That is, the iso could be dumped to a usb disk directly. For example,
where /dev/sdX is the device name of your USB disk. The feature is available for all iso files released after 2011/12/25.
If you build an rpm file, install it to your Linux host and run the qemu-android script directly. Or reboot and choose android-x86 item from the booting menu.
For more details about how to use the iso or install it, see the installation howto.
ОС Андроид
Забудьте про эмулятор если у вас есть возможность установить полноценную ОС. На это есть целый ряд преимуществ, которые это подтвердят:
- Для работы системы достаточно всего 1 ГБ ОЗУ. Для игр необходимо 2 ГБ и более в зависимости от игры.
- Идеальное решение для слабых ПК (Пример в видео ниже).
- Доступен весь функционал Андроид.
- Можно установить в качестве дополнительной системы или основной. ОС Андроид не будет влиять на работу вашей Windows.
- Установить так же легко, как эмулятор.
- Полная оптимизация под компьютер.
Недостаток в том, что в некоторых случаях бывает несовместимость с железом ПК. Я думаю этого достаточно для того, чтоб Вы решили, что лучше для Вас.
Установка Phoenix OS
Phoenix OS – это полноценная операционная система Андроид для ПК, которая имеет лаунчер (оболочка/загрузчик или внешний вид) как у Windows 10. Т.е. другими словами, это гибрид 2 операционных систем с внешним видом Windows и функционалом мобильного устройства.
Немного скриншотов с моего компьютера:


Кто подписан на мой YouTube канал, тот уже с ней знаком и знает, как установить:
Для тех, кто не любит смотреть видео или не имеет такой возможности, порядок установки следующий:

- Запускаем .exe файл и нажимаем «Install». Выберите любой диск, можно даже «Диск С». На нём создастся папка «PhoenixOS» в которой будет всего 8 файлов. S. система никак не навредит вашей основной ОС.
- По завершению установки подтвердите перезагрузку компьютера, после чего подождите пока он включится.
- При запуске системы у вас будет выбор языка «Английский» или «Китайский» выберите английский, потом поставим русский язык в настройках.
- Система полностью установлена, осталось дождаться пока она обновиться (5-10 мин.) и нам нужно установить русский язык. Для этого откройте «Настройки» на панели задач и перейдите в раздел «language» далее нажмите на + и добавьте русский язык.
Готово. Установка и настройка системы не отнимает много времени (плюс-минус 15 мин.). Теперь нажав на кнопку «Пуск» и выбрав «Google Play» введите логин и пароль от своего Google аккаунта, и Вы можете использовать все функции Андроид на компьютере.
Установка эмулятора
- + установив эмулятор, Вы остаетесь в своей ОС Windows и мгновенно можете переключатся с одной системы на другую.
- + совместимость со всеми компьютерами 80% гарантированно (За исключением старых и слабых ПК).
- + хорошо оптимизировано управление в играх. Собственно, для этого и сделали эмуляторы.
- — высокие системные требования. Для комфортной работы с приложениями в эмуляторе, у вас должно быть не менее 8 ГБ ОЗУ, обязательно включена виртуализация и не слабенький процессор.
- — много встроенной рекламы и постоянные навязывания мусорных приложений, удалять которые нет смысла.
- — это не полноценный Андроид и в эмуляторе нет многих возможностей.
BlueStacks
BlueStacks is nothing but an Android emulator for your PC. It’s like having an Android phone but having it on your computer. Basically, you can download any Android application through BlueStacks on your PC or laptop.
BlueStacks is great to play Android games on PCs and is also one of the fastest mobile gaming platforms available with lower CPU and memory usage.
It helps you to get faster gameplay and better graphics, and at the same time saves your phone’s battery and storage space.
Currently, there are more than 370 million people using BlueStacks and 212 countries have access over it. It is also free which makes it an excellent choice for using Android OS on a PC computer.
There are 3 steps involved to start enjoying Android games and apps with Bluestacks:
- Download and install Bluestacks on your Windows computer.
- Download the game or app of your choice from the Google play store (within BlueStacks).
- Customize your controls or use the built-in controls and start playing.
Although there are many other alternative emulators online, Bluestack is considered one of the best and is certainly one of the most popular options.